 |
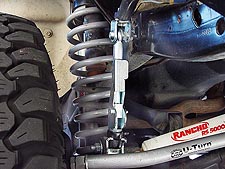
Much to my surprise, the Nth Degree Mobility Quicksilver Disconnects come in a box full of parts and hardware. Be sure to check to make sure you have everything listed on the packing sheet and that they are in fact for your particular Jeep. |
 |
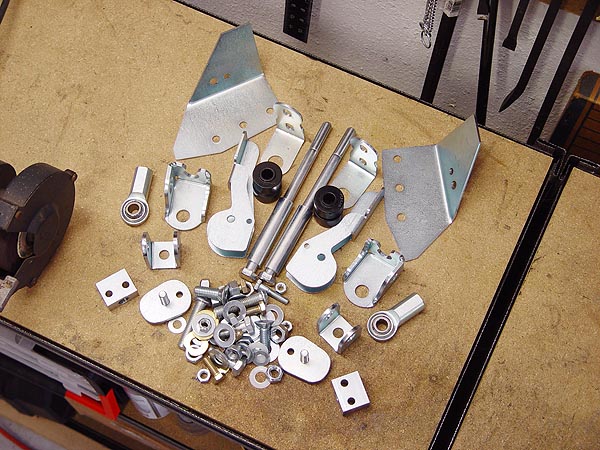
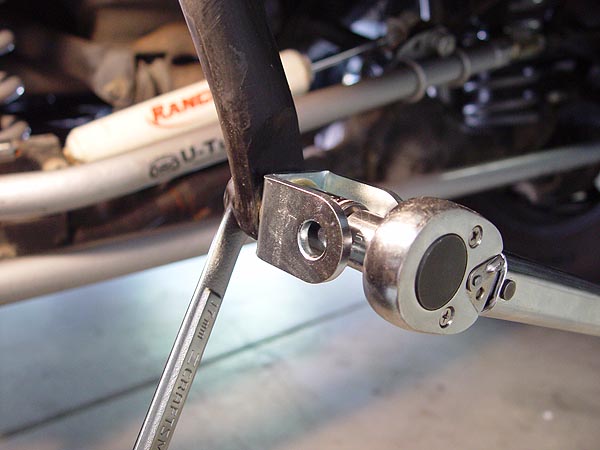
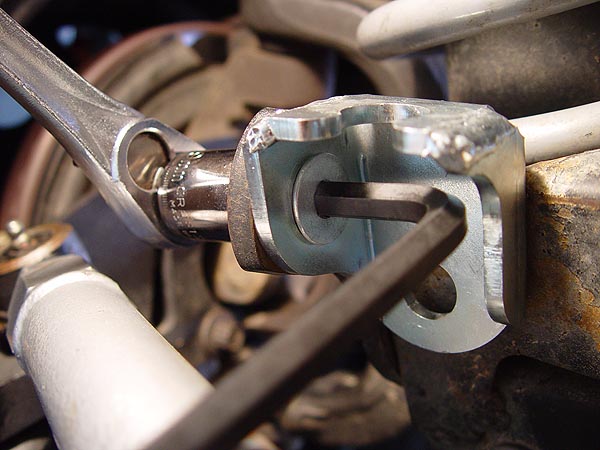
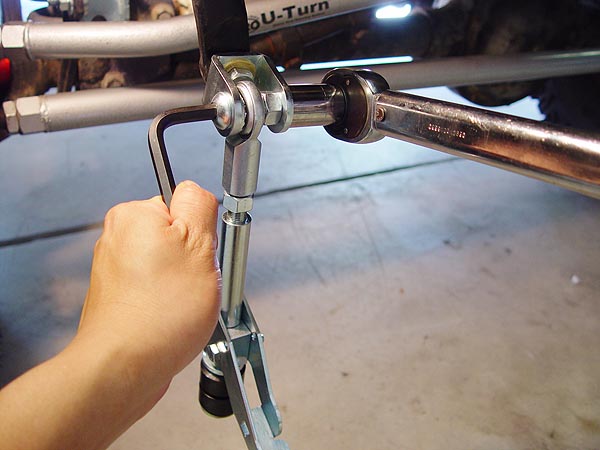
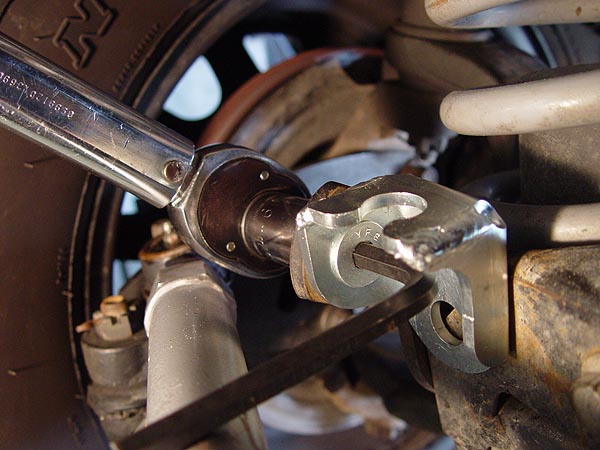
1. Park your Jeep on a level surface. This will ensure that there is no pre-load on your sway bar links. Remove the lower sway bar link bolts and nuts using a Torx T-55 Bit and 18mm socket. The upper nut can be removed using a 17mm socket but separating the links tapered stud from the sway bar will require the use of a tie-rod end puller like the one shown in the pic to the left.
Simply slip it over your sway bar, locate the bolt over the top of the tapered stud and then proceed to slowly ratchet down the tool with a wrench until the links pops off. |
 |
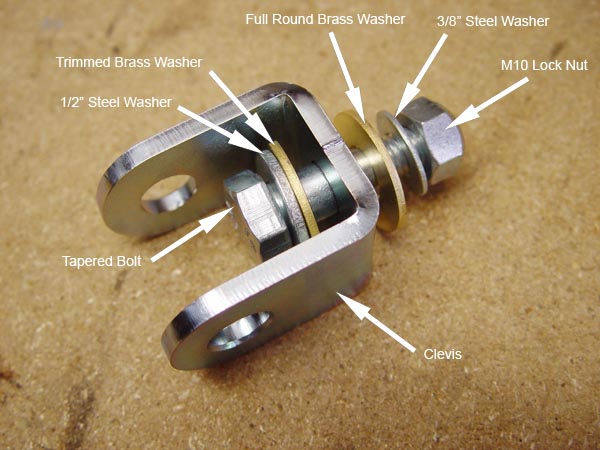
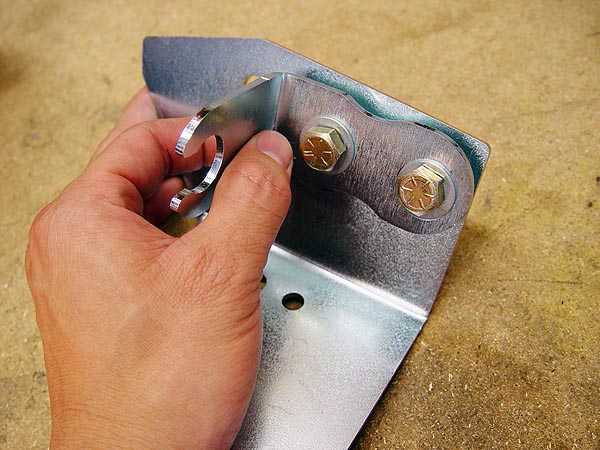
2. Assemble your Nth Degree Mobility Quicksilver upper link adapters using the hardware supplied with the kit and as shown in the pic to the left. The sequence of parts should go together in the following order: Tapered bolt, 1/2" steel washer, trimmed brass washer, insert the bolt through the clevis and then add a full round brass washer. Once this is all assembled on your Jeep's sway bar, you will secure it with a 3/8" steel washer and M10 lock nut. |
 |
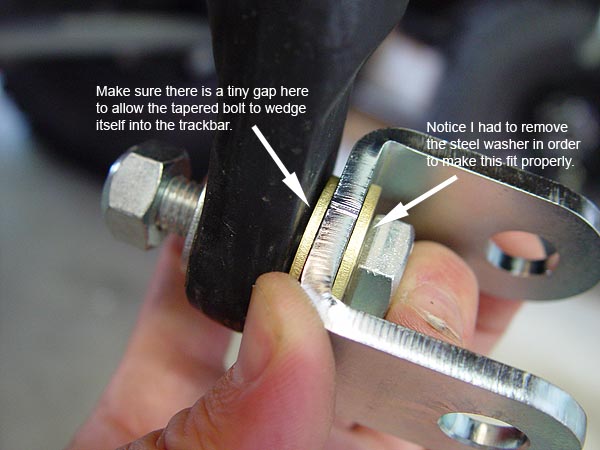
3. Do a test fit of your Nth Degree Mobility Quicksilver upper link adapters and make sure that you have a small gap between the sway bar and the full round brass washer once the tapered stud is inserted. If there is no gap, remove the steel washer at the base of the bolt head and try again. If there still is no gap, proceed to remove the trimmed brass washer as well. As you can see in the pic to the left, I had to remove the steel washer in order to make this work. If you still can't get this to work out, Nth Degree Mobility does provide additional nylon washers and instructions to help you out. |
 |
4. Now, remove and unassembled the Nth Degree Mobility Quicksilver upper link adapters, apply a thin layer of white lithium grease to both sides of both brass washers and then reassemble all the hardware. |
 |
5.
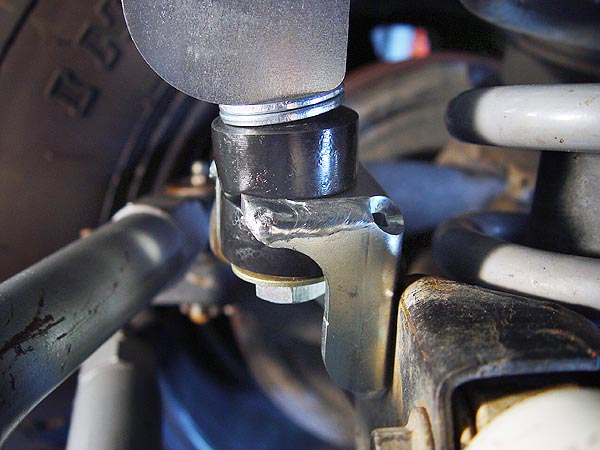
Secure the Nth Degree Mobility Quicksilver upper link adapter to your Jeep's sway bar using a 19mm socket and 17mm wrench. Tighten them down to 30 ft. lbs. of torque. You should notice that the small gap you wanted previously has been eliminated as the tapered stud got wedged into the sway bar. |
 |
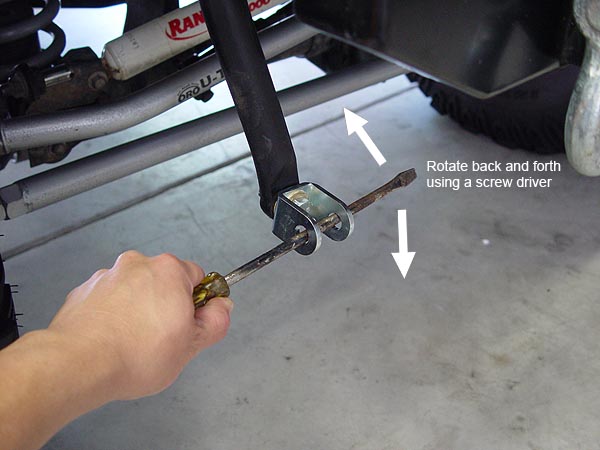
6. Check the 'freeplay' of the the Nth Degree Mobility Quicksilver upper link adapter by slipping a screwdriver through the clevis and rotating it back and forth. Once you have the rest of the link attached, this can easily be done by hand. |
 |
7. Now you need to install the Nth Degree Mobility Quicksilver lower link adapters onto your axle using the supplied 1/2" flat head bolt, washer and lock nut. Tighten the bolt and nut using an 8mm Allen Key and 19mm socket but leave it just loose enough so that it can still be rotated a bit for later adjustments. Each adapter is side specific and you need to make sure that they are mounted accordingly. The pic to the left shows the passenger side adapter being installed. |
 |
8. Back at your workbench, begin pre -assembling your Nth Degree Mobility Quicksilver sway bar disconnect links by sorting out and the following parts and hardware. Per side, you will need the long 1/2" bolt, spacer tube, (3) 7/16" washers, black pair of polyurethane bushings, cam pivot block, cam bracket and rod end. |
 |
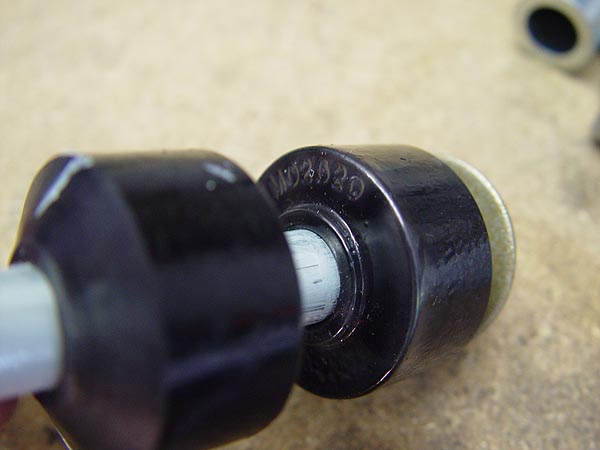
9. Apply a thin layer of white lithium grease to 3" of the long bolt starting from the head of it. Then slide on one of the supplied 7/16" washers followed by a pair of black poly bushings as shown in the pic to the left. Make sure the stepped side with numbers are facing each other. |
 |
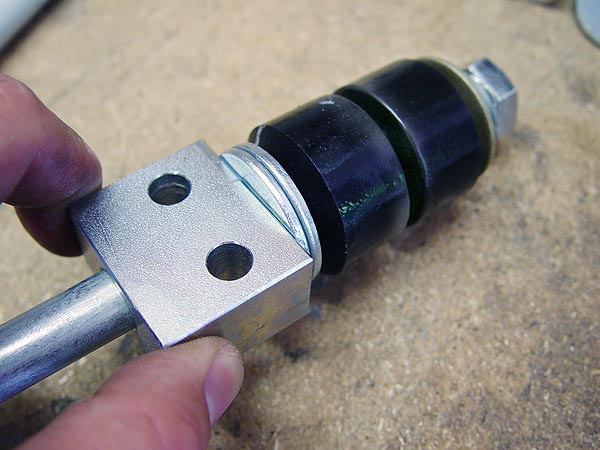
10. Next, slide on (2) more 7/16" washers on to the bolt followed by the cam pivot block. Make sure the two cross holes on the cam pivot block are sitting closest to the washers as shown in the pic to the left. |
 |
 |
 |
|
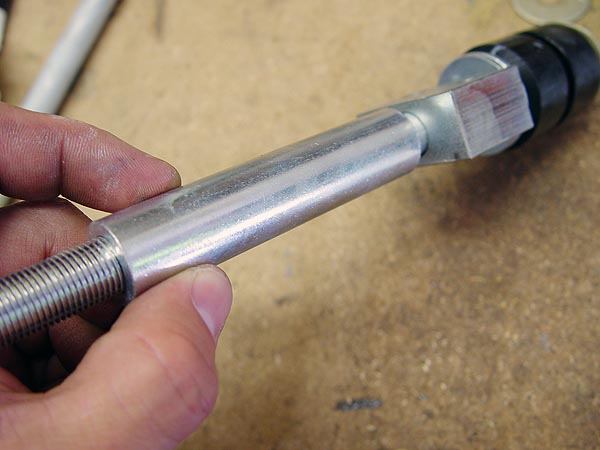
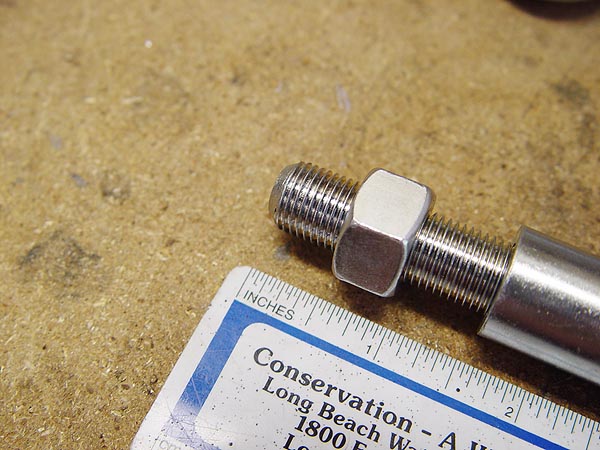
| 11. Slide the spacer tube onto the bolt. |
12. Thread on the 1/2"-20 machine nut onto the bolt until 1/2" of thread is still showing. |
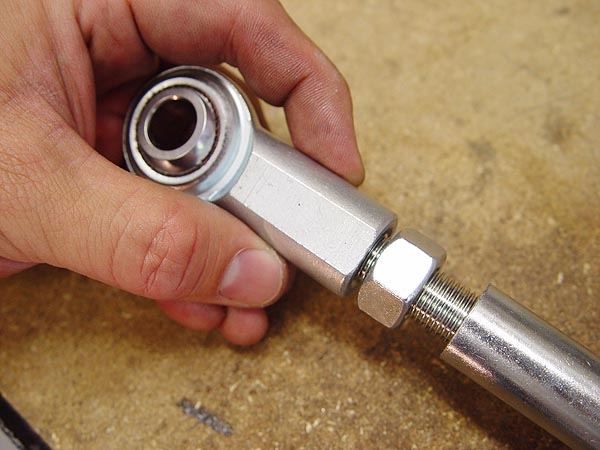
13. Now thread on the female rod end on the bolt until it almost makes contact with the nut. |
|
 |
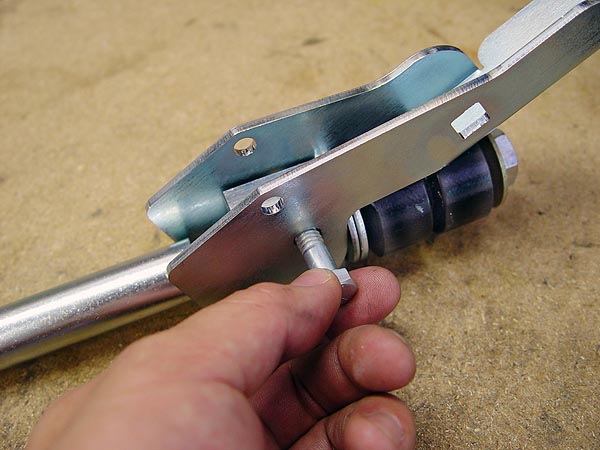
14. Slip one of the supplied cam bracket onto the cam pivot block and line it up with the larger of the two holes nearest the cross-holes in the cam block. Then, secure it in place using the supplied 5/16" bolt and lock nut. A 1/2" socket and wrench will be needed to tighten the bolt and lock nut just enough so that the cam still swings freely.
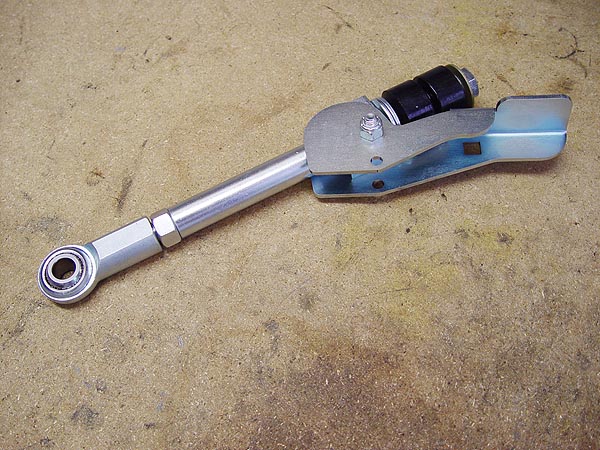
15. This is what your new Nth Degree Mobility Quicksilver Sway Bar Disconnect links (passenger side shown in pic) should look like when completely assembled. Repeat steps 9-14 and build your other Quicksilver link. |
 |
16. Starting on the passenger side of your Jeep, slip one of the supplied button head bolts through the clevis just enough to place a 1/2" washer on the end of it as shown in the pic to the left.
17. Place the rod-end of your new Nth Degree Mobility Quicksilver link
up to the sway bar adapter, slide the button head bolt through it just enough to hold the link in place, place one of the standard 1/2" course-threaded nuts that came with the kit in-between the rod-end and the clevis and then thread the button head bolt all the way through to the other side. Tighten this inner nut against the rod-end using an 8mm Allen Key and 19mm wrench. |
 |
18. Attach a lock nut onto the end of the button head bolt now protruding through the other side of the clevis. Secure this nut in place using an 8mm Allen Key and 19mm socket and tighten it down to 40 ft. lbs. of torque. |
 |
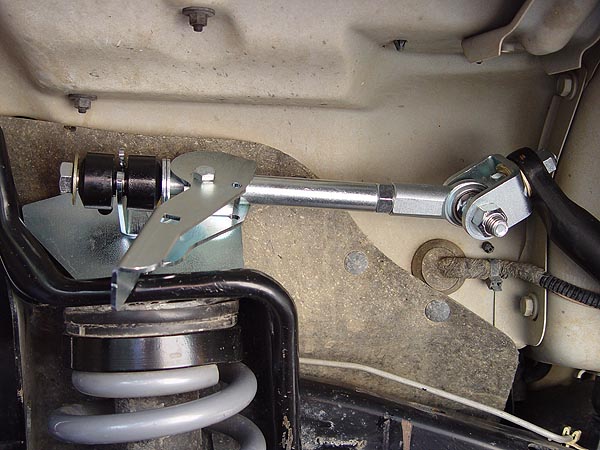
19. Assemble your Nth Degree Mobility Quicksilver parking brackets onto the adapter plates using the bolts, washers and lock nuts provided with the kit. You will need a 9/16" socket and wrench to fasten the nuts and bolts. The holes on the adapter plate are slotted and will allow for some adjustment if needed later. The pic on the left shows the proper placement of the passenger side parking bracket for a Jeep with a 4" lift.
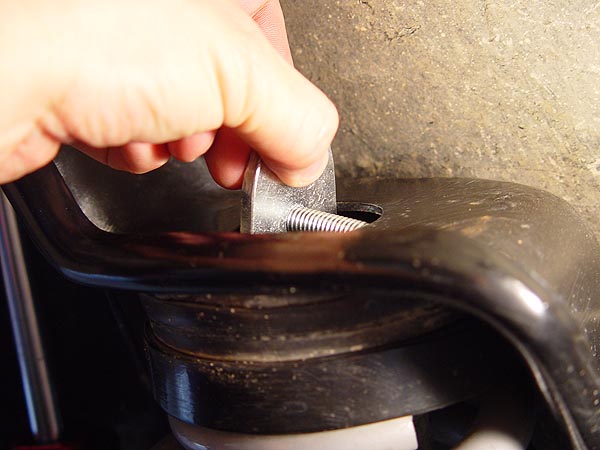
20. Slip one of the retainer plates that come with this kit completely into the large hole on top of your passenger side spring tower. |
 |
21. Carefully manipulate it around so that you can pull the bolt back up and through the hole. Then, rotate the plate until the small hole on it is facing toward the front of your Jeep.
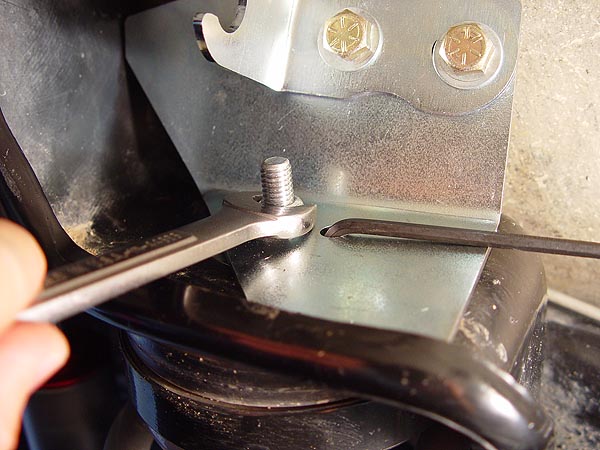
22. Place your assembled Nth Degree Mobility Quicksilver parking bracket and adapter plate on top of your spring tower feeding the retainer bolt through the larger of the two holes. Place a small Allen Key into the smaller hole making sure it goes through the hole in the retainer plate too. The Allen Key will help keep the retainer plate from spinning while you secure it in place using the lock nut supplied with the kit. You will need a 9/16" wrench to tighten the lock nut and make sure to only tighten it just enough so that the plates will stay in place. |
 |
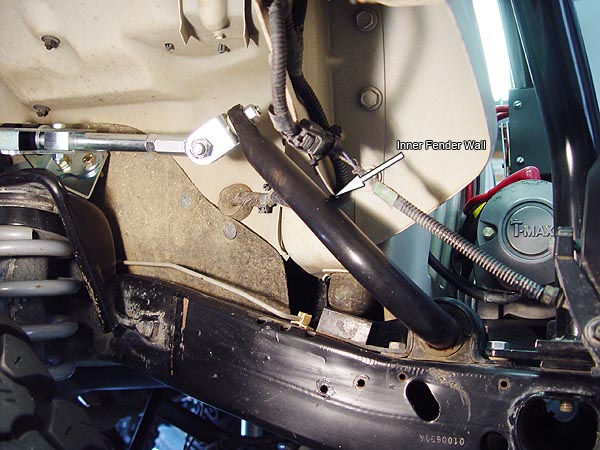
23. On Jeep TJ's without a 1" Body Lift, it will be necessary to trim and/or fold back the inner fender wall at the point shown in the pic to the left. This is needed so that you can rotate your Nth Degree Mobility Quicksilver Sway Bar Disconnect links up and over your spring towers so that they can be parked. |
 |
24. Now you need to set the Nth Degree Mobility Quicksilver axle adapter bracket so that it sits square with the link bolt when connected. To do this, place both links into the axle adapter brackets and lift up on the handle until they are fully 'cammed'. This action should rotate the axle adapter brackets into their proper alignment.
25. Carefully remove the links by 'un-camming' them and then secure the axle adapters brackets in place by tightening them down to 45 ft. lbs. of torque. |
 |
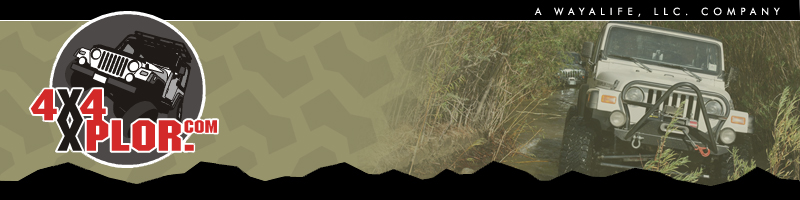
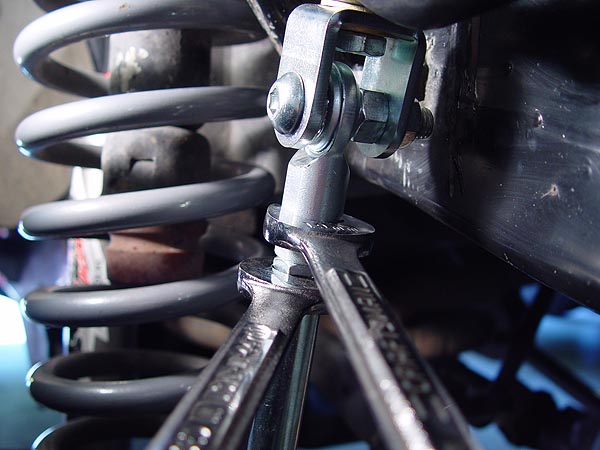
26. Check the pre-Load of each link separately by measuring the gap between the Nth Degree Mobility Quicksilver Sway Bar Disconnect link bushings when cammed. There should be no more than 1/16" gap as shown in the pic to the left. If you have more than 1/16" gap, you need to release the link and adjust the bolt length by turning its head.
27. Check the pre-load again and once you have the correct amount, tighten the jam nut against the rod end using a 3/4" wrench and a 19mm wrench or crescent wrench. |
 |
28. More than likely it is probably fine where it's at but it's a good idea to double check your Nth Degree Mobility Quicksilver parking bracket to make sure it'll sit square with the link when cammed. If adjustment is needed, be sure to adjust the bracket only. |
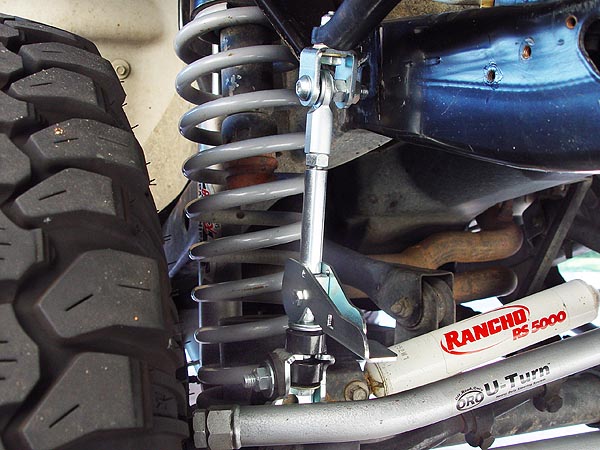
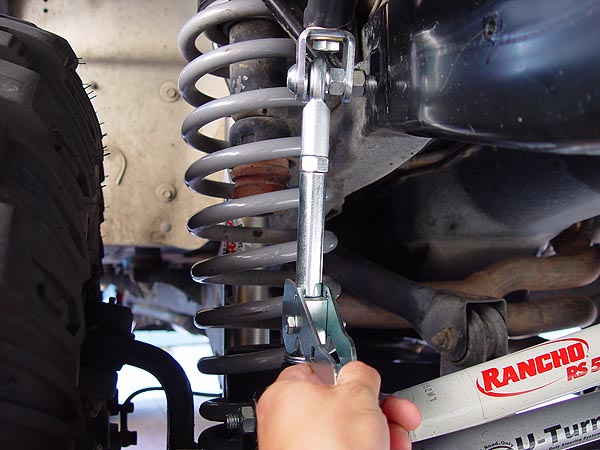
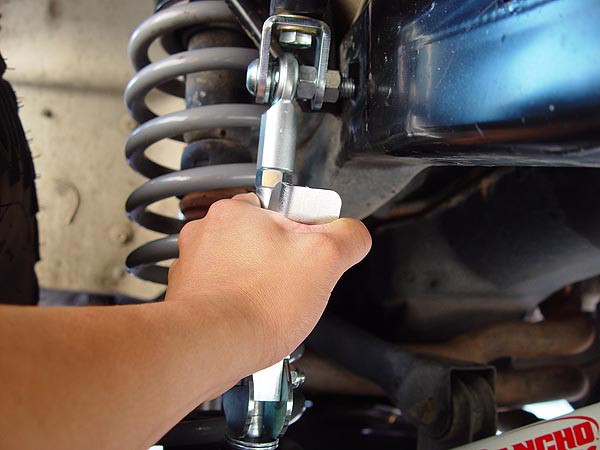
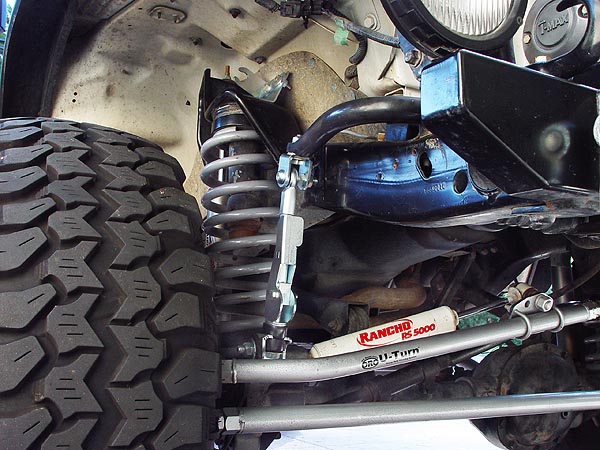
The Final Result
Here's a few shots showing how the Nth Degree Mobility Quicksilver Sway Bar Disconnects work and what it looks like when it's in the parked position. |
 |
 |
 |
|
 |
 |
 |
|