
|
|
|
What
You will Need
• Nth
Degree Mobility Shock Shifters
• 13,15,18,19mm Socket/Wrenches
• Standard Ratchet
• 12" Ratchet Extension
• Torque Wrench - 100 ft.lb. Capacity
• Torx
T-55 Bit
• Hand Drill
• 3/8" Metal Drill Bit
• 2 - Jack Stands
• Floor Jack
• Wheel Chocks
• Plasma Cutter, Torch or Sawzall
• Mig or Tig Welder
• Welding Equipment
• Grinder (optional)
• Sander (optional)
• Angle Finder
• White Lithium Grease
• Bench Vice
• Primer & Paint
What Comes with the
Nth Degree Mobility
Shock Shifters
• 1-LH & 1-RH Upper Frame Brackets
• 1-LH & 1-RH Lower Axle Brackets
• 2-HCS 3/8-16x1
• 2-Nuts 3/8-16
• 2-F/W 7/16
• 2-Top LK 1/2-13
• 2-F/W 5/8
Where I Bought My Parts
& Where I Went for Welding
Because I do not own any welding equipment (and even if I did, I'd
be the first to admit that I am not a great welder), I decided to
take my Jeep into a local shop and have them remove the factory
shock mounts off my rear axle and to have them weld on the new Nth
Degree Shock Shifter ones. I had this done at:
South Coast Muffler, Hitch & Welding
33011 Calle Aviador #A
San Juan Capistrano,CA
(949) 493-5977
Jim Tebbetts, the owner is an amazing welder, a great guy to work
with and very affordable. If you are in the South O.C. Area, I would
highly recommend his shop for your welding needs.
Post Installation Notes
Even if I had not busted my shock mount off
my axle, I most likely would have installed the
Nth Degree Mobility Shock Shifter on my Jeep TJ anyway some day.
I can't say for sure whether or not the so called "sea leg
stance" has made a difference in my ride or if it's just my
new shocks or a combination of both but I can say for sure that
my ride is better than ever before and my Jeep seems to handle better
too. Certianly all the new clearance you gain from shifting over
the axle mount as well as the clearance your shock will get from
the lower spring perch is well worth the moderate price tag.
As I mentioned before, I had my welding done by a professional and
I would highly recommend you doing the same if you have any doubts
about your welding skills. For the record, it only cost me $40 to
have all the work done.
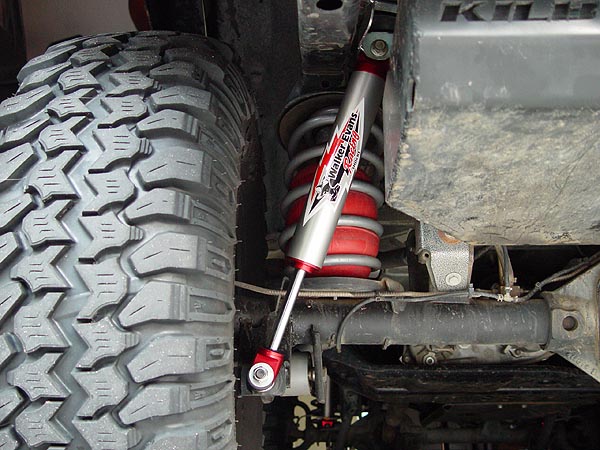
Also, I purchased new Walker
Evans Racing Shocks to go with my new Nth Degree Mobility
Shock Shifter. However, they are not needed with this kit.
Other Nth Degree Mobility Products Installed
On My Jeep TJ
Nth Degree Mobility Quicksilver
Sway Bar Disconnects
|
|
|
|
Nth
Degree Mobility Shock Shifters
So, why would
anyone want to hack off their Jeep TJ's factory axle shock mounts,
have a new set welded on, install new upper cross member mounts and
pay about $100 to do it plus whatever it cost for welding if you don't
have the means to do it yourself? Well, in my case I tore off my passenger
side shock mount right off my Jeep's axle and saw this as an opportunity
to fix my break and upgrade to something better all at the same time.
Why are they better than the factory mounts and why would you want
them on your Jeep? Well for one, the Nth Degree Mobility Shock Shifters
relocate your axle mounts and shifts them outboard by 5" providing
more clearance under the rear axle. Also, the new mounting location
effectively solves the problem of your shock cans making contact with
the lower spring perch caused by a lift and/or by a raised-pinion
(rotated rear axle). Last but not least, the new mounting location
improves your shock clearance next to the exhaust and prolongs the
life of your shock bushings.
Installation
 |
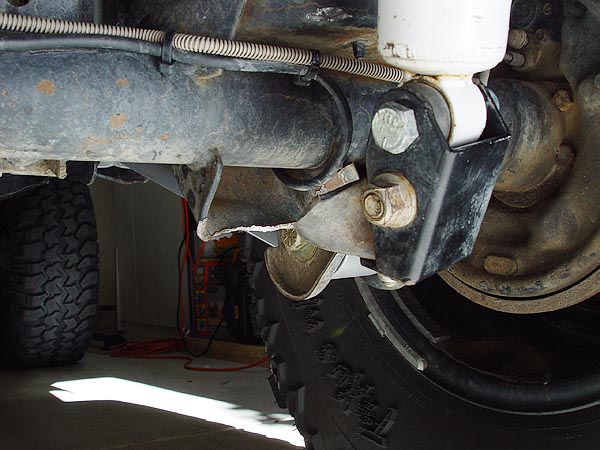
Here is a pic of my passenger side rear lower shock mount
right after it tore off my Dana 44 axle. Why did the mount fail?
I'm not 100% sure but my best guess would be that my shocks
were bottoming out when I had my old and saggy Rusty Coils.
This probably caused the metal to fatigue and then break. |
 |
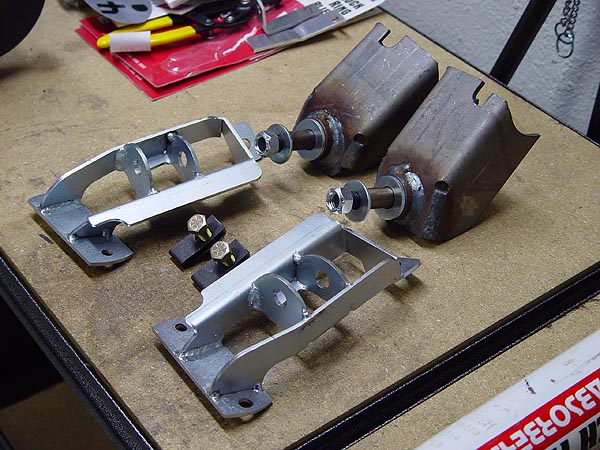
Here is a pic of all the part you will get with your new Nth
Degree Mobility Shock Shifter kit. These parts are for a Dana
44 and Dana 35. Do yourself a favor and double check to make
sure you have all the parts before you start working on your
Jeep. |
 |
1. To begin the installation of your new
Nth Degree Mobility Shock Shifters, remove the rear shocks from
your Jeep TJ using a 13mm socket and 12" extension for
the top frame mounts and a 15mm socket and 18mm wrench for lower
the axle mounts. Make sure to put aside the lover axle mount
bolt and nut as they will reused later on. |

 |
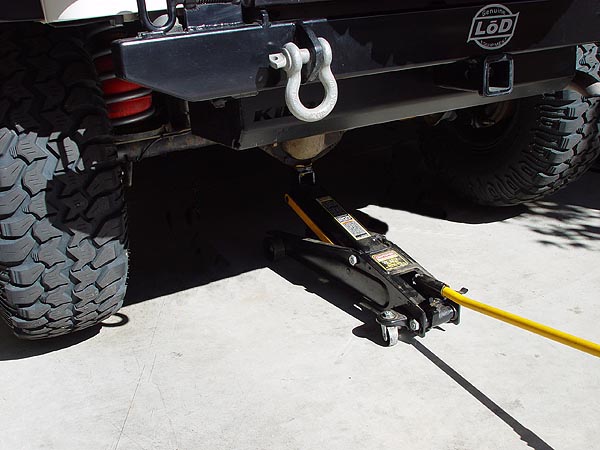
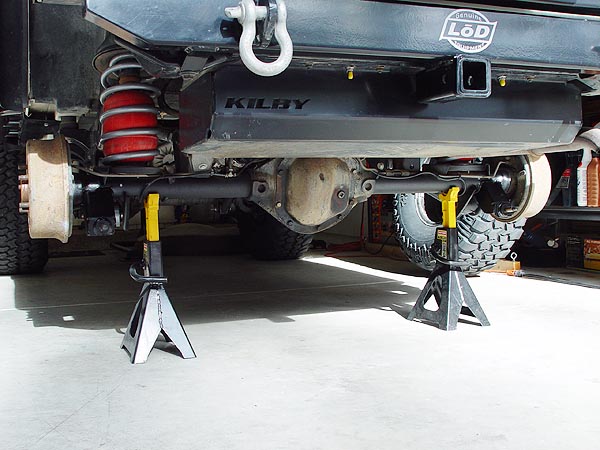
2. Chock your front wheels and then using
a floor jack, lift up the rear of your Jeep from the differential.
Place jack stands just in front of the lower control arm mounts
on the frame rails and then remove your wheels. Place the wheels
in front of the jack stands and underneath the frame rails for
added protection.
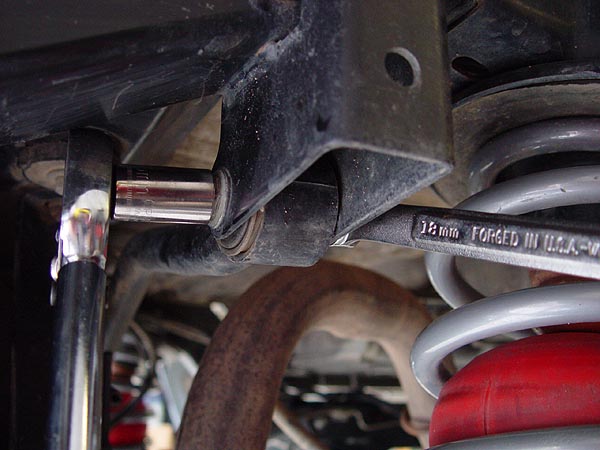
3. With the axle
still supported by your floor jack, remove the bolt and nut
securing your rear track bar to the frame mount using a 15mm
and 18mm socket and wrench. You may have to raise or lower your
axle to make removing this bolt easier. To get more room to
work with, you may want to completely remove your rear track
bar which is secured to your axle by a Torx T-55 Bit. |

|
4. Now, lower your rear axle so that it droops
as far as it can go but making sure to leave your floor jack
under your differential to support it.
5.
Using the factory bolts, install the new Nth Degree Mobility
Shock Shifter upper brackets to your Jeep TJ's frame cross member
where your factory bar pins used to be mounted. The left and
right hand side can only go on one way so you can't mess up
here. Secure the bolts but do not torque them at this time.
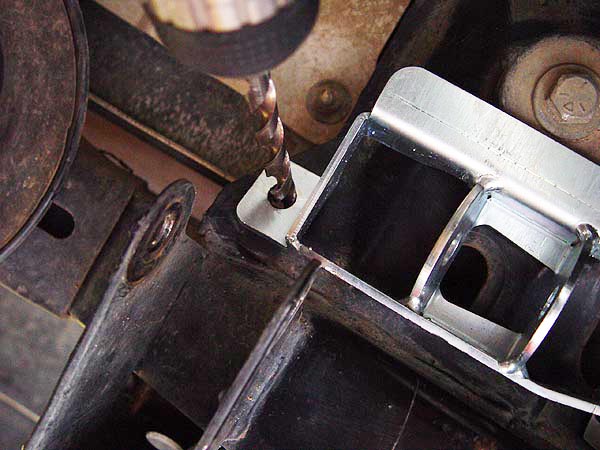
6. Using the Nth Degree Mobility Shock Shifter
upper brackets as a template, proceed to drill a 3/8" hole
through your Jeep TJ's frame cross member as shown in the pic
to the left. Go slowly and be careful not to punch right through
your tub.
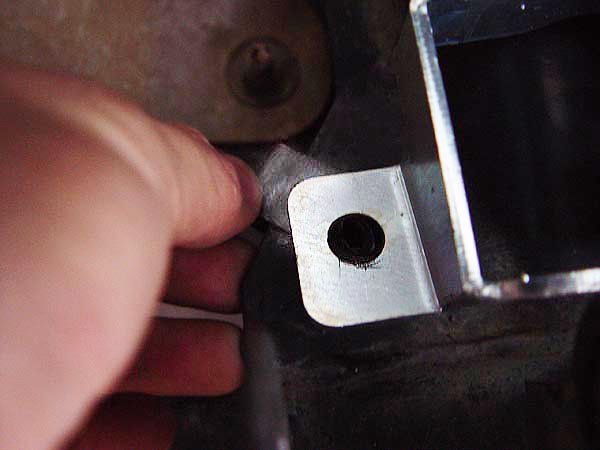
7. Remove the Nth
Degree Mobility Shock Shifter upper brackets. Then, slip on
the U-Nuts that came with the kit onto the frame cross member
so that they are positioned over and lined up with the holes
you just drilled. Make sure that the threaded portion of the
U-Nuts are pointing up.
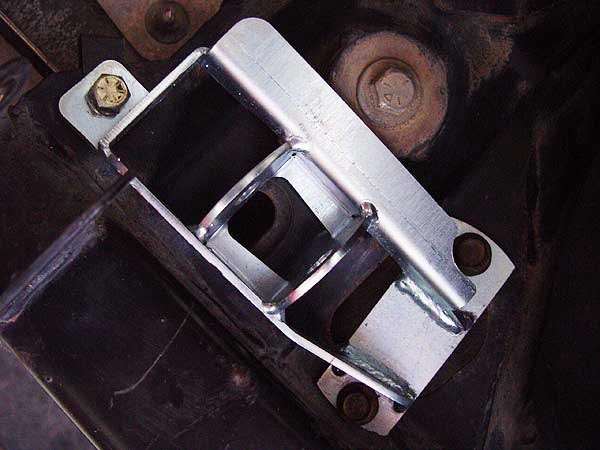
8. Reinstall the new Nth Degree Mobility Shock
Shifter upper brackets using the factory bolts and 3/8"x1"
grade 8 bolts supplied with the kit. Tighten all the bolts to
35 ft. lbs. of torque.
9. Re-install
your factory trackbar tightening the bolts to 85 ft. lbs. of
torque. You may need to raise and lower your axle a bit with
a floor jack to line up the holes better. |
 |
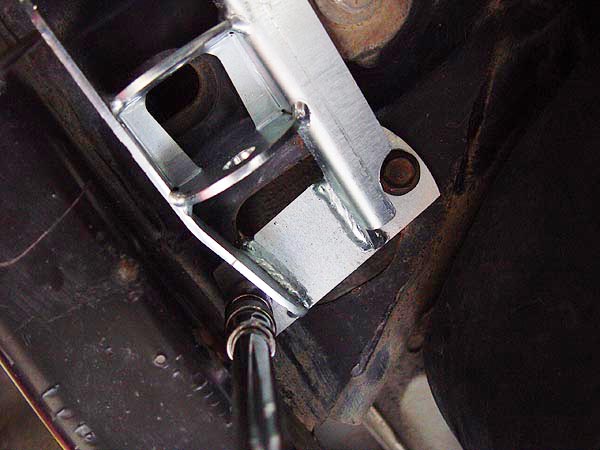
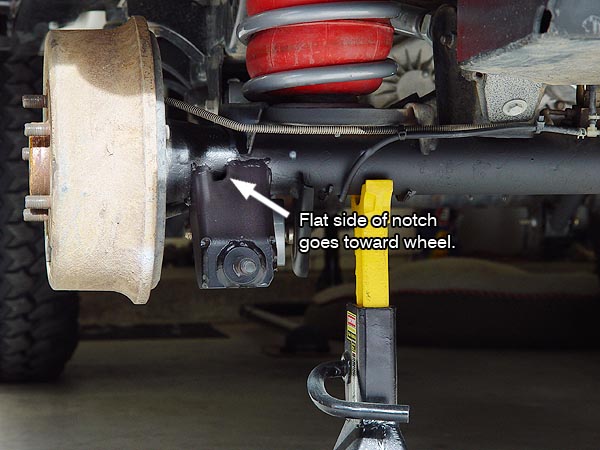
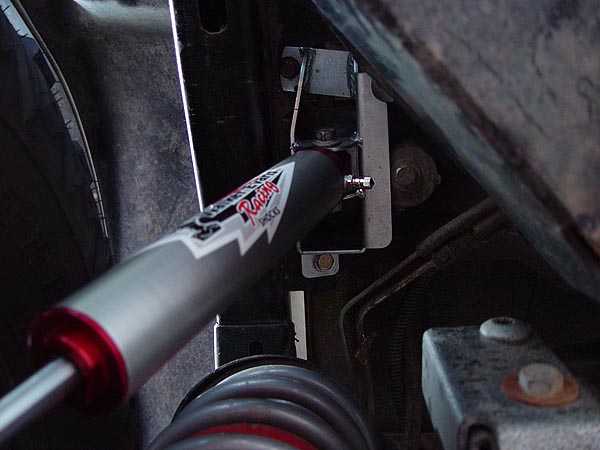
10. The Nth Degree Mobility axle brackets
are made as a left and a right hand bracket and can be distinguished
by the notch at the top. As you can see in the pic to the left,
the flat side of the notch needs to go towards the wheel.
When you're ready to weld your Nth Degree Mobility axle brackets
on, position them so that the notch is straddling the tail of
the outside lower control arm bracket. Depending on how much
your axle is rotated due to a lift, the lower control arm tail
may or may not protrude through the notch.
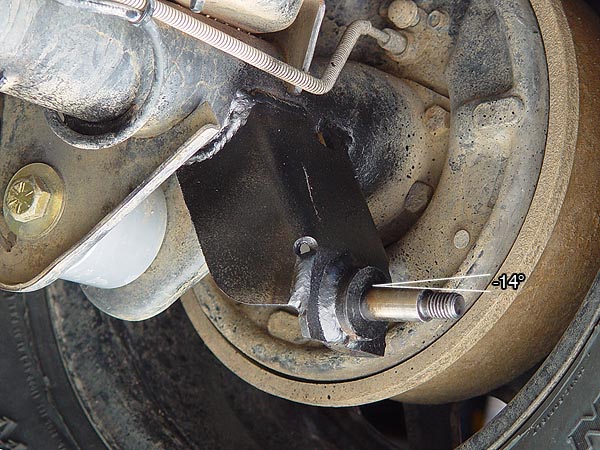
Last but not least, it is very important to make sure the shock
mounting stud is positioned to the correct angle. To do this,
you can temporarily install your shocks on the new Nth Degree
Mobility upper frame bracket and then use them to hold the lower
axle brackets long enough for you to tack weld them in place.
The shop I took my Jeep to had an angle finder and they just
used it to set the horizontal axis of the shock mounting stud
to approximately 14° below horizontal as indicated by Nth
Degree Mobility. |
|
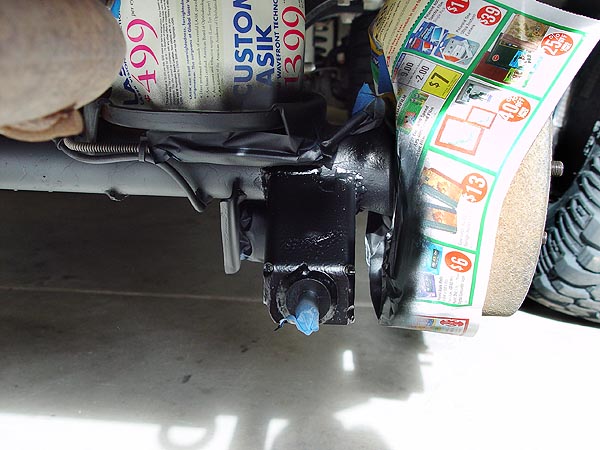
11. If you haven't already done so, now would
be a good time to hack off your factory axle shock brackets.
The shop I took my Jeep to used a plasma cutter and was able
to knock off the brackets in what seemed like seconds. If you're
anal about things, spend some time grinding the axle tube smooth
although make sure not to cut or grind into the axle tube itself
as it will weekend it. I decided to leave well enough alone.
Make sure to prime and paint your new Nth Degree Mobility axle
brackets as well as any exposed steel left over from hacking
off the factory brackets. |
|
12. Time to install your shocks. If you are
going to be reusing your old shocks, you will need to remove
the bar pin from the upper bushing as it is not needed anymore.
You will also need to remove the metal sleeve inside the lower
shock bushing at this time. Try not to damage this sleeve as
you will need to reuse it on the top bushing.
13. Take the metal sleeve you just removed
from the lower shock bushing and press it into the top bushing.
Apply some white lithium grease to the bushing and attach your
shock to the Nth Degree Mobility upper frame bracket using the
bolt and nut that was previously used on the factory lower axle
mount. The fit will be tight but it will eventually go on with
some effort. Tighten these bolts and nuts to 50 ft. lbs. of
torque.
14. Apply some white lithium grease to your
lower shock bushing and slide it on to your new Nth Degree Mobility
lower axle mounting stud. Make sure to sandwich the lower shock
bushing between the washers provided with the kit and then secure
it in place using the nylock nut that also came with the kit.
Tighten this nut to 40 ft. lbs. of torque.
That should be it. Please let me know
if you have any questions. |
|
|
|