|
|
| Problems
I Ran Into
Along The Way
Lock Rings and Snap Rings
By far the biggest problem I ran into along the way was trying to
get the large lock ring onto the new output shaft. The right tool
for the job is a pair of heavy duty lock ring pliers and I was trying
for about an hour to get it on using a pair of "snap"
ring pliers which is impossible to do. Do yourself a favor and get
the right tools for the job.
Oil Pump Pickup Tube
Of all the dumb things I did along the way, this was it. Just after
I finished installing my AA SYE, I took it for a test drive, ate
dinner and then went to bed. That's when it happend.... as crazy
as it may sound, I typically lie in bed after a mod install and
go over in my head everything I had just done to make sure I didn't
forget anything. Sure enough, I did.... or did I? Need I say, I
spent the rest of the night wondering if I remembered to reconnect
the oil pump pick up tube. Well, after a restless night of sleep,
I got up the next morning and decided to partially take things apart
to double check my work. It was a pain to do but better safe than
sorry right? Anyway, I'm glad that I did because I did in fact forget
to reconnect the oil pump pickup tube. It is connected now.
Drive Shaft Bolts
When I went to install my new CV drive shaft, I climbed underneath
my Jeep, bolted it up to my rear axle, held it up to my new AA SYE
output shaft and then..... realized that I didn't have any bolt
to attach it to the yoke. Scratching my head, I started to look
though all my boxes and packaging and thought maybe I threw them
away by mistake. In the end, I called up Northridge4x4 and it turns
out that I just didn't get any. Something about how High Angle Drivelines
doesn't provide them. Fortunately, David at Northridge4x4 is way
cool and he shipped me out some new bolts for FREE. Needless to
say, make sure you have your bolts or ask for them before you start
this install.
|
|
|
|
Advance
Adapters Slip Yoke Eliminator (AA SYE)
& CV Drive Shaft Installation on a Jeep TJ
<< Back
- Page 2
- Next>>
|
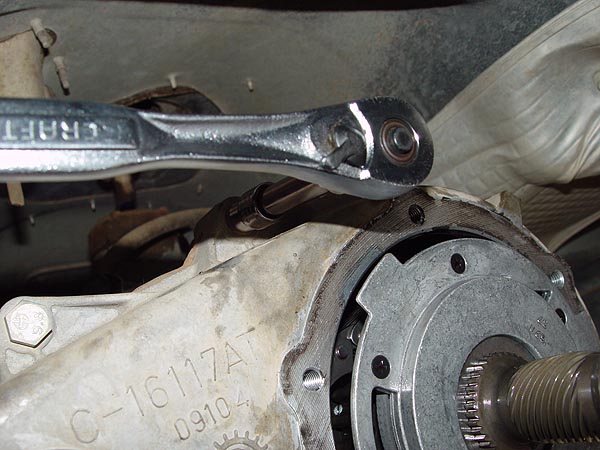
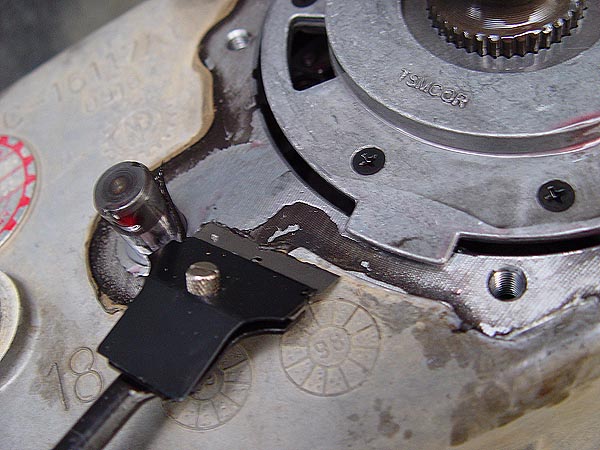
21. With the exception
of one bolt on top as indicated on the pic to the left, remove
all the bolts holding the two halves of your transfer case
together using a 15mm socket. The one bolt on top will need
a 12-point 10mm socket to remove it. Pay close attention to
where each bolt came off of and arrange them accordingly on
the ground. You should notice that a couple of them will be
longer and they will need to go back to the specific hole
they originally came from.
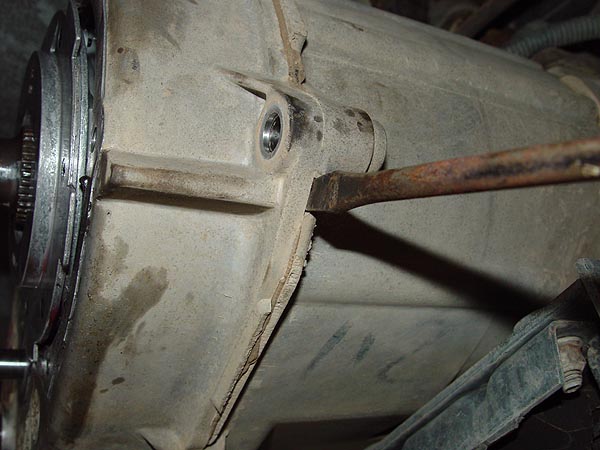
22. If you look carefully at the seam where
the two halves of the transfer case come together, you should
see a small notch where a flat head screwdriver can be inserted.
Use this notch to carefully pry open the transfer case just
a bit making sure not to use excessive force which can cause
damage.
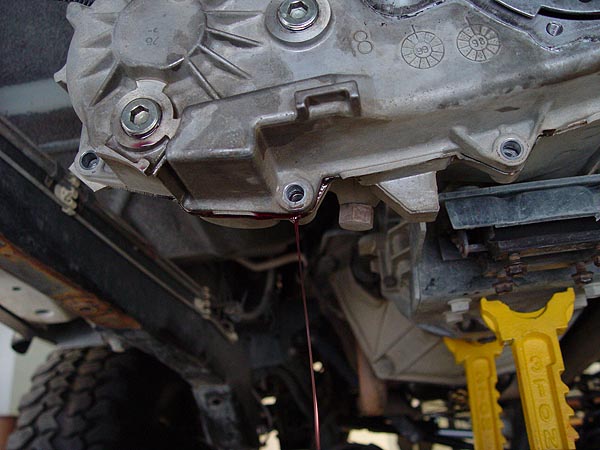
23. Some ATF left inside will drain out at
this point so be sure to have a rag ready. |
 |
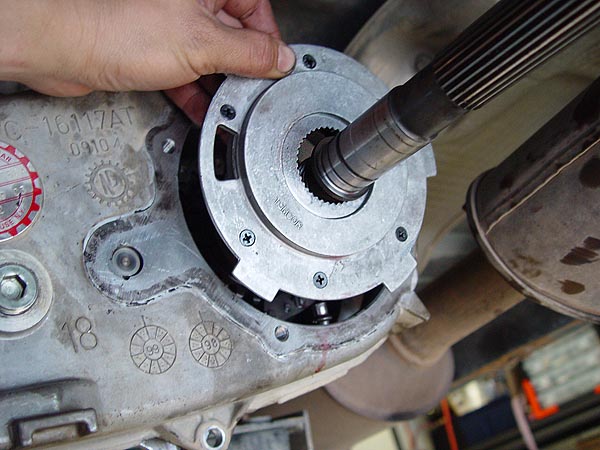
24. With the transfer case partially separated,
you should now be able to remove the oil pump simply by lifting
up and pulling it off the output shaft. There is a small pickup
tube at the base of the pump that will need to be disconnected.
It's just held in by a rubber O-ring and will just unplugs with
little effort. |
|
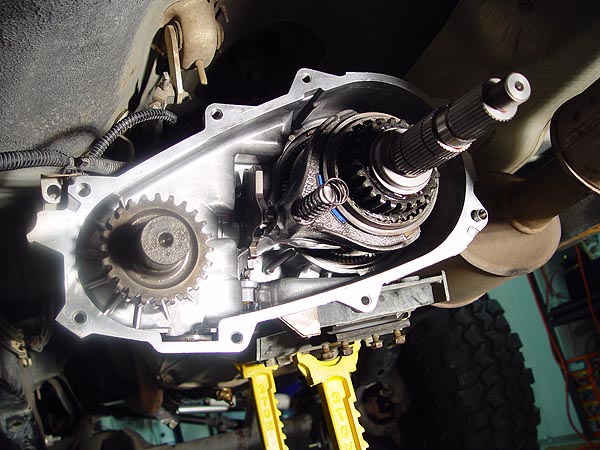
25. Completely remove the transfer case
half and set it aside for now. At the base
of the transfer case, you should find a flat round magnet
slipped into a slot where the two halves come together. Pull
this collecting magnet and clean it off of any iron filings
attached to it and look for larger chunks that would indicate
serious wear or damage to the components inside.
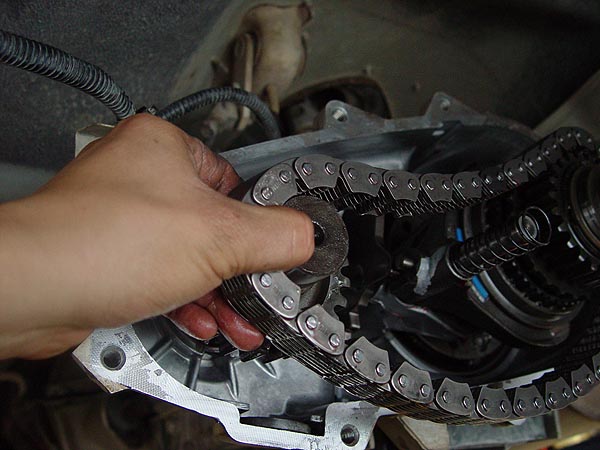
26. Take a hold of the the front output shaft
and carefully pull it back just a bit. This will make it easier
to get a hold of the transfer case chain and lift it off the
drive gear.
27.
With the transfer case chain off the front gear, you should
be able to just lift up and off the chain from the main output
shaft. Set aside this chain in a safe clean location.
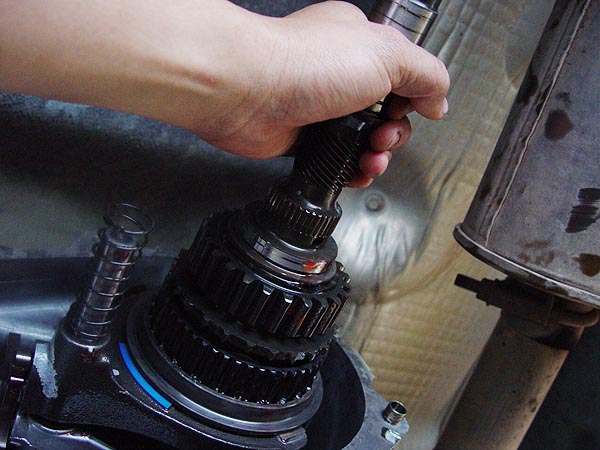
28. Grab a hold of your output shaft and
carefully pull it back and out of the transfer case make sure
not to hit the drive gears on anything. |


|
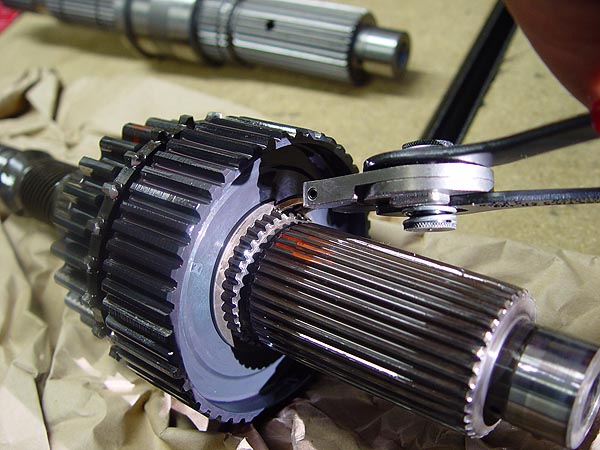
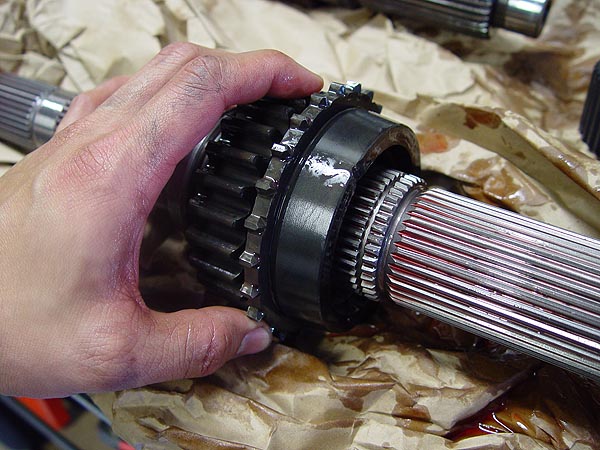
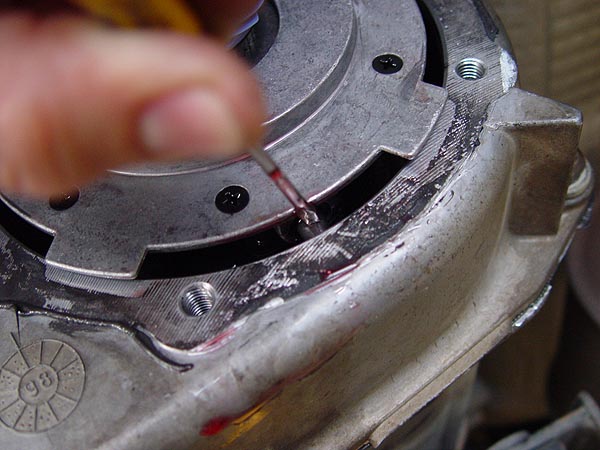
29.
With your output shaft in hand, climb out from under your
Jeep and go to your work bench. Lay out some rags or newspaper,
place your output shaft on it and the begin working on removing
the large lock ring securing the gears on the output shaft
using a pair of heavy duty lock ring pliers.
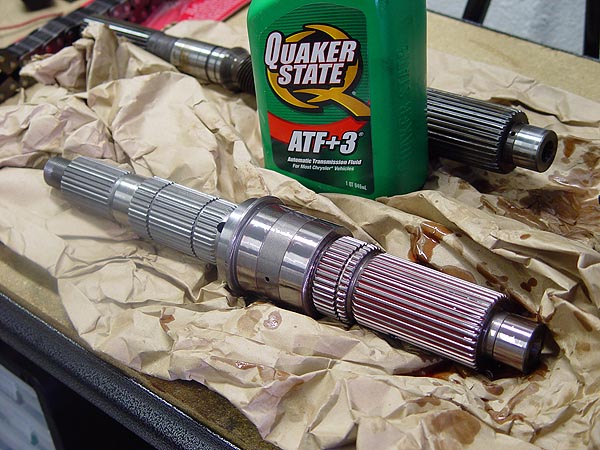
30. Set aside your old output shaft for a
moment and lube up your new AA SYE output shaft with some
ATF+3 or better.
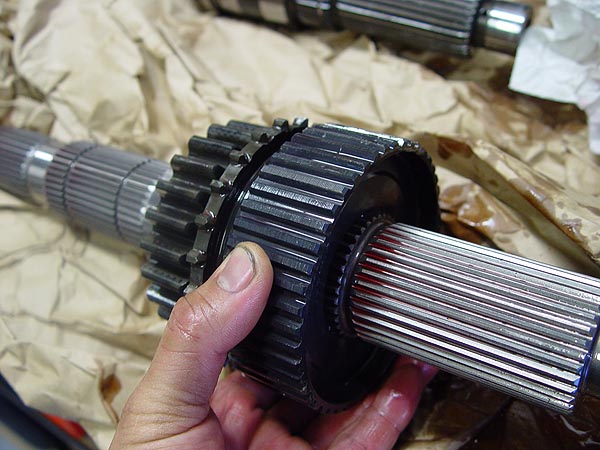
31. Now, back at your old output shaft, carefully
remove the large drive gear on it by sliding it off and then
setting it aside on a clean surface. Next, carefully remove
the smaller gear the same way.
32. Take your new AA SYE output shaft and
carefully slide on the smaller drive gear followed by the
larger gear.
33. Secure the drive gears onto the new output
shaft using the large lock ring supplied with the AA SYE kit.
This is by far the most difficult part of the job especially
if you do not have heavy duty lock ring pliers. Even with
the pliers, this will still be a challenge to put on. |
|
34. Okay, leave your new AA SYE output
shaft on the workbench for now and crawl back under your Jeep.
Spend sometime cleaning off the old gasket material from both
mating surfaces of the transfer case halves as well as where
the tail housing mates up to. A flat razor blade or a gasket
remover tool will make this job a lot easier. Be careful not
to let crap fall into your transfer case and be sure pick up
any trash that does. Finish up by wiping down the mating surfaces
with a little brake cleaner and a clean rag.
35.
Now, carefully insert it into your transfer case being mindful
not to bump the gears on anything and then re-attach your transfer
case chain onto your new AA SYE output shaft as well as your
front drive gear. Slowly push in your front output shaft until
it in all the way.
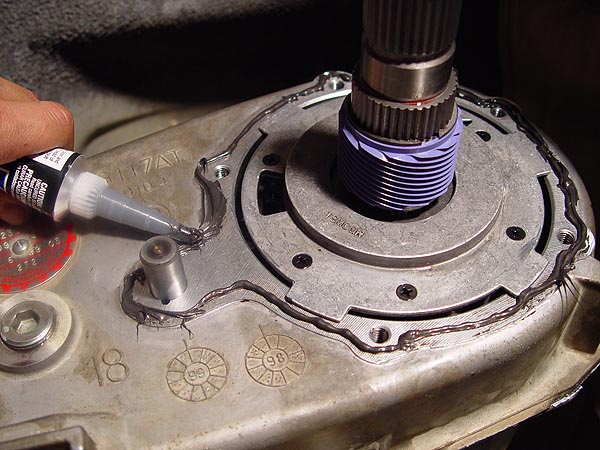
37. Apply a thin
1/8" bead of RTV along the edge of your transfer case half
that is still on your Jeep as show in the pic to the left. Be
sure to go around the bolt hoes as well.
38. Do not let the RTV set more than a couple
of minutes and then sandwich the two halves of the transfer
case back together being careful not to move it around too much.
Also, make sure your oil pump pick up tube is plugged securely
back into the O-ring at the bottom of the pump using a small
flathead screwdriver.
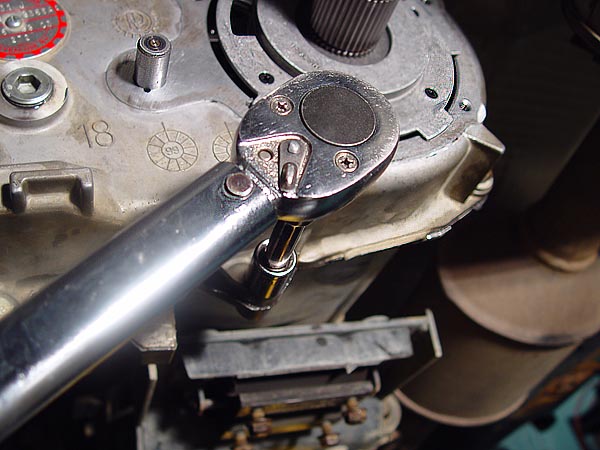
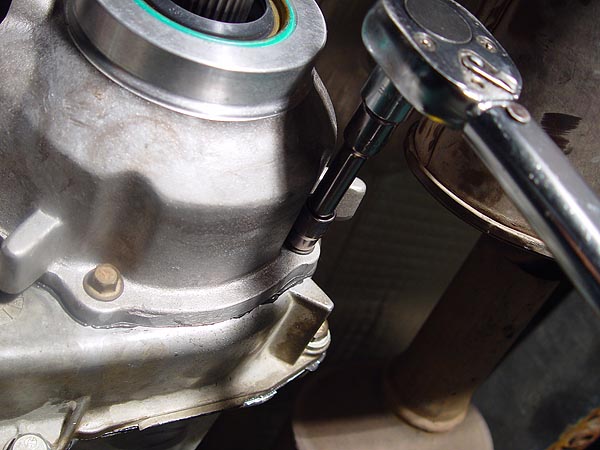
39. Fasten all the bolts to 20-25 ft.
lbs. of torque. Make sure to use a torque wrench as you do not
want to over torque these bolts. |
 |
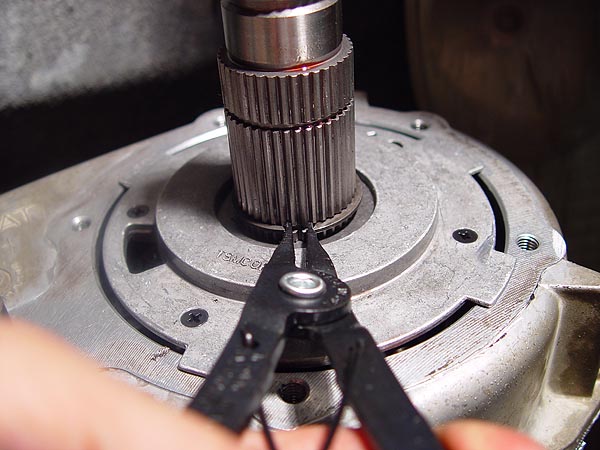
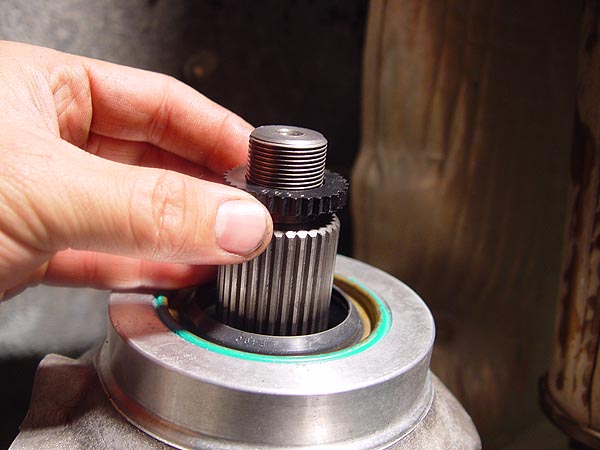
40. Using one of the new lock rings that
come with the AA SYE kit, attach one to the base of your output
shaft as indicated in the pic to your left. Again, you will
want to use lock ring pliers for this job.
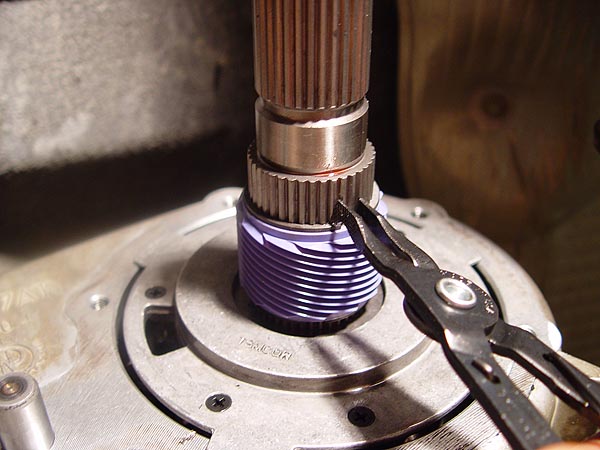
41.
Next, slide on the new speedometer ring gear on to the output
shaft all the way down to the lock ring you previously installed.
42. Attach the last lock ring that came
with your AA SYE kit to the output shaft as indicated in the
pic to your left. This will secure your speedometer ring gear
in place. |
 |
43. Now,
apply a thin 1/8" bead of RTV around the edges of where
your new AA SYE tail housing will attach to. Make sure your
bead of RTV goes around the outside of the shift rail (the cylindrical
post sticking out to the left) as shown in the pic to the left.
You do not want to cut off the supply of oil to this rail.
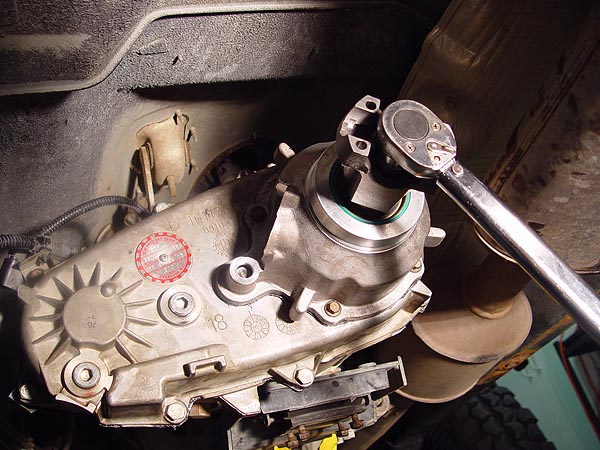
44. With your finger, lube up the rubber output
shaft seal with a little ATF+3 and then affix your new AA SYE
tail housing to your transfer case being careful not to move
it around too much. As before, do not let your RTV set more
than a couple of minutes and then torque the bolts to 15-20
ft. lbs. |


|
45. Slip on the new rubber gear looking seal
washer on to the threads of the output shaft. There should be
two of these rubber washers and they should be different sizes.
Check against the rubber washer you removed from your front
output shaft earlier to make sure you are using the correct
one.
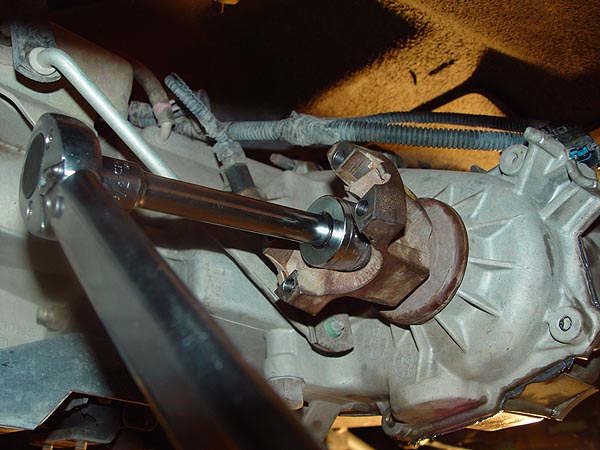
46. Now, slip on the new CV
rear yoke that comes with the AA SYE kit onto the output shaft.
Then thread on the new rear yoke nut that came with the kit
too and secure it in place by tightening it to 150 ft. lbs.
of torque. |
 |
47. Back at the front of your transfer case,
slip on the new rubber gear looking seal washer onto the front
output shaft threads and then slip on the factory yoke. Re-thread
the factory yoke nut on and then tighten it to 150 ft. lbs.
of torque just like the rear. |
|
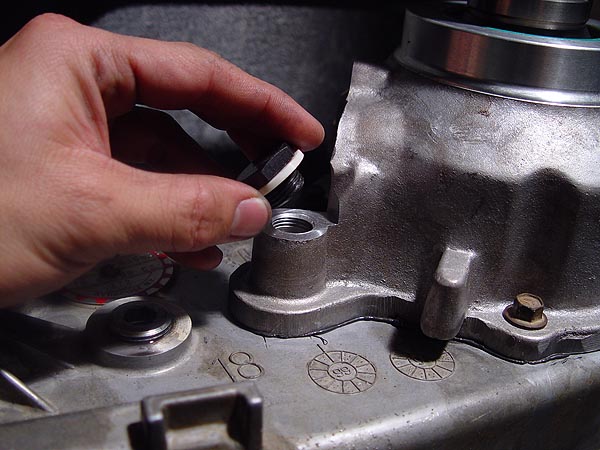
48. Because the AA SYE is made for Jeep Cherokee's
(XJ) too, there is a hole in the back of your new tail housing
where the shift rail is that needs to be plugged using the supplied
bolt plug and washer.
49. Install your speedometer gear and housing
into the new tail housing and rotate it back to the proper index
numbers.... remember, you took notes on this when you removed
it.
50. Secure the speedometer gear using the factory
bolt and retaining clip and then plug the wiring harness back
into it. Re-secure the little red harness clip. |
|
|
|