Advance Adapters SYE
& CV Drive Shaft |
|
|
|
What
You will Need
• Advance
Adapters SYE for NP231
• CV Drive Shaft (Order to Fit)
• Adjustable Rear Upper Control Arms
• 10,15,19,21mm Socket/Wrenches
• 10mm - 12 Point Socket
• 5/16,1/2,1-1/8" Socket/Wrenches
• 10mm Allen Bit
• Ratchet
• 3" Ratchet Extension
• 1-1/2" Crescent Wrench
• Torque Wrench - 150 ft.lb. Capacity
• Breaker Bar
• Large Monkey Wrench
• Flat Head Screwdriver
• Rubber Mallet
• Flat Wood Chisel
• Hammer
• HD Snap Ring Pliers - Lisle 49200
• Lock Ring Pliers - Lisle 44900
• Needle Nose & Regular Pliers
• Angle Finder
• 2 - Jack Stands
• Floor Jack
• Gear Puller w/5"+ Reach
• Gasket Scraper
• RTV Gasket Sealer
• 2 - Pints ATF+3 or Higher
• Bottle Pump or Yorker Spout
• Oil Catch Pan
• Rags
What Comes with the
Advance Adapters Slip Yoke Eliminator Kit
• Die Cast Tail Housing
• Main Output Shaft
• Rear Yoke Seal Washer
• Rear CV Yoke
• Rear Yoke Nut
• Front Yoke Seal Washer
• Speedometer Ring Gear
• Speedometer Ring Gear Snap Ring
• Tail housing Plug & Washer
• 207 Open Ball Bearing
• 207 Bearing Snap Ring
• Mode Retaininer Ring
• Tail Housing Seal
Pros & Cons of Installing an Advance
Adapter Slip Yoke Eliminator & CV Drive shaft
PROS:
• Eliminates vibrations caused by incorrect drive line angles
typically associated with lifted Jeeps.
• Increases the life of your drive shaft U-joint. and prevents
pinion shaft oil seal leaks or other leaks caused by drive line
vibrations.
CONS:
• The cost of a slip yoke eliminator which costs about $250
• You will need to buy a CV drive shaft which will cost about
$275
• You will need to buy rear adjustable control arms which
cost about $200
In a nutshell, this isn't exactly cheap to do but in my opinion,
worth every penny in the long run. |
|
Advance
Adapters Slip Yoke Eliminator (AA SYE)
& CV Drive Shaft Installation on a Jeep TJ
Whenever you lift a Jeep TJ above 2" (and
sometimes even just 2"), your drive line will be off enough to
cause what is known as drive line vibrations or "vibes"
for short. Because of this, most lift kits will include a transfer
case skid plate lowering kit to help restore your drive lines back
to or at least closer to stock. For the most part, this will do the
trick but then you have to ask yourself, do I really want to lower
the very part of my Jeep that I just spent a boat load of money to
raise up? Yes, there are other ways you can kind of get around this
like installing a 1" motor mount lift and/or lowering your transfer
case skid plate just a bit with washers and you can even try to convince
yourself that the vibes are gone.... but believe me, once you install
an Advance Adapter slip yoke eliminator or AA SYE for short and a
CV drive shaft, you'll know that you had just been kidding yourself.
Once installed, your Jeep will drive like butter. It will also be
quieter which is something I hadn't expected and you will be doing
your U-joints a huge favor.
Installation
NOTE:
This AA SYE and CV drive shaft installation write-up is for a Jeep
with an NP231 transfer case only.
|
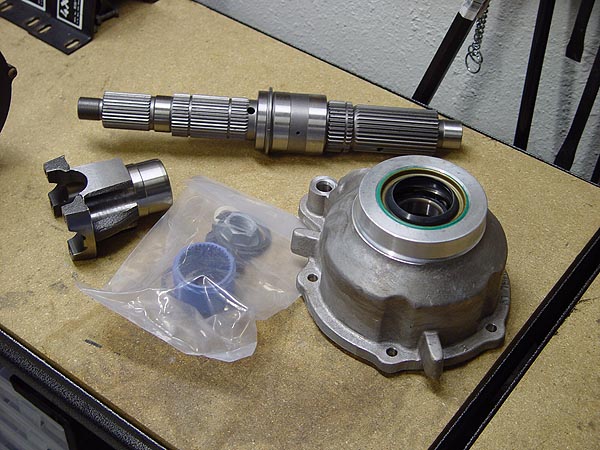
Here is a pic of all the parts you will
get with your new AA SYE. Before you being this installation,
do yourself a favor and make sure that you have ALL
the tools listed on the left. Trust me, you will not be able
to finish this job without them. |
 |
1. Due to the lack of work space and my overall
general laziness, this write-up will be performed while the
transfer case is still on my Jeep. To begin, park your Jeep
on level ground and somewhere you won't mind sitting under for
a few hours.
2. Put your Jeep in gear,
engage the emergency brake and then shift your transfer case
to 4WD Low.
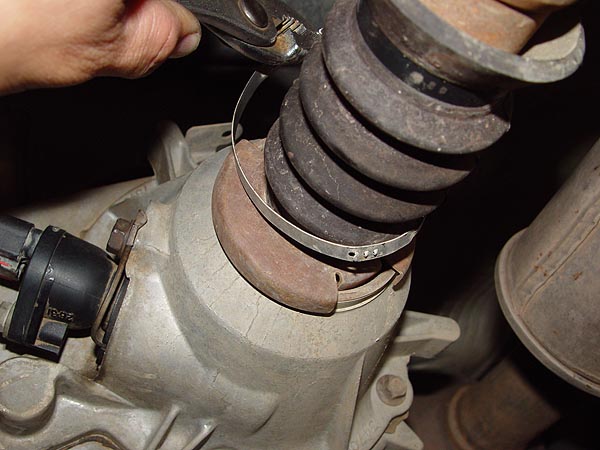
3. Climb underneath your Jeep and remove the
2 metal band securing both ends of the rubber boot on the transfer
case output shaft using a pair of pliers. |
|
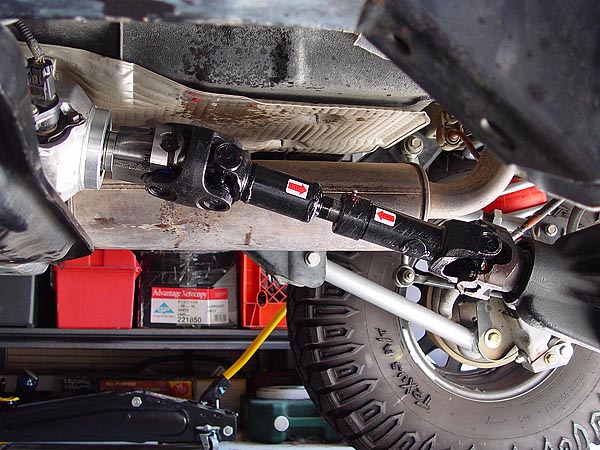
4. Now, roll over towards the Jeep's rear
axle and remove the 4 bolts and 2 yoke straps securing the drive
shaft to the rear axle using a 5/16" socket or wrench.
5. Set aside your yoke straps and bolts,
grab the drive shaft with one had and then give it a tap with
a rubber mallet to free it from the pinion shaft. Loosely re-attach
the U joint bolts and strap on to the pinion shaft for safe
keeping.
6. You can now remove the
drive shaft from your transfer case by simply pulling it toward
the rear of your Jeep. |

|
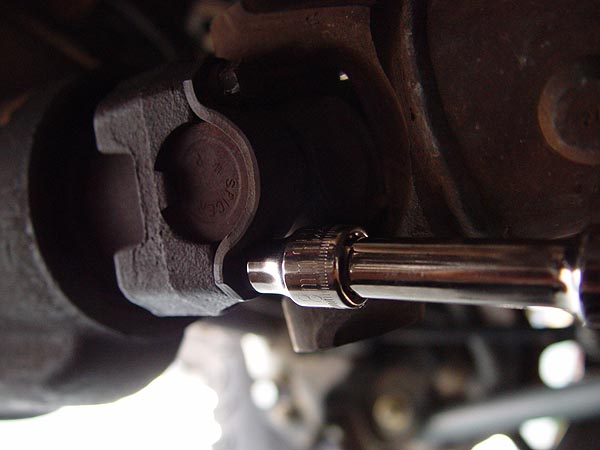
7. Now, remove the 4 nuts securing your
transmission mount to the transfer case skid plate using a 1/2"
socket.
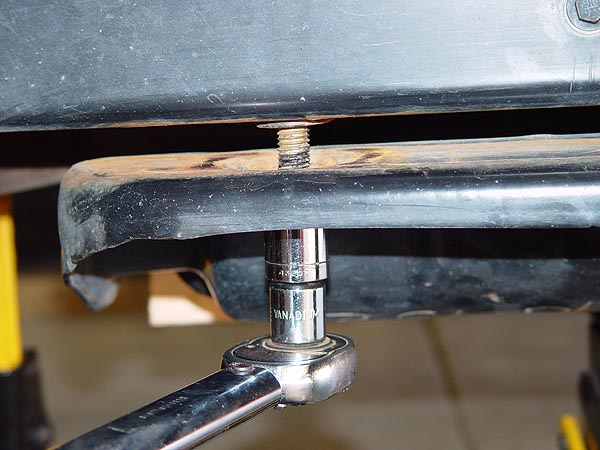
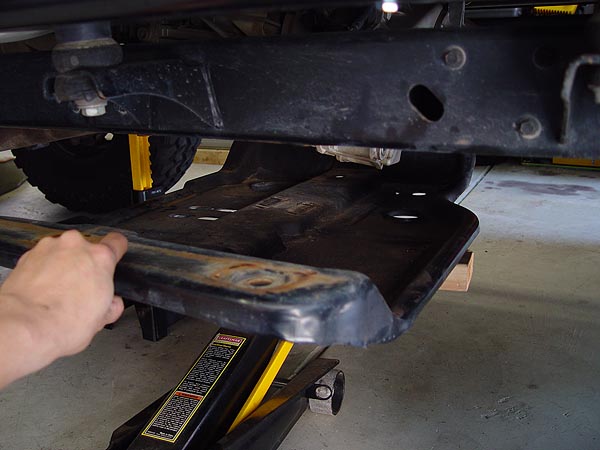
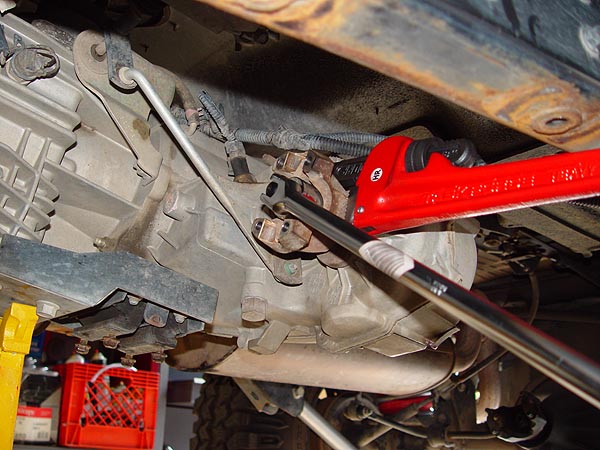
8. Place a jack
stand underneath the bell housing of your transmission and then
slide a floor jack under the center of your transfer case skid
plate and then raise it up until it puts a little pressure on
it. As you can see in the pic to the left, I also used a short
2x4 piece of wood to help distribute the load.
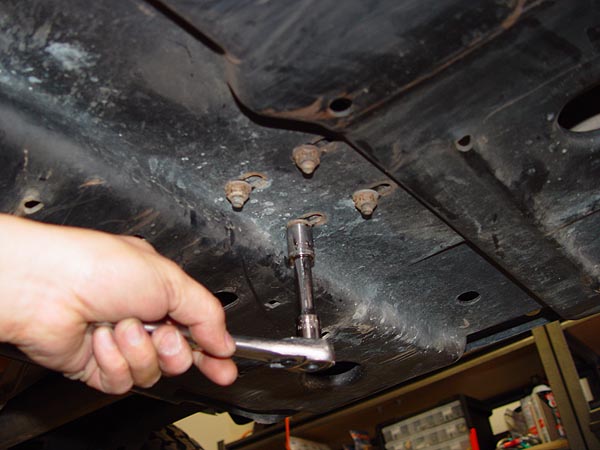
9. Remove the
6 bolts securing your transfer case skid plate to your Jeep's
frame rails. On a 1997-2002 Jeep TJ, you will need a 3/4"
socket. 2003+ TJ's use a metric bolt that is similar in size
but I do not know what it is. A breaker bar will come in handy
here and if you live in the rust belt of America, some PB Blaster
on the bolts will help out a lot.
10. With the bolts remove, slowly lower your
floor jack just a little and make sure that your transmission
is now resting on top of the jack stand you place under the
bell housing. Then, grab the lip of the transfer case skid plate
and roll the whole thing out from under your Jeep. Set your
skid plate aside for now |
|
11. Climb back under your Jeep and remove
the 4 bolts attaching your front drive shaft to the transfer
case output shaft using a 5/16" wrench. Carefully lower
it to the ground and then proceed to remove the 4 bolts attaching
the drive shaft to your front axle using the same wrench. Set
your front axle someplace out of the way. |
|
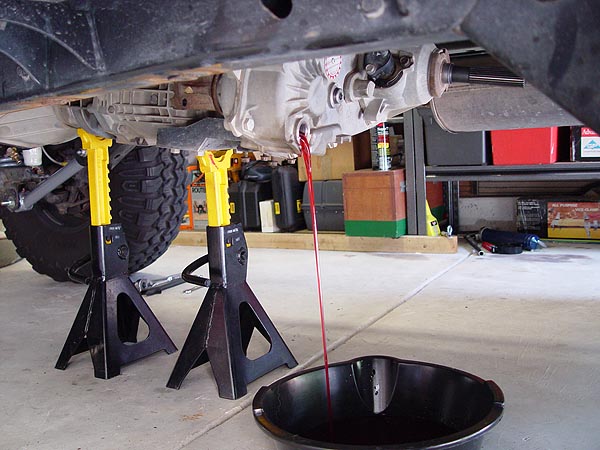
12. Place an oil catch pan under your transfer
case, loosen the upper fill bolt using a 10mm allen bit and
then remove the lower drain bolt using the same allen bit. Allow
as much of the fluid to drain as possible before continuing. |
|
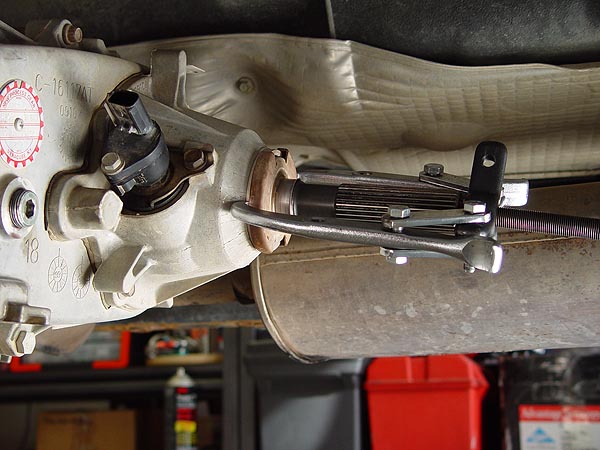
13.
For
some reason or another, some Jeep TJ's came with just a slinger
on the output shaft while others came with a dampener or harmonic
balancer. As you can see in the pic to the left, my NP231 came
with a slinger which required the use of a gear puller (borrowed
from Autozone) with a 5" reach to extract.
If your Jeep has a dampener instead, a gear puller will work
just fine and much in the same way too.
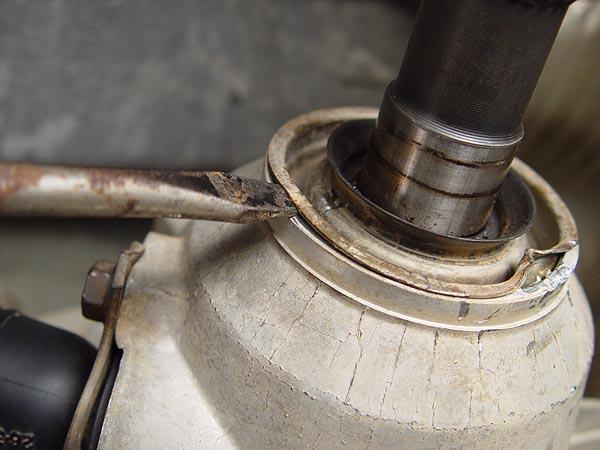
14. Remove the output shaft seal by tapping a flathead
screwdriver with a hammer all the way around the seal until
it comes off. |
 |
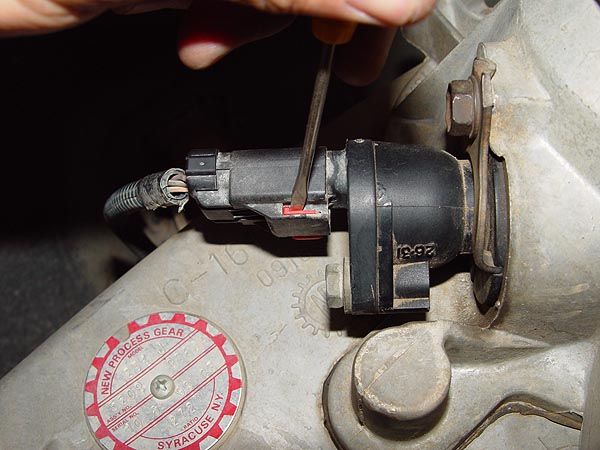
15. At this point, you will need to unplug
the speedometer wiring harness connected to your transfer case
Tail housing To do this, you will need to use a small screw
driver to slide out the red key locking the connector in place.
(See photo to the left)
16. Examine the position of your speedometer
gear housing in relationship to your Tail housing and make a
note of where it is indexed. Then, using a 1/2" socket,
remove the retaining bolt and metal clip securing your speedometer
gear housing to your Tail housing Firmly grab the speedometer
gear housing and carefully pull it out. |
 |
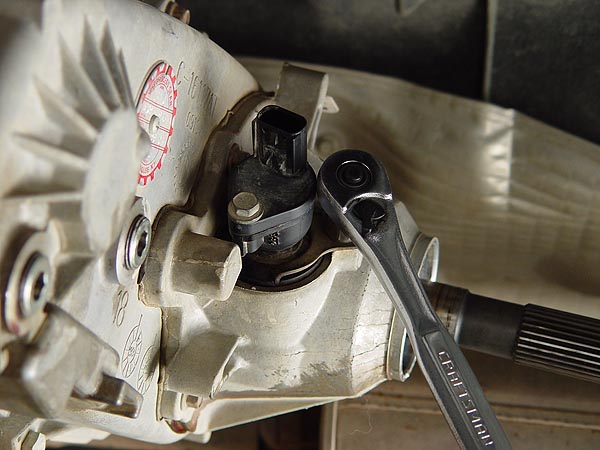
17. Back at the output shaft, remove the
inner and outer snap and lock rings using a pair of heavy duty
snap ring pliers and lock ring pliers. Trust me, the right tool
for the right job will make this a lot easier to do.
18. Now, remove all the bolts securing the
transfer case Tail housing using a 10mm socket.
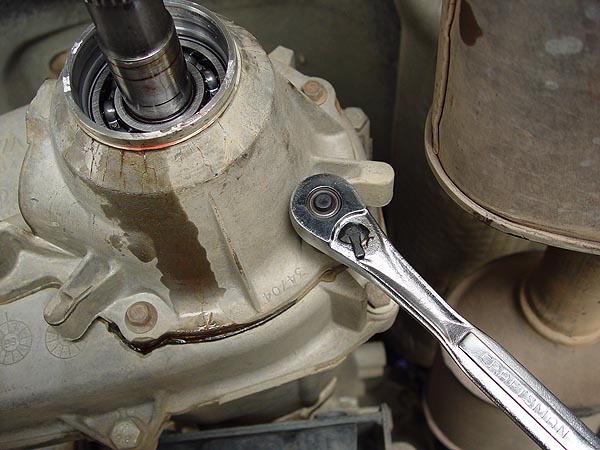
19. Using a rubber mallet, you should be able
to give the Tail housing a couple of good whacks to free it
from its bond to the rest of the transfer case.... or so I was
told. I ended up using a flat wood chisel and a hammer to separate
the two. Be aware, your transfer case is made of aluminum and
can be damaged easily. If you need to go this route, pay special
care not to damage the mating surface of the transfer case.
The tail housing will be replace with the new one provided by
the AA SYE kit so if anything, it is expendable. |
|
20. Moving back over to the front of your
transfer case, remove the front yoke nut using a 1-1/8"
socket. This nut is on very tightly and a breaker bar and a
large monkey wrench to hold the yoke will be needed to remove
it. Or, if you have an impact wrench, that'll do the trick too.
When you pull the yoke off, be sure to remove the rubber washer
that will be on threads of the shaft. |
|
|
|