
|
|
|
What
You will Need
•
Kenwood KDC-MP5028
CD/MP3 Receiver
• Chrysler/Dodge
Wiring
Harness Receiver 1984-Up
• Chrysler
Dash Mounting
Plate Kit 1974-Up
• Motorola
Antenna Cable 18"
Male-to-Female Extension
• 1
- Radio Shack 1/8"
Stereo Phone Jack - Part# 274-246
• 2
- Radio Shack 3' Shielded
RCA Audio Cables - Part# 42-2370A
• iRiver
H340
• Rosin Core Flux for Electronics
• Soldering Iron
• Electrical Tape
• 16 Gauge Wire
• Wire Cutters/Splicers
• Solderless Ring Connectors
• Solderless Connection Pliers
• 1/4" Drill Bit
• Drill Press or Hand Drill
• 1/2", 3/8" Socket & Wrench
• 10mm Socket
• Phillips & Flat Head Screw Drivers
• 3" Ratchet Extensions
• Ratchet
• Ratchet Extension
Where to Buy Your Parts
I bought my new Kenwood KDC-MP5028 CD/MP3 receiver head unit from
Crutchfield. Their price of $199 was about $20 more than other places
I had found but only Crutchfield offered all the extra parts I needed
and shipped everything to me for $199. When you do the math, this
was ultimately the better deal and they have a great return policy.
All the other parts to make my In-Dash Aux Input were purchased
at RadioShack. Total cost was just under $10.
Why Buy the Kenwood
KDC-MP5028?
I set a price range for myself of about $150-$200 but the new stereo
head unit had to play CD's, MP3's and it needed to have an auxiliary
input so that I could hook up an iPod, iRiver or other mp3 player
to it. I would have preferred a front aux input but the only two
I could find in my price range didn't perform as well as I would
have liked. Ultimately, I chose the Kenwood KDC-MP5028 because of
it's price first, performance second and the built in rear aux inputs
third. The rear aux inputs were a draw back but I knew I could figure
something out and need I say, I did.
 Why Buy an iRiver H340
and Not an Apple iPod?
Believe me, I was all set and ready to buy an iPod when my wife
showed me the iRiver H340. Much like the iPod, this mp3 player could
store up to 40 GB worth of music and photos but unlike the iPod,
the iRiver has a standard back lighted color display and it can
record from any audio source including line in voice recording....
and it can do all this for considerably less money than the iPod.
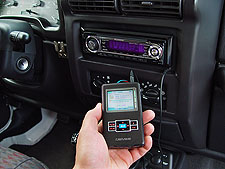
Post Installation Notes
Over all, I really love my new Kenwood KDC-MP5028. The controls
are a bit confusing to figure out at first but nothing a little
playing around can't figure out. Compared to the factory stereo,
there is absolutely no comparison in sound quality. I already had
Infinity Kappa speakers installed and this new stereo really makes
them shine.
As far as the dash mounted auxiliary input goes, I'm very pleased
with the results and glad that I did it. I think it looks very intentional
(as opposed to looking like a sorry after thought) and it is very
functional.
Please let me know if you have any questions.
|
|
|
|
Aftermarket
Jeep TJ Stereo Head Unit Installation
& Dash Mounted iPod or MP3 Auxiliary Input
Now that you've
got your nifty new iPod, iRiver or equivalent mp3 player, how do you
get it to play in your Jeep right? Well, if you have a factory stereo
with a tape deck, you can buy a cassette adapter that works pretty
well. Or, if you have a newer Jeep with a stereo that has a CD changer
input, you can buy an adapter/converter to use it as an auxiliary
input. But what if you don't have a cassette player or CD changer
input, what do you do then? Well, you can buy an FM transmitter but
trust me, you'll hate it. I bought one and the thing was such a total
pieces of junk, I returned it the very next day. In the end, I decided
that the best solution was to break down and get a new aftermarket
stereo head unit and one that had an auxiliary input built into it.
Through my research, I found two aftermarket stereo head units that
had auxiliary inputs on the front (Aiwa CDC-X504MP and JVC Arsenal
KD-AR560) but for the price, I decided that sound quality was more
important than convenience. Need I say, that's why I bought a Kenwood
KDC-MP5028. In a side by side comparison, this one delivered the goods
and it had a built in rear RCA aux input. After a quick trip to RadioShack
and $10 later, I had all the parts I needed to make my own in dash
aux input anyway.
Installation
| |
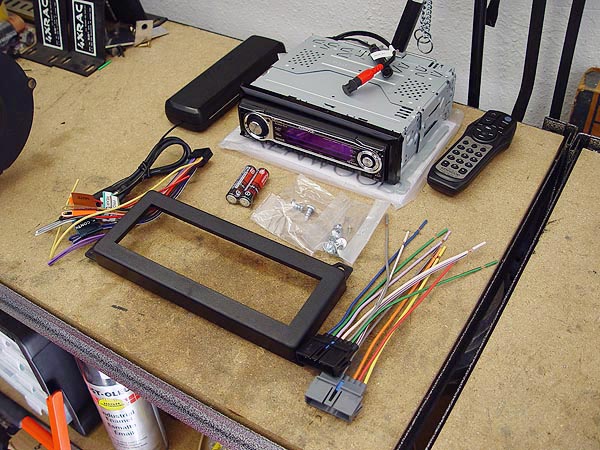
Here is a pic of all the parts you will
need to get in order to install an aftermarket stereo head
unit (like the Kenwood KDC-MP5028 I bought) on your Jeep.
If you plan on installing an auxiliary input directly on your
dash, you will need to get the additional parts listed to
the left. |

|
NOTE: If you do not plan
to install a dash mounted aux input, proceed to step #4.
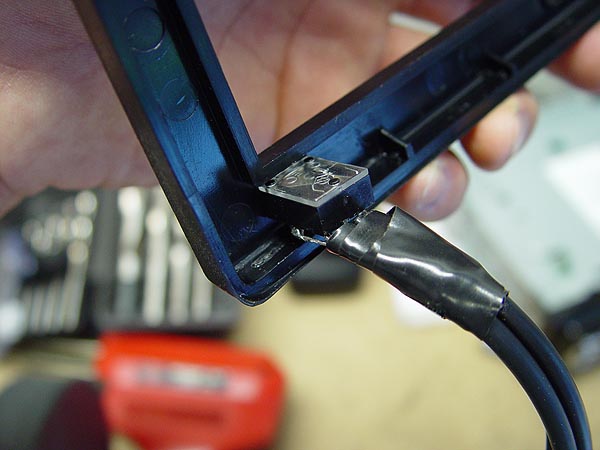
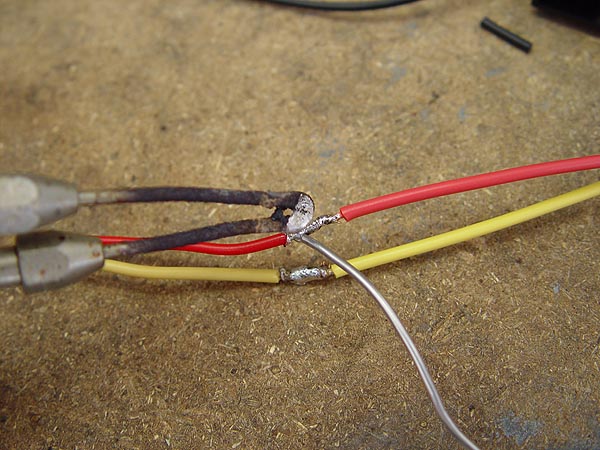
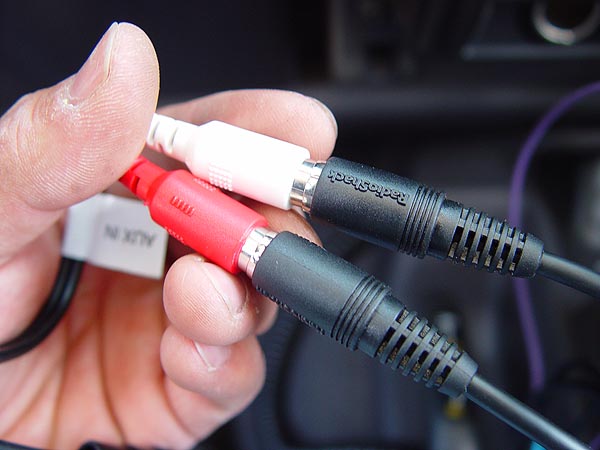
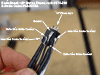
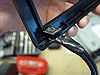
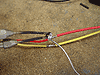
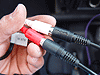
1. Starting with the construction of your new aux input,
solder your RadioShack RCA audio cables to your RadioShack 1/8"
panel mount phone jack. Each RCA audio cables will have an inner
and an outer wire that will need to be soldered as shown in
the pic the left. The last terminal at the top and next to the
phone jack input is for ground. This is necessary to use and
be sure to use at least a 16 Gauge wire for this. Also, make
sure that it's long enough to reach a grounding point on the
body of your Jeep TJ and apply a solderless ring connector to
the end of it. When done, be sure to wrap up the individual
wires with electrical tape.
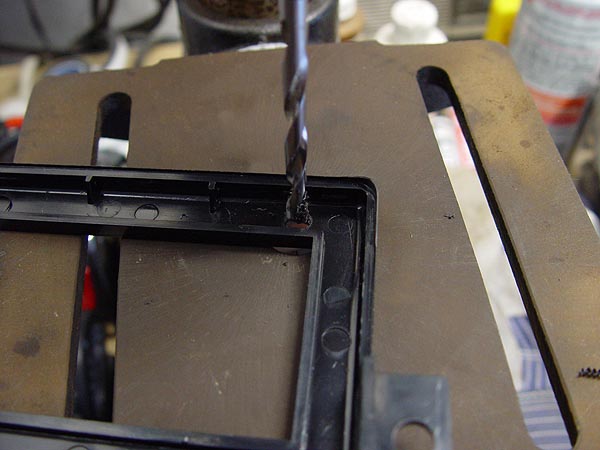
2. Using a 1/4" drill bit and preferably
a drill press, locate and drill a hole into your new Chrysler
dash mounting adapter plate. I decided to locate my hole on
the bottom right hand corner.
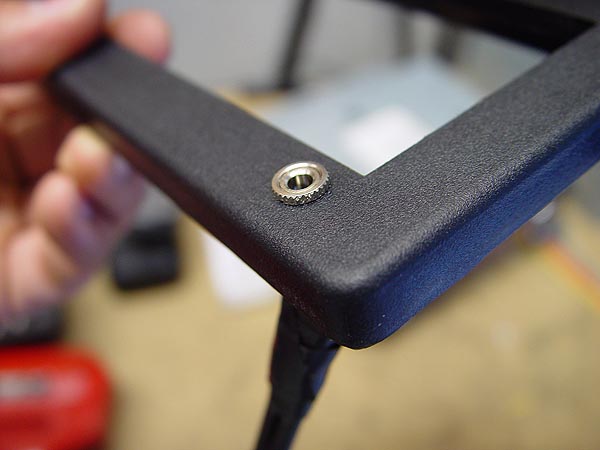
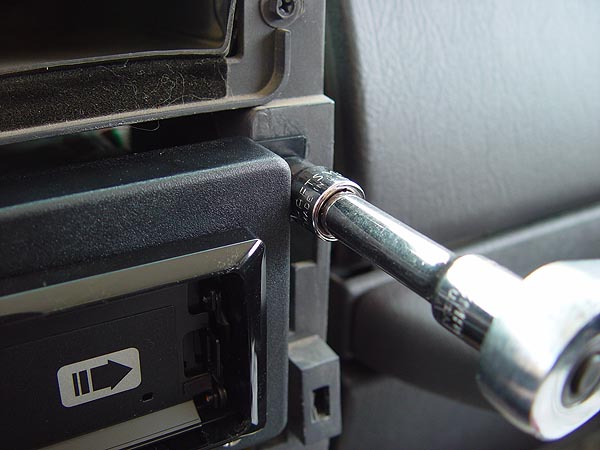
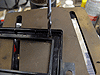
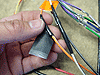
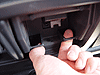
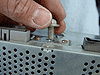
3. Now, remove the ring nut on the input
shaft of the 1/8" RadioShack phone jack mount, insert the
shaft through the hole you drilled on the Chrysler dash mounting
adapter plate and then secure it in place by threading the ring
nut back on as shown in the pic to the left. |
 |
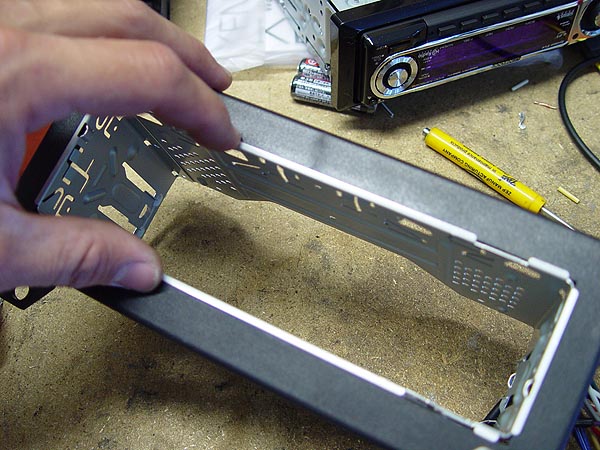
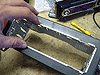
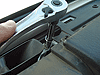
4. To begin the installation of your new
Kenwood stereo head unit, remove the the mounting sleeve from
the receiver and then slide it through the front of the Chrysler
dash mounting adapter plate as shown in the pic to the left.
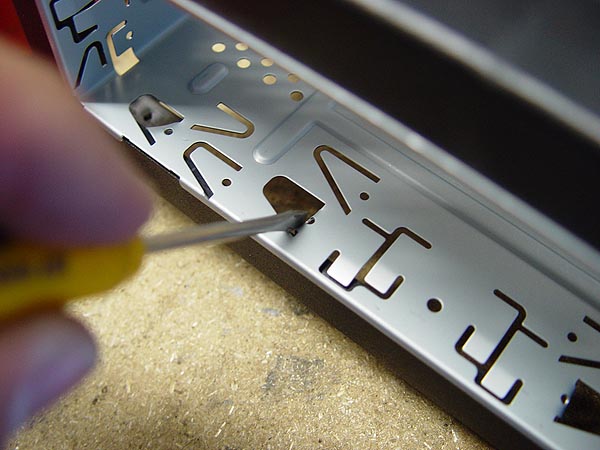
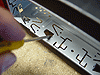
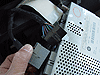
5. Once the mounting sleeve is in place, make
sure that the flanged edge is sitting flush on the adapter plate
and then secure it by bending the metal tabs down with a flat
head screw driver as shown in the pic to the left. Bend back
all the tabs that will help to hold the sleeve on the adapter
plate nice and tight. |
 |
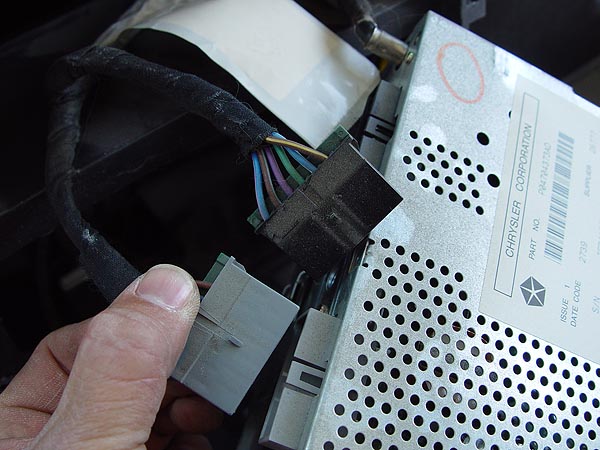
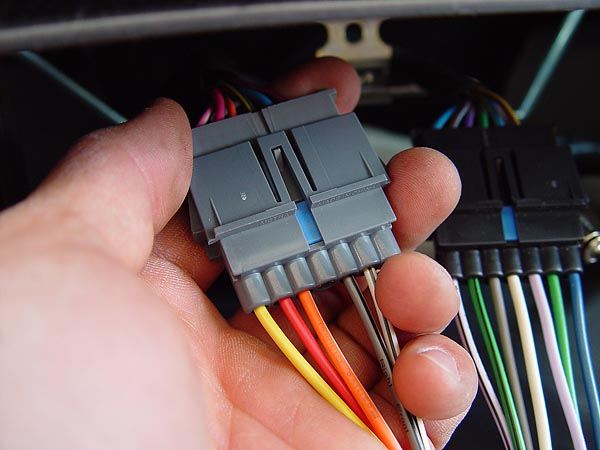
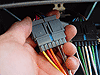
6. On to the wiring. Take the wiring harness
that comes with your new Kenwood stereo head unit and connect
each end to your new Chrysler wiring harness. The wires on each
end are color coded and labeled so this is really a no brainer.
You can use solderless connectors but I choose to solder the
wire ends to insure the best connection possible. There is a
ground wire that will not have a matching connection and I just
applied a solderless ring connector on it.
7. With all the wires soldered together, be sure to
wrap up them up with some electrical tape to prevent corrosion
and/or an electrical short. |
|
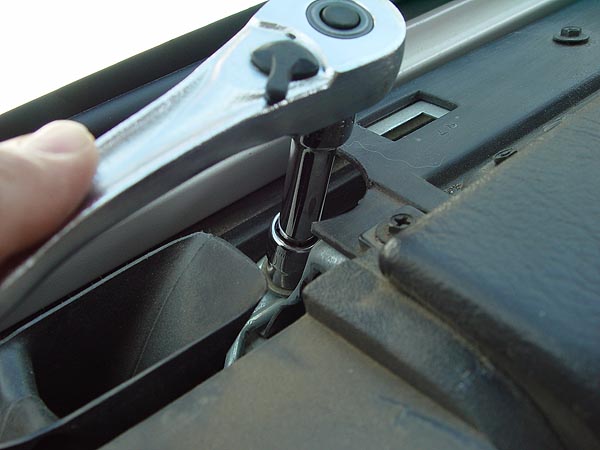
8. Time to start working on your Jeep. To
begin, pop open your hood and proceed to disconnect the negative
cable on your battery using a 1/2" wrench.
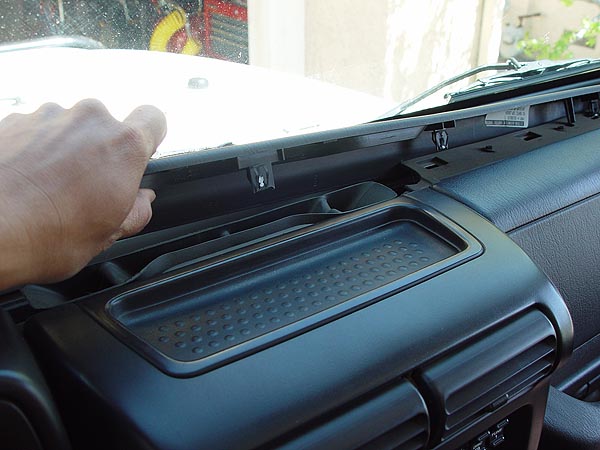
9 . Now, climb inside your Jeep and remove the dash
defroster vent/top trim panel by prying along the front edge
with a flat head screwdriver which will release the retaining
clips underneath. Be sure to pry carefully so that you don't
break anything.
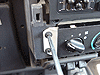
10. With
the dash defroster vent/top trim panel out of the way, remove
the 2 phillips screws that sit just behind the dash tray as
shown in the pic to the left.
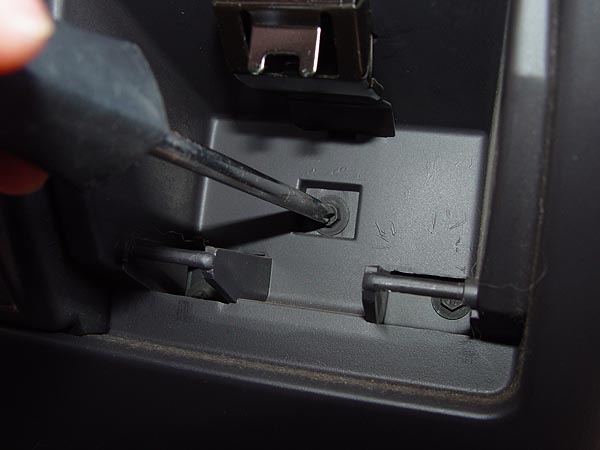
11. Remove the ash tray from the dash and then
remove the single phillips screw at the very back of the ash
tray cavity as shown in the pic to the left.
12. Okay, with all the screws removed, grab
the top of your dash and the loops inside your ash tray cavity
and carefully pull in a gentle rocking motion until it comes
loose. It may take a little effort to do but take your time
as you do not want to brake any of the plastic tabs or anything
else. |
|
13. Using a 3/8" socket, remove the
lower left hand corner bolt and upper right hand side bolt securing
your factory radio to your dash. There's actually one more bolt
in the back that needs to come out before you can remove your
factory radio but a few more things need to come first.
14. Using a phillips screwdriver, remove the 4 screws
securing your climate controls to your dash. Once the screws
are off, allow your climate controls to dangle from its wiring
harness so that you can gain access to the back of your factory
stereo.
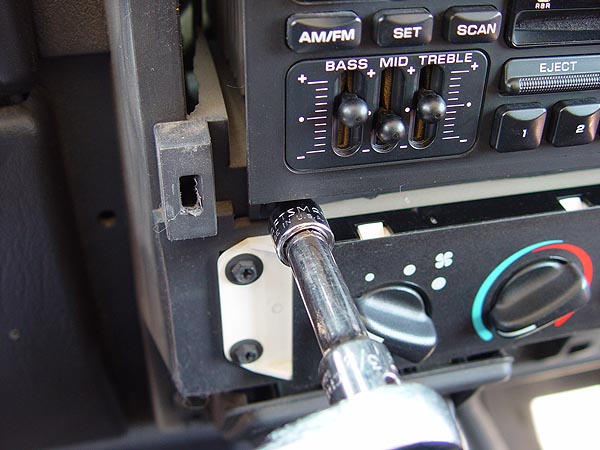
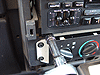
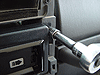
15. You can't see it but there is a bolt securing
the back of your factory stereo to a support bracket (see pic
to the left). Using a 3/8" wrench, reach up through the
climate control cavity, feel around for the bolt and the proceed
to remove it. There should also be a ground strap attached to
this point so be sure to set it aside once you remove the bolt.
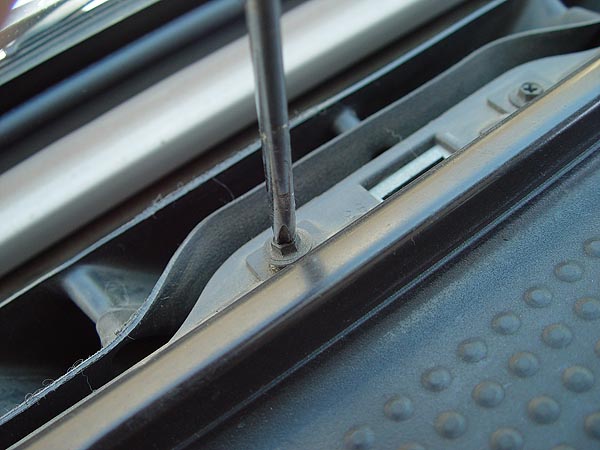
16. Now, look up on top of your dash where
your defroster duct is. On either side, there will be a bolt
securing the factory stereo support bracket to your Jeep's body.
Remove these bolts using a 10mm socket and then pull the support
bracket out. The factory wiring harness is routed through this
bracket so you may need to work them out of the way.
17. Pull your factory stereo out a bit, unplug
the wiring harnesses and antenna cable and then remove the stereo
completely from your Jeep. |
|
18.
Insert
your new Kenwood stereo head unit into the mounting sleeve/adapter
plate until it locks into place.
19. Connect your new antenna extension cable into your
new Kenwood stereo head unit and then connect the wiring harness
to the factory end still inside your Jeep's dash.
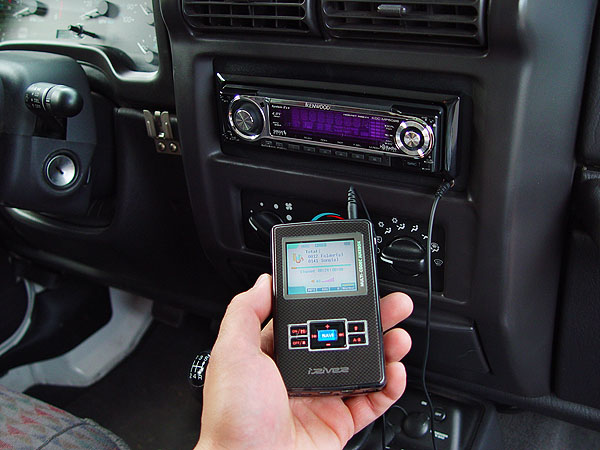
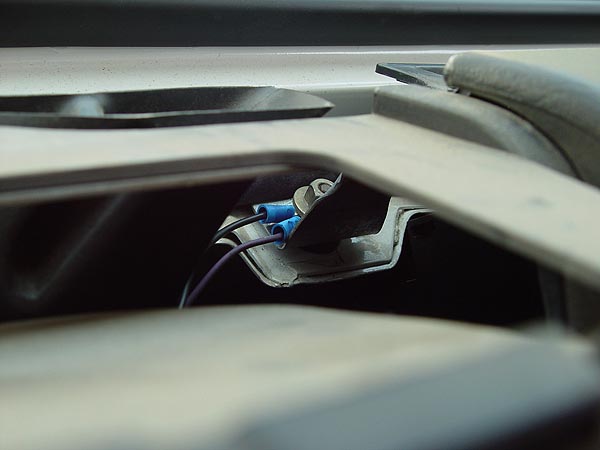
20. If you installed an in dash aux input or
if you are going to be hooking up a Y-Adapter, connect them
to your Kenwood stereo head unit's RCA aux inputs now.
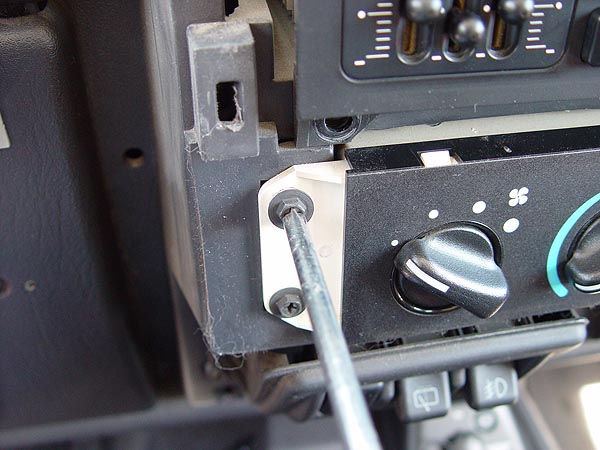
21. Set your new Kenwood stereo head unit into
your dash to give you a little more working length with your
wires and attach the stereo and aux input (if you are using
one) ground onto the threaded stud used to mount your factory
stereo support bracket. Also, attach the factory ground strap
(previously bolted to the back of the factory stereo) to the
opposite threaded stud. Secure both ground wires and strap using
the factory nuts. |
 |
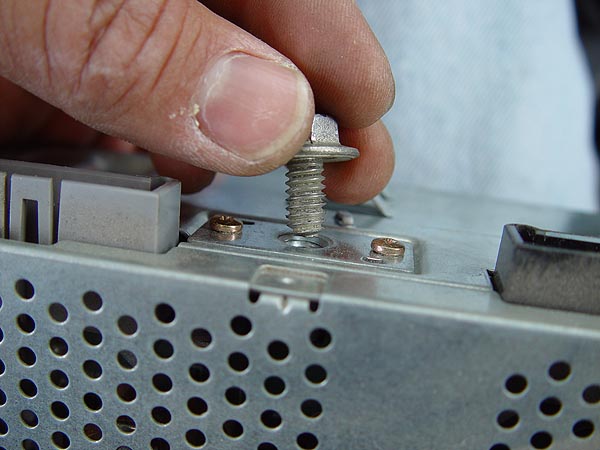
22. Secure your new Chrysler adapter plate
holding your Kenwood stereo head unit
and to your dash using the factory bolts. There is a stabilizing
tab on the upper left hand corner of the adapter plate that
may need to be removed.
23. If you have a back strap that came with
your stereo, install it at this time. My setup didn't have one
nor did it seem like it needed one. However, to prevent any
unwanted jiggling when off-roading, i installed a piece of foam
underneath the Kenwood stereo and the plastic shelf above the
climate controls. |
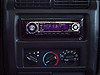 |
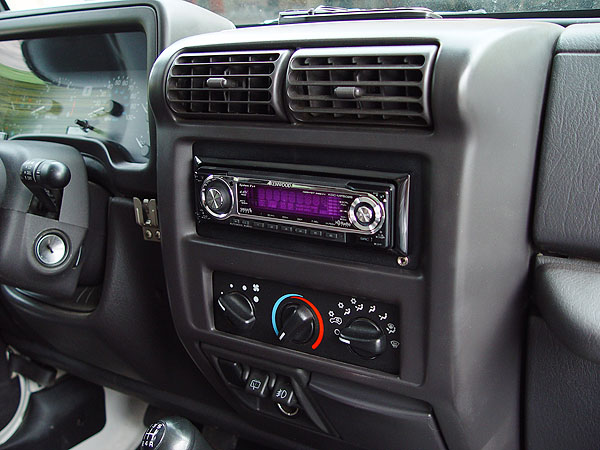
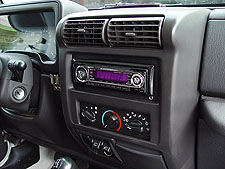
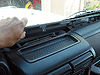
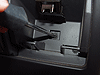
24. Here's a shot of what my new Kenwood
KDC-MP5028 stereo head unit looks like installed on my Jeep
TJ. If you look towards the bottom right hand corner of the
adapter plate, you will see my new auxiliary input. |
|
|
|