|
|
Rubicon
Express Jeep Hand Throttle
So,
you're climbing up a tricky section on a trail with big rocks, a bit
off camber and really steep just as your engine stalls on you. With
one foot on the clutch and the other standing on the brake for dear
life, what do you do? Well, anyone who's ever wheeled a Jeep with
a manual transmission knows exactly what I'm talking about. If only
you had a third foot right? Well, a hand throttle is cheap and easy
to install mod that is just that and more. Truly a must have for any
Jeeper with a manual transmission.
What
You Will Need
•
Rubicon Express Hand Throttle Kit - Part# RE1000
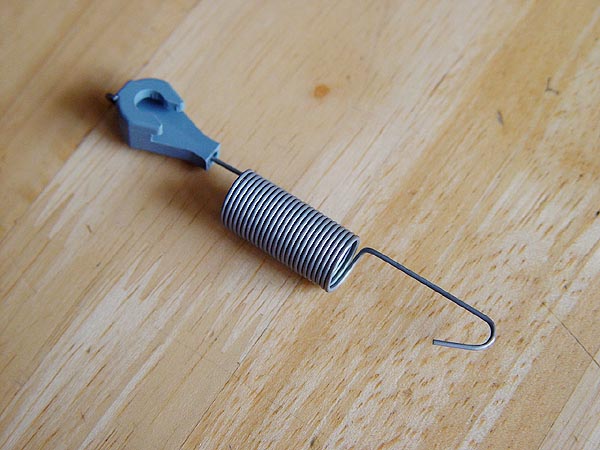
• Jeep/MOPAR Throttle Return Spring - Part# 52078102
• Basic Socket Wrench Set
• Pliers
• Wire Cutters
• Power Drill
• Drill Bits for Metal
• Center Punch
• Petroleum Jelly
Installation
1.
Before you start this installation, be sure to pick up the Mopar Throttle
Return Spring listed above from your dealer. This part should only
cost about $4.
2. Open your box and
check the contents of it. I have found that a few of these kits have
come with differing specific parts but you should have everything
you need to make this work. Anyway, look for the "L" shaped
bracket, a regular bolt and nut to fit and a hollow center thumb screw.
The thumb screw is where your throttle cable will be routed through
in your engine compartment and it should come pre-assembled.
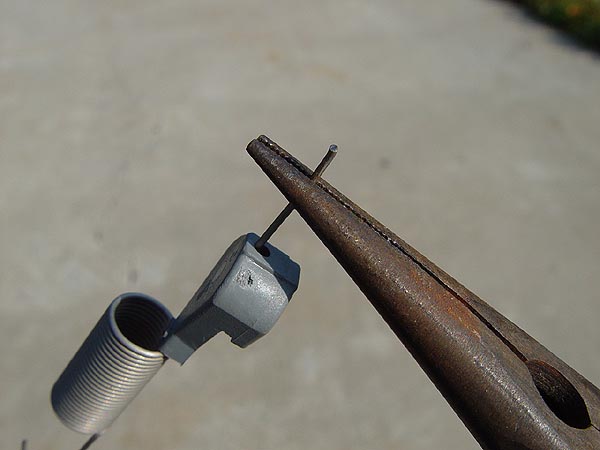
3. Remove one nut on
the hollow thumb screw. Make sure that the remaining nut is close
to the head of the screw and then slip it through one of the holes
on the "L" shaped bracket so that the head is on the inside
of the "L". Fasten the screw to the bracket using the nut
that you removed earlier. In the end, the screw should be attached
to the "L" shaped bracket with the two nuts sandwiching
it.
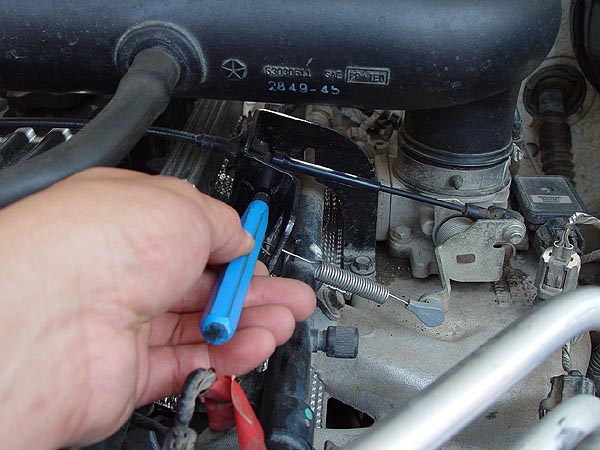
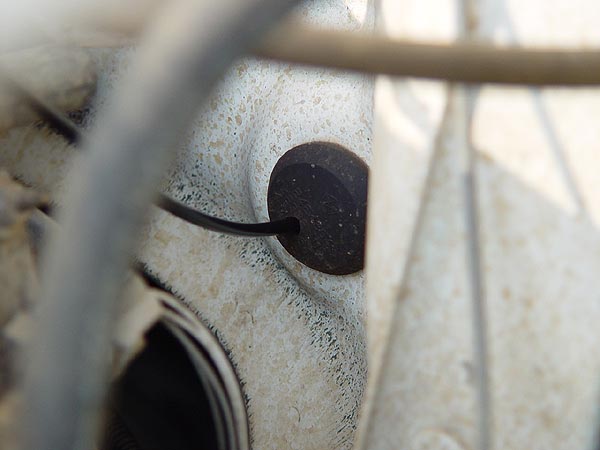
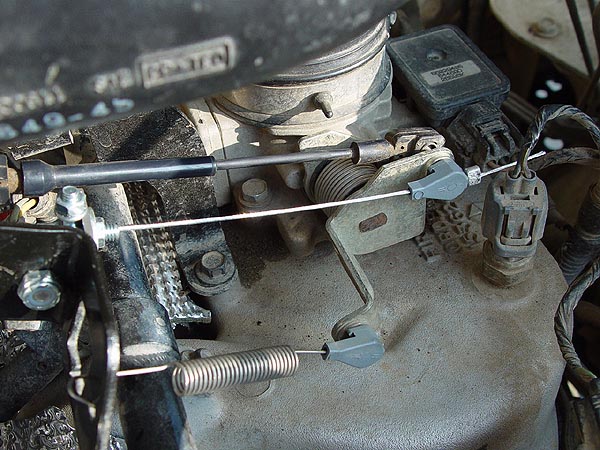
4. Open up your hood
and look for the black bracket just in front of your air intake tube
where your throttle return spring is attached to. If you examine this
bracket closely, you will see your throttle cable passing through
the far end it and a square hole next to it (if you do not have cruise
control like me that is). Using your assembled pieces, locate, center
punch and carefully drill a hole into the engine bracket as show in
the pic to the right.
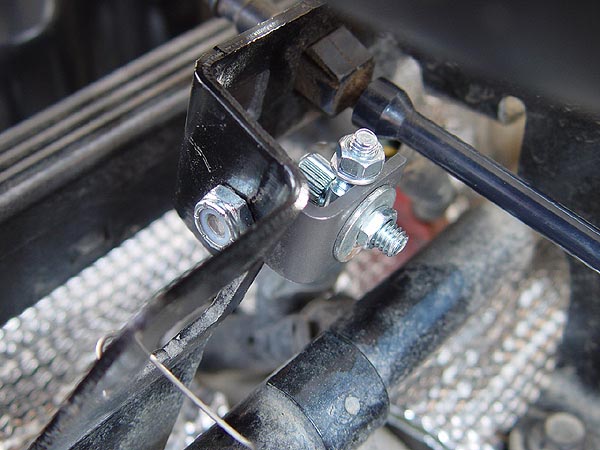
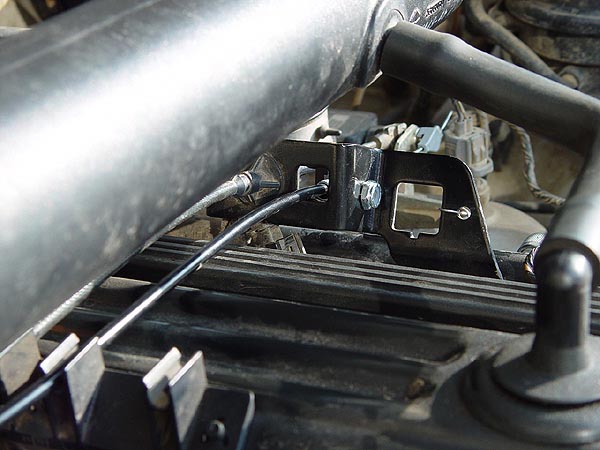
5. Mount your assembled
pieces to the engine bracket as shown in the pic to the left.
6. Okay, now to the
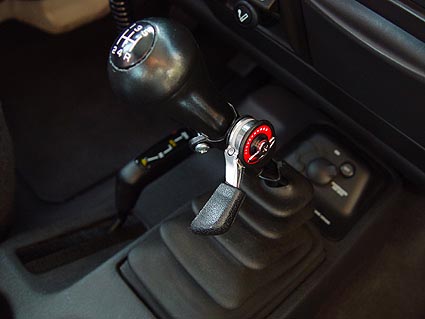
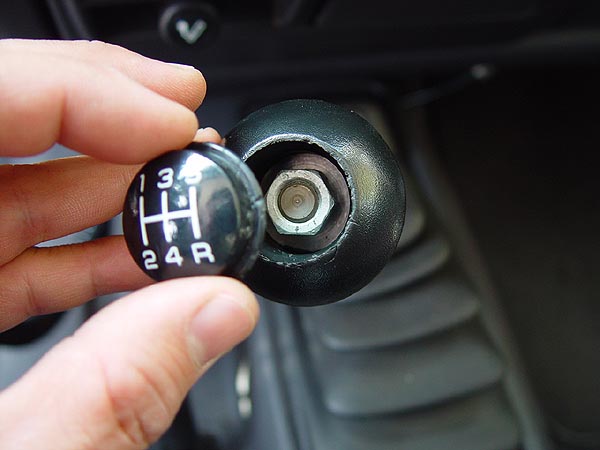
inside of your Jeep. With
a very small flat-head screwdriver, pry off the cap to your shifter.
This will reveal the nut holding the knob on the lever. Once you remove
this nut, the knob can be screwed off.
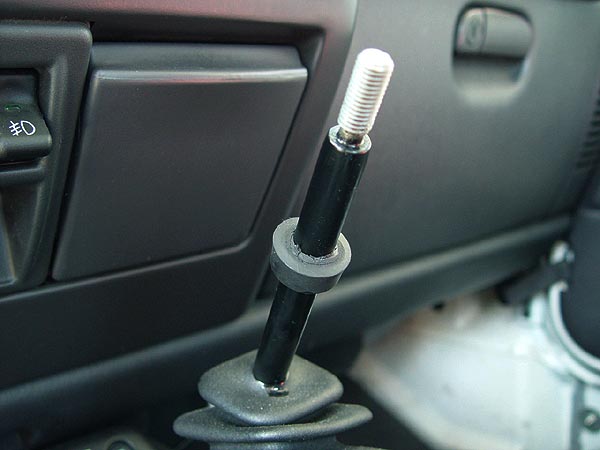
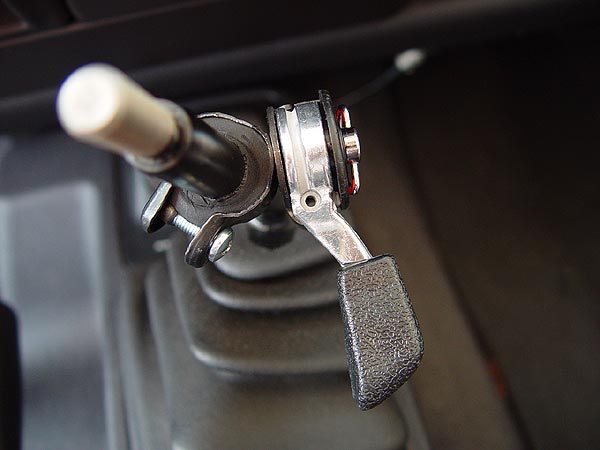
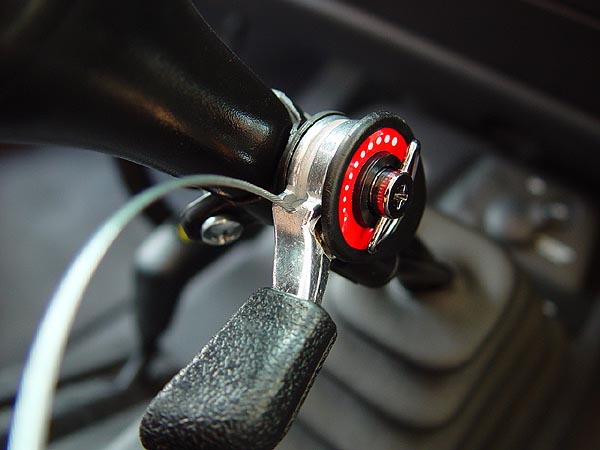
7. Supplied
with this kit is a small rubber grommet You will need to ream this
bugger onto your stick, locating it just at the bottom of your shifter
knob. This will require some effort but to not trim the inside of
the grommet as it is meant to sit on tightly. If necessary, I found
that a little Petroleum jelly helps to slide this on. Attach
the bike shifter to the rubber grommet with the lever on the passenger
side of your shifter lever.
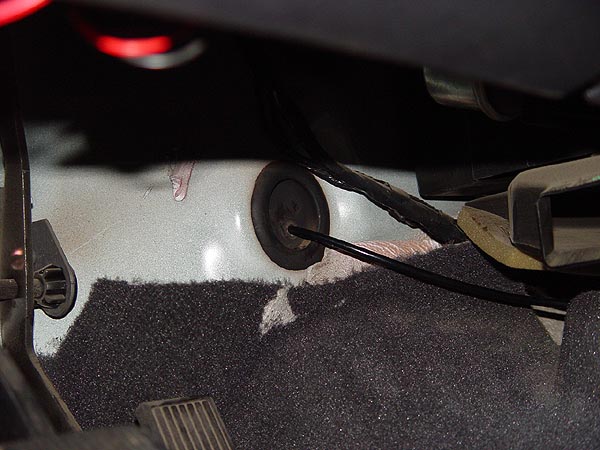
8. Underneath
the driver side dash, you will see a large round rubber grommet attached
to your firewall. Drill a small hole here and feed the black rigid
cable into your engine compartment. Try to make sure that the hole
you drill is a hair smaller than the black cable to insure a tight
fit. If the hole is too big, you will risk water coming into the cab.
9. Take
the opposite end of the black rigid cable and route it through your
center consol and up the rubber shifter boot along side your shifter
lever. Insert
the end of this cable to the bottom of your bike shifter.
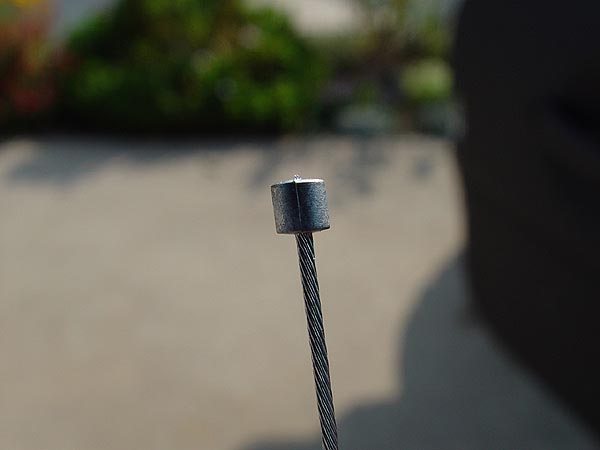
10. You
will notice that steel bike cable supplied with this kit has two different
ends to it. On one end, the cable enters the lead cylinder from the
flat bottom side as shown above in the pic to the right (this is the
end you need to keep). The other end enters the lead cylinder on the
curved side and this is the end you need to cut. Make sure you get
this right or else you're screwed.
11. Carefully insert the cut end of the steel
cable through the top of the small hole in the bike shifter as shown
in the pic to the left. Continue to feed the steel cable all the way
through the black rigid cable to the very end. You should notice that
the lead cylinder you kept will fit nicely into a counter sunk hole
in the bike shifter.
12. Underneath your
hood again, take the black cable and route it in a way that follows
your throttle cable. Use the snap mount on your valve cover which
was intended for your cruise control cable to hold the black cable
in place.
13. Carefully feed the
steel cable protruding from the black rigid cable through the hollow
screw you had assembled onto the "L" shaped bracket earlier.
Shove the end of the black rigid cable into the head of the hollow
screw.
14. Now, grab
the return spring you picked up from the dealer. Using a pair of pliers,
straighten out the hooked end of it and remove the gray plastic piece
from it.
15. If you look at your
throttle lever, you should see a round connection on the side facing
you (opposite side of the throttle cable connection). This is where
your cruise control would have been hooked up to. Snap on the gray
plastic piece to this connection and feed the remaining steel cable
through it.
16. Make sure your transmission
shifter lever is in neutral and the bike shifter in the off position.
Slide the supplied crimp on to the steel cable so that it touches
the gray plastic piece you attached to your throttle lever.
17. Lightly pull the
steel cable taught but not so much that you cause anything to shift
or move and then fasten the crimp to the cable.
18. Trim the excess
steel cable but be sure to leave a little extra behind... just in
case.
19. Climb into your
Jeep, make sure no one is in front of you, your parking brake is on
and that you're in neutral. Turn on your engine, leave your transmission
in neutral, put your foot on the brake and test out your new hand
throttle by slowly pulling up on the lever. Make adjustments as necessary.
That should be it. You now have that third foot to save your ass on
the trail. A hand throttle is also great to use when negotiating rough
terrain that would otherwise cause your foot to bounce around on the
gas pedal. Let me know if you have any questions. |
|
|