|
|
Aussie
Locker by Torq Masters
Dana 30 Front Axle
Just
about everyone and their mother knows that a Jeep TJ, right out of
the box is one of the most capable (if not the very best) off road
vehicle on the planet. Now, what if I told you that you could take
a stock Jeep, throw about $250 (shipped to your door) at it and make
it perform a hell of a lot better on the trail... would you be interested?
Well, with an Aussie Locker by Torq Masters installed in your front
Dana 30 axle, a hell of a lot better is exactly what you will get.
The Aussie Locker is strong, amazingly quite, easy to install and
will take you places you never dreamed your Jeep could go.
What
You Need
•
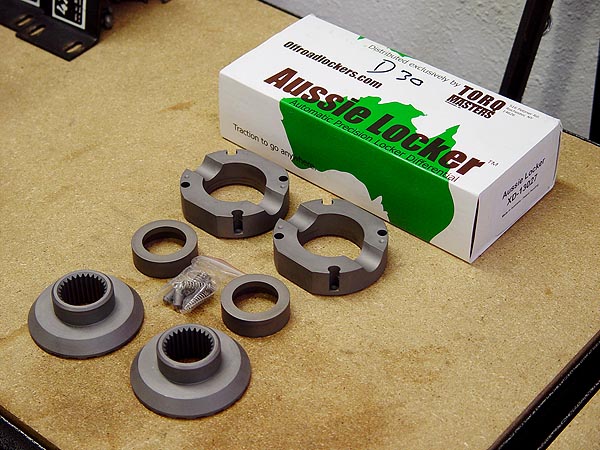
Aussie Locker - Part#XD-13027
• 2 - Bottles of 85W-140 Gear Oil
• Axle Grease
• 1/2" (12 Point), 5/8" and 11/16" Sockets
• Ratchet
• Torque Wrench
• Breaker Bar
• Standard and 3 lb. Hammer
• Flat Chisel
• Pry Bar
• 3/16" Punch
• Bench Vice
• Vice-Grips
• Floor Jack
• Jack Stands
• Wheel Chocks
• Zip Ties
• PB Blaster
• Oil Drain Pan
• Gasket Scraper
• Hi-Temp RTV
• 1 Gallon Milk Jug
• Brake cleaner (spray can)
• Hand pump or funnel (for refilling diff when done)
Installation
1. Open your Aussie
Locker box and verify that you have all the parts indicated on the
parts list. Also make sure that you have all the supplies listed above
before you start anything. Then, park your Jeep on a level surface,
engage your parking brake, chock your wheels, crack loose your lug
nuts (but do not remove at this time), jack up your front axle one
side at a time and then rest it on jack stands so that your tires
are clear of the ground.
2. Remove your front wheels and place
them underneath your frame rails for added protection should your
Jeep fall off the jack stands.
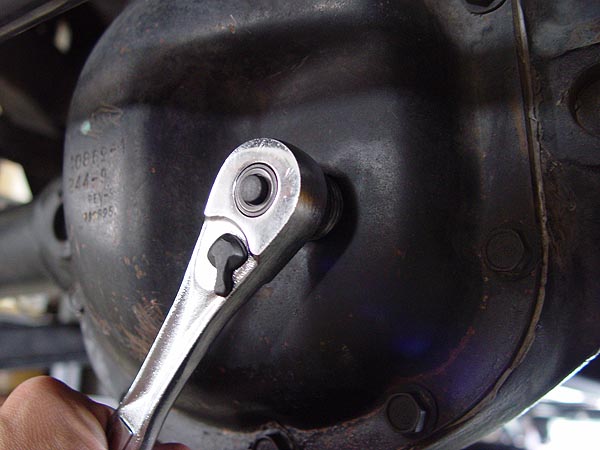
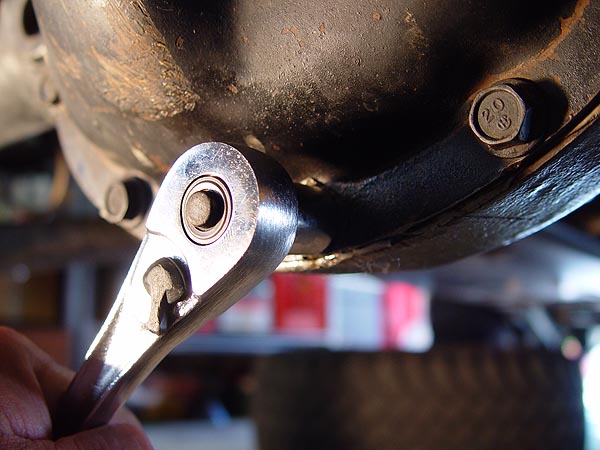
3. Place an oil catch
pan underneath your differential and then remove the fill bolt on
the differential cover using the
square drive head of a 3/8" ratchet.
Next, remove all but one (top one - just leave loose) of the bolts
securing your differential cover using a 1/2" socket. You may have trouble getting to a couple of the bolts due to the track bar right in front of it. Don’t remove the track bar! Put your jack on the frame and raise it an inch or two (remember, your jack stands stay under the axle)
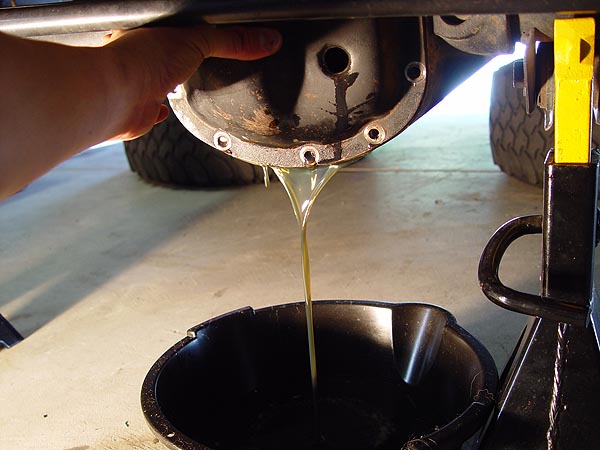
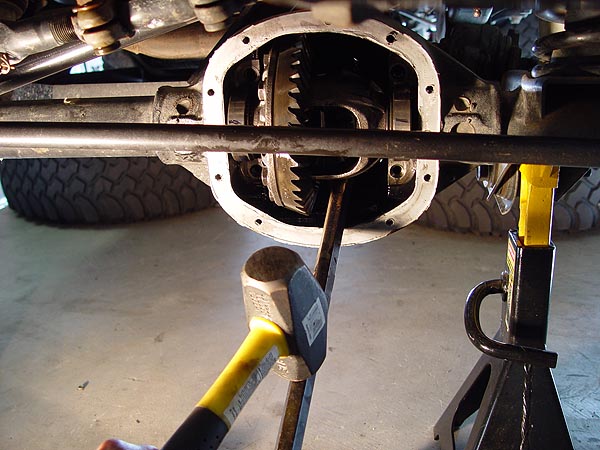
4. Place a flat chisel
between the differential and cover and then carefully tap it with
a hammer until the cover separates just a bit. This may take quite a bit of “tapping”. Position the chisel in different places around the diff and tap it until is breaks loose. Then, Slowly pry open the
cover and let your gear oil drain into the catch pan. Remove the last
bolt on top and set your differential cover aside for now.
5. Thoroughly clean
out the internal components of your differential using brake cleaner
and a clean rag or paper towels. Pour your gear oil into a 1-Gallon
Milk Jug and be sure to take it to your local auto parts store for
recycling.
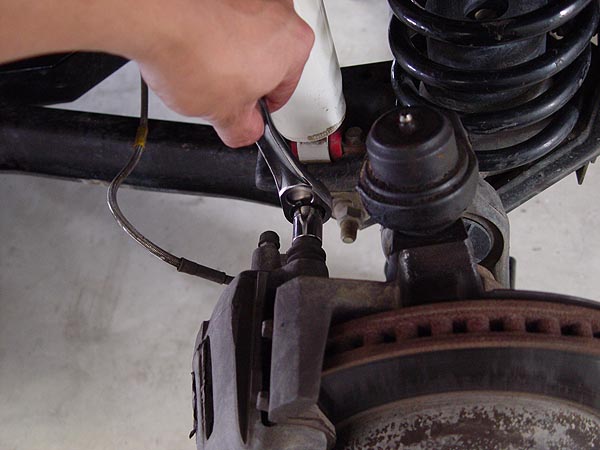
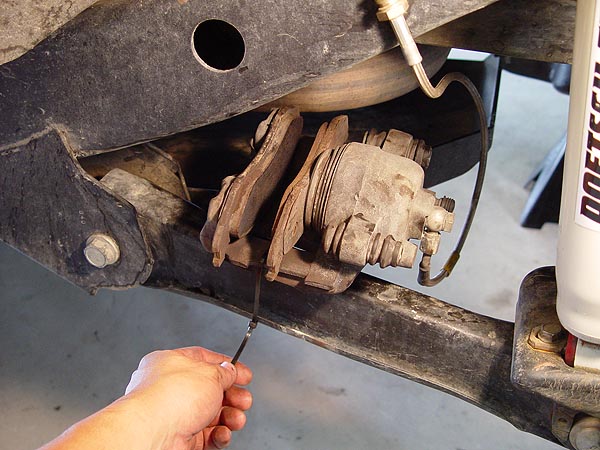
6. Remove the 2 bolts
securing your disc brake calipers using a 1/2" socket. Then,
pull off the entire caliper and zip tie it on top of your control
arm so that it doesn't fall.
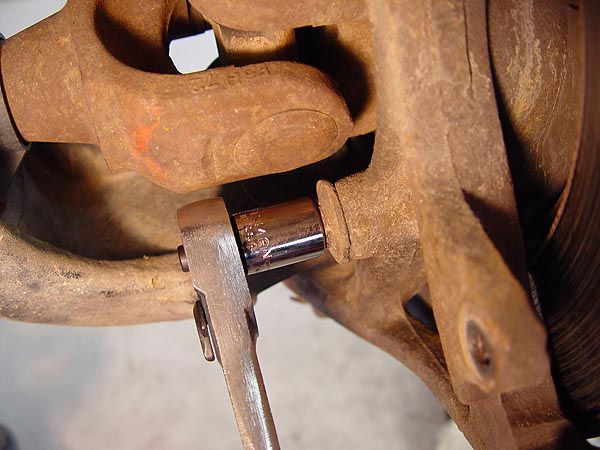
7. Now, if you look
at the back of the spindle, you should see a total of 3 bolts (1 up
front and 2 behind) that have a 12 pointed head. Remove these bolts
using a 12 point 1/2" socket. Some PB Blaster and a breaker bar
may be required to do this.
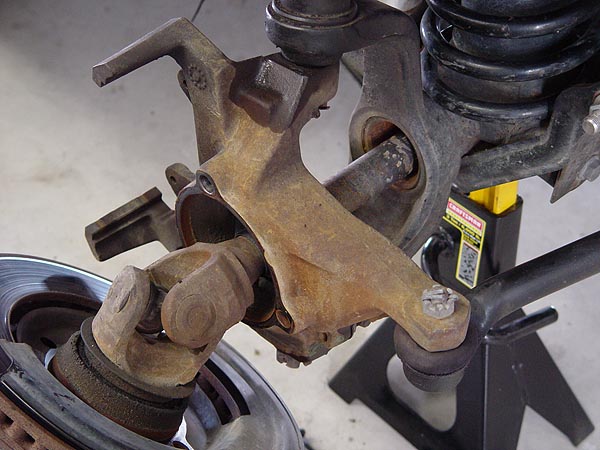
8. Carefully pull your
axles out about 6". You do not need to completely remove them
for this installation.
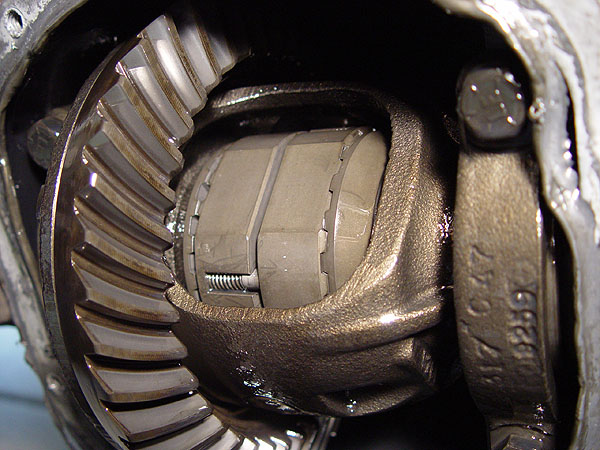
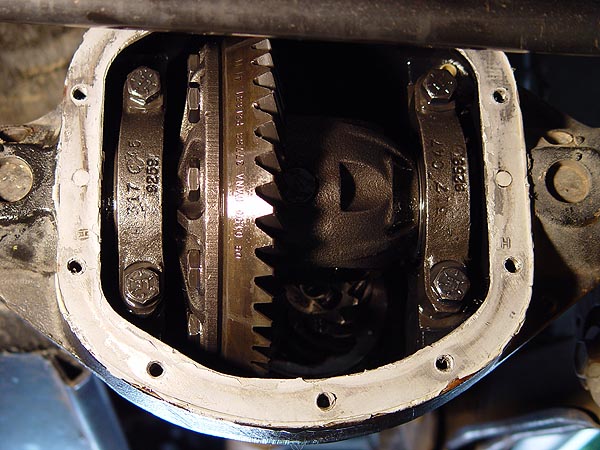
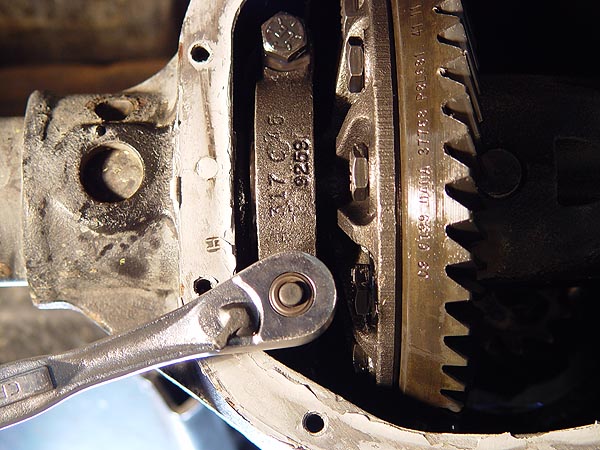
9. Okay, back to your
differential. Remove the four bearing caps securing your carrier in the
differential using a 5/8" socket. Please pay attention and make
note as to where each of the bearing caps goes and in what orientation
they need to be in.
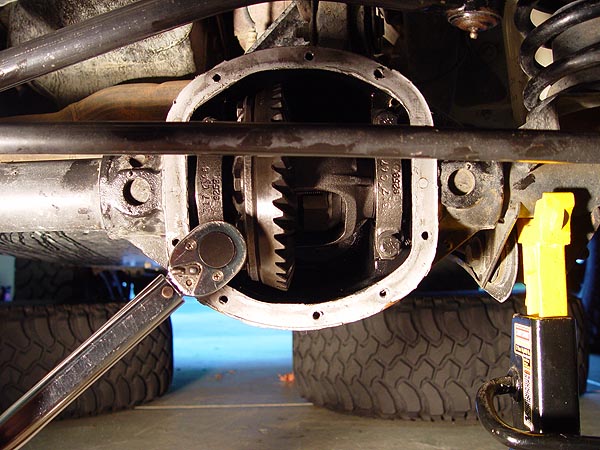
10. Using the differential housing as leverage, place
a pry bar between it and the carrier inside and then carefully tap
it loose using a 3 lb. hammer. You just want it out enough that you
can remove it by hand and not let it drop to the ground. Be ready to catch it! Some times the carrier is ready to fall out with minimal prying.
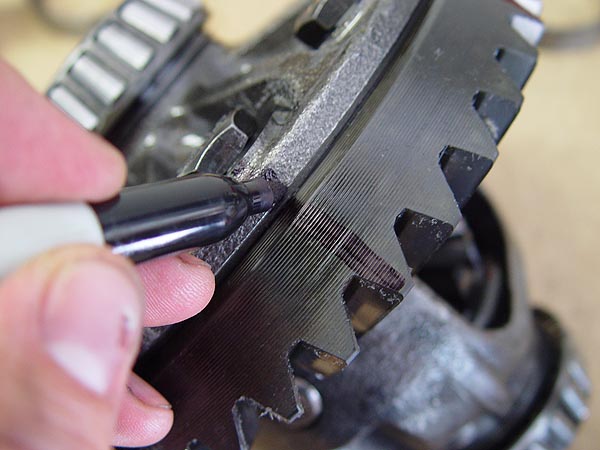
11. Clean up your carrier the best you can of gear
oil using brake cleaner and a clean rag or paper towels. Put a plastic sandwich over the bearings at each end of the carrier to keep dirt out (use a rubber band to hold the baggie over the bearing). Place the
carrier on a clean work bench and mark it and the ring gear so that
you know where to put things back. Note - be gentle when you put the carrier in the vice. You don’t want to scratch the carrier housing.
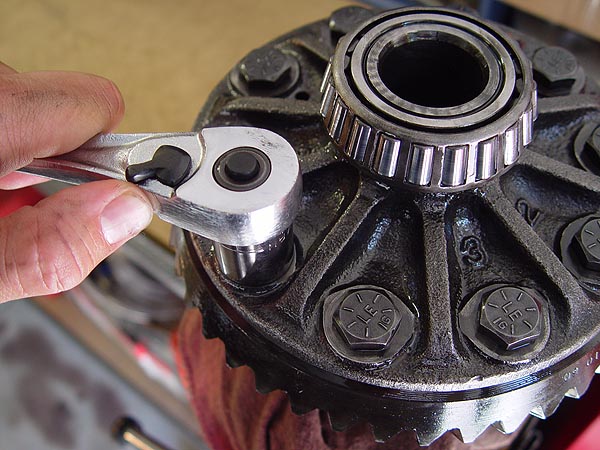
12. Place the carrier into a bench vice with the
ring gear bolts facing up and proceed to remove these bolts using
an 11/16" socket. Remove the carrier from the bench vice and
remove the ring gear from it. Some effort may be required but you
should be able to do this by hand. If it doesn’t want to come out with hand pressure, use a rubber mallet (but do not hit the gear teeth!).
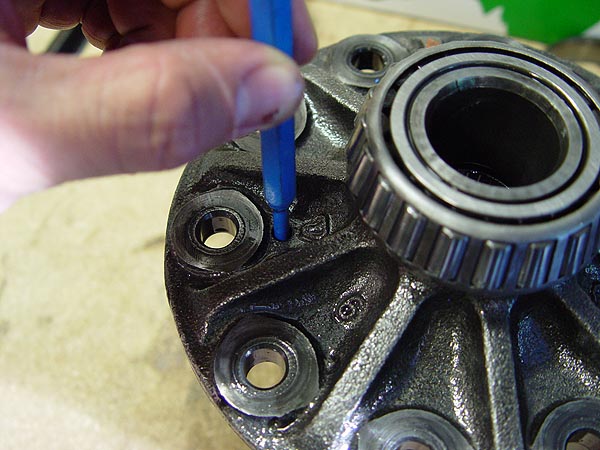
13. Set your carrier back on your work bench with
the larger disc end up. If you look carefully, you should see a small
hole that has a rolling pin inside securing the pinion shaft in place.
Take hammer and a 3/16" punch and tap out this pin.
14. With the rolling pin out, you should be able
to remove the pinion shaft and subsequent spider gears with ease.
If the pinion shaft sticks, a couple of light taps of a hammer and
punch should knock it free.
15. The pinion shaft and thrust washers will need
to be reused so be sure to clean them up and check them for wear or
damage. Set aside all the other spider gears, you will not be needing
them.
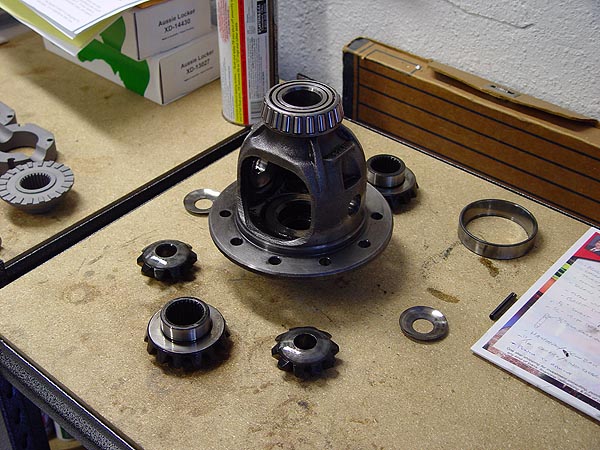
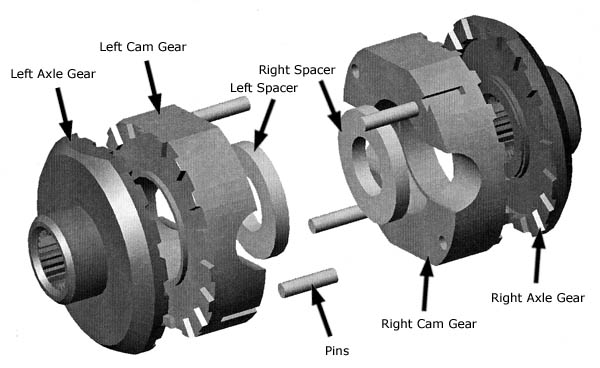
16. Gather up all the Aussie Locker components, the
pinion shaft and thrust washers and apply axle grease to them. The
grease will help to keep everything together like glue as you assemble
them together and into your carrier.
NOTE: Please refer to the diagram above before continuing
so that you have an understanding of what is what.
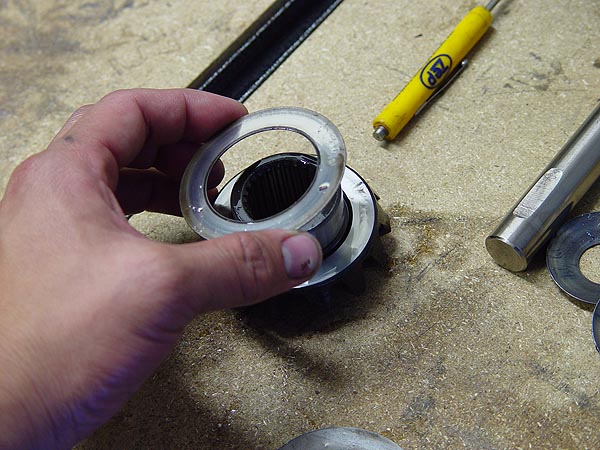
17. With all your components greased, slip a thrust
washer onto each of the Aussie Locker axle gear and insert them into
the appropriate location of your carrier. Driver side thrust washer
on the driver side and passenger side on the passenger side.
18. Now, if you look at your Aussie Locker cam gears,
you should see 4 holes on the smooth side of each. 2 will be shallow
and fully enclosed and the other 2 will be deep and partially open
on the side of the gear. Insert a pin (with the stepped end facing
into the holes) into each of the deeper and partially open holes on
both cam gears. Once in, the pins should sit relatively flush to the
surface of the cam gear.
19. Insert the Aussie Locker spacers into each of
the cam gears (make sure that the flat sides will be facing each other
once assembled) and then install them onto the axle gears (teeth to
teeth) one at a time inside your carrier.
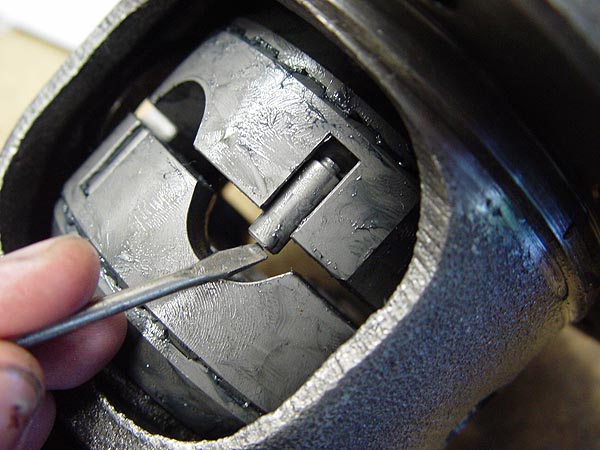
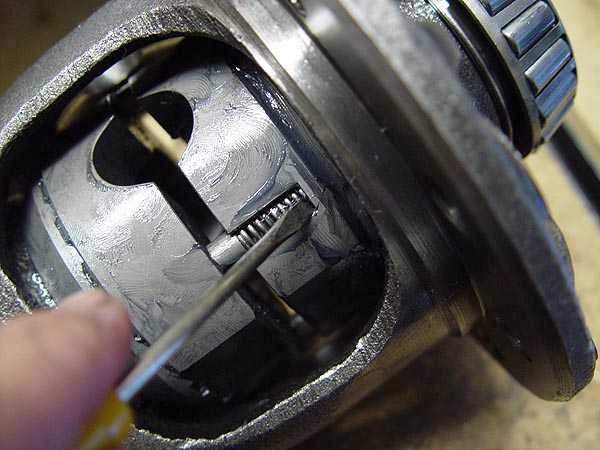
20. Once inside your carrier, rotate the Aussie Locker
components so that the pinion shaft hole lines up. Then, slip the
pins you installed earlier down into the holes on the opposite side
cam gear. Using a small screwdriver, install a spring onto each of
the pins as shown in the pic to the left. The step on the top of the
pin and the recessed hole on the cam gear will hold the springs securely
in place.
21. Slide your pinion shaft back through the carrier
and Aussie Locker and secure it into place with the rolling pin you
removed earlier.
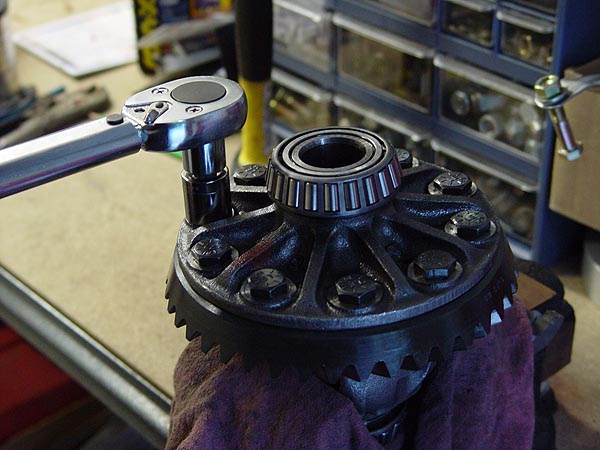
22. Reinstall your ring gear onto the carrier being
mindful that the marks you drew on it earlier line up. Then, place
your carrier back into your bench vice and reinstall the ring gear
bolts in a star pattern. Torque these bolts to 80 ft. lbs., again
in a star pattern.
23. Clean up your carrier and Aussie Locker one last
time using brake cleaner making sure it is free of debris or metal
pieces, remove the plastic baggies from the bearings and then carefully reinstall it back into your differential
housing. Make sure your bearing caps go back on the way they came
out and torque the bolts to 45 ft. lbs.
24. Carefully slide your axle shafts back in, bolt
them into place and then torque the 3 bolts down to 75 ft. lbs. Just
to make sure everything has been installed correctly, go to one side
of your axle and rotate your hub by hand. You should see that the
opposite side is now rotating too.
25. Cut the zip ties holding your disc brake calipers,
reinstall them and torque the caliper bolts to 11 ft. lbs.
26. Back to your differential, cover up your carrier
and newly installed Aussie Locker with some paper towels and then
proceed to thoroughly clean the RTV off your differential housing
and cover using a gasket scraper. Do a good job here or else you will
end up doing it again.
27. Once cleaned, remove the paper towels out of
your differential, clean up any gasket debris and then prep the mating
surface of it and the cover by spraying and then wiping them down
thoroughly with brake or carb cleaner.
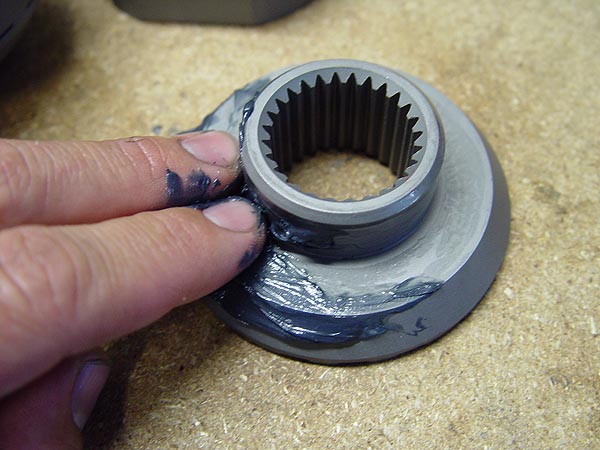
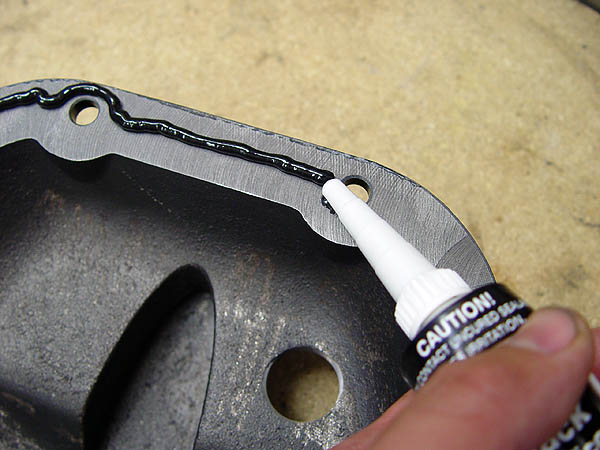
28.
Apply a continuous 1/4" bead of RTV along the mating surface
of the differential cover as shown in the diagram to the right and
then, carefully place it onto your differential making sure not to
move it around too much. Fasten the bolts in a criss cross pattern
to 30 ft. lbs. of torque. It is very important that you do NOT over
torque your bolts and installation of the cover should be done within
a 5 minute after applying the RTV.
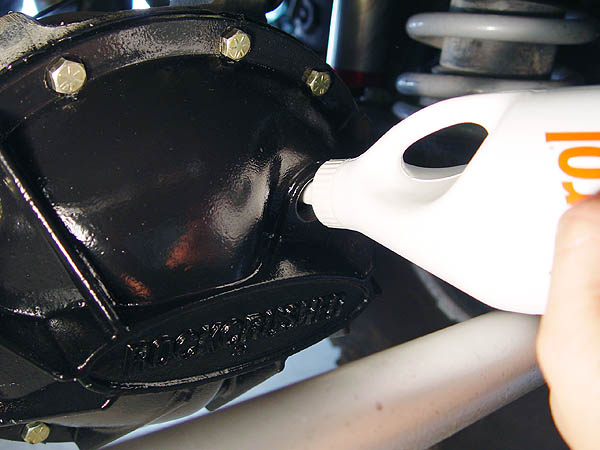
29. Now, fill up your
differential with the appropriate gear oil recommended for your axle.
I have a Dana44 rear end with a Trac-Loc which requires a special
friction modifier to work properly. Most synthetic gear oils like
Valvoline make already have it mixed in. Using a cheap bottle pump
($2 at PepBoys) will make it a lot easier to do this task. Keep filling
your differential until gear oil starts to ooze out of the fill hole
and then re-install the fill bolt to 25 ft. lbs. of torque.
30. Reinstall your wheels, jack up one side of your
jeep and remove one jack stand so that one wheel is still up in the
air. Go to this wheel and rotate it by hand. If you installed everything
correctly, it should rotate freely. Do not be alarmed if you here
a ratcheting or clicking while the tire rotates. This is normal for
an autolocker and will be virtually transparent on the road. This clicking may be louder the first couple times you turn the wheel, as the oil has not covered everything yet.
31. Remove your last jack stand, torque your lug
nuts to 95 ft. lbs., remove your wheel chocks and then take your Jeep
out for a spin.
That should be it! You are now locked up and ready to take trails
you would have never dreamed of and on your own power. Don't forget
to take your gear oil into your local auto parts store be recycled
and not dump it in the trash or worse. Please let me know if you have
any questions.
Special Thanks
I'd like to give special thanks to Cliff for providing great additions to this write-up which ultimately have made it more complete.
Post
Installation Notes
11/15/04
I've now had my Aussie Locker in my front axle for about 1,000 miles
now and can tell you this. As far a auto lockers go, these are by
far one of the most quiet ones I've seen. Inside my Jeep, they are
virtually invisible and can only really be noticed when making a hard
U-turn. I will be sure to post an update once I've had a real chance
to test it out on the trail.
02/26/05
I've finally had a chance to really test out my new Aussie Lockers
on the trail in Death Valley and in Anza Borrego and all I can say
is WOW!! While this locker is virtually invisible on pavement, it
has made my Jeep virtually unstoppable on the trail. My Jeep pretty
much walks all over obsticals that would have required some effort
in the past and has made it possible for me to take on ones that i
couldn't have climbed over in the past. If you are in the market for
an auto locker, I would highly recommend getting an Aussie Locker!!
|
|
|