
AIR SUSPENSION SYSTEMS |
|
|
|
|
Jeep
TJ
Air Lift Suspension
After
installing my used 3" coils, I noticed that the rear end of my
Jeep sagged quite a bit with the added weight of my hard top, Kilby
gas tank skid and roof rack. Once I loaded up with gear and family,
I could pretty much kiss my lift goodbye. To top it off, I'm currently
in the market for a swing-away tire carrier/bumper and can't imagine
how that's gonna help things out. What to do right? Well, my first
thought was to get a set of new 4" coils for the rear to compensate
for all the extra weight but in the end, I was afraid that they too
would just not be enough. So, I did some research, talked to a few
people and decided that maybe what I needed was an Air Lift Suspension.
Unfortunately, I have never seen this done on a TJ before but couldn't
see any reason why it wouldn't work. My local 4WheelParts
shop told me that a company call Air
Lift no doubt makes a kit for TJ's and that they sell
for only $79. Because I technically have a 4" lift (3" coils/1"spacers),
I decided to contact Air Lift directly to make sure they sold a kit
that would fit my needs. Well, the guys there were very helpful and
they told me that the kit I needed has air bags that measured 5.38"
wide X 6.50" tall. I just needed to make sure that the inside
diameter of my aftermarket coils were at least 5.38" wide. Any
less and the bags would be at risk of damage and/or pre-mature failure.
This was not a problem for me so I went ahead and bought the kit.
Although Air Lift sells kits that come with neat air compressors and
onboard controls, I decided to save my cash and just get the basic
kit with the standard valve stem you can fill up with any tire pump.
This is not a difficult mod but it is time consuming. I would allow
for about 3 hours from start to finish.
What
You Will Need
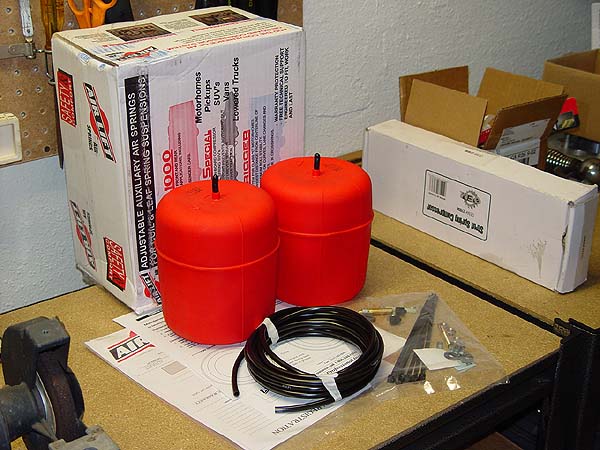
•
Air
Lift 1000 - Part#60734 (5.38"wide X 6.50" tall)*
• Metric (13,15,17,18,19mm & 3/4") Socket & Wrench
Set
• Ratchet
• Torque Wrench
• Ratchet Extension
• Hand Drill
• 1/2" & 5/16" Metal Drilling Bit
• Dremel w/Grinding Bit
• Pliers
• Safety Glasses
• Floor Jack
• Jack Stands (2 minimum)
• Wheel Chocks
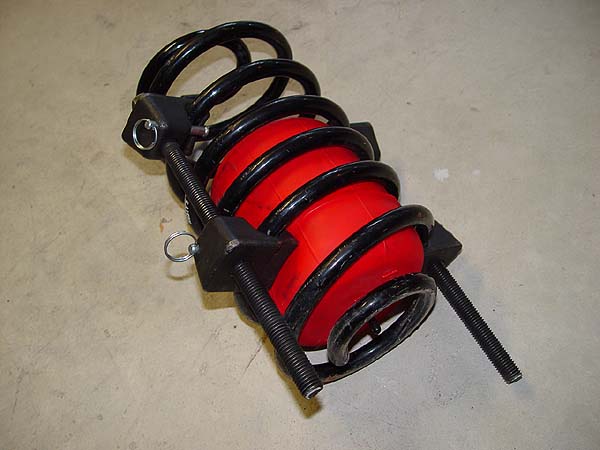
• Spring Compressors
• Center Punch
• Hammer
• White Lithium Grease
• Zip Ties
• Air Pump
• Tire Pressure Regulator
* Part# may be different for your application. Please consult the vendor you are purchasing your kit from or contact AirLift directly to verify what you need.
Installation
1. Park on level ground, chock
your front wheels, crack loose the lug nuts on your rear wheels and
jack up the rear end of your Jeep from the differential.
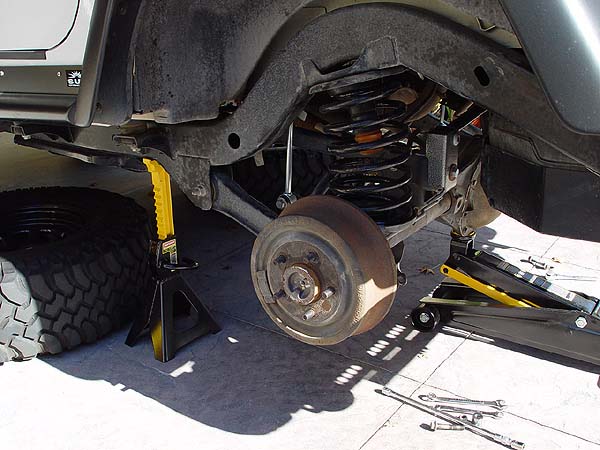
2. Place
floor jacks underneath the frame rails just in front of the lower
control arms, remove your wheels and place them in front of your jack
stands. Lower the jack until your Jeep is resting on the jack stands
but leave the jack under your differential for now.
3. Remove your rear shocks, disconnect your rear swaybar
links and unbolt your rear track bar at the frame. It may help to
lower or raise your axle a bit to make the removal of your swaybar
links and trackbar. If you're axle is at the correct height, the removal
of these parts should be quite easy.
4. Now, lower your jack
completely down slowly making sure too much strain is not be placed
on your brake lines.
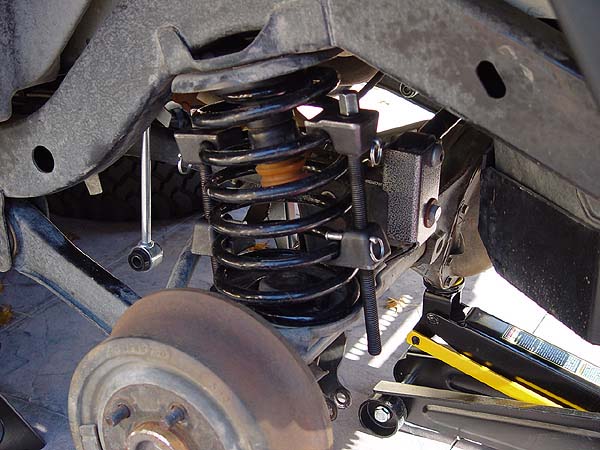
5. Place your jack underneath
the passenger side of the axle and raise it so that your spring is
compressed. Then attach your coil compressors to the coil and make
sure they are on snug and that the safety pins are engaged. Springs
are very dangerous to handle when compressed so be sure to wear safety
glasses during this procedure.
6. Slowly lower your
axle back down to the ground. Your spring should just about fall out
at this point but if it doesn't, you can encourage it out by pushing
down on the axle with your foot while pulling. If that still doesn't
free it, crank down each compressor a bit using a 3/4" wrench
until it does. Make sure you crank each compressor down evenly.
7. Carefully set your
coil down, clean your spring perch off of dirt and if you have a bumpstop
extension from a previous lift, you will need to remove it at this
time and return your bumpstop to it's factory height. Measure the
distance between the bottom of your bumpstop and the spring perch.
It should be somewhere close to 6" if you have a 3.5"-4"
coil lift. If it is not, you may have to trim off some of your bumpstop
with a hacksaw.
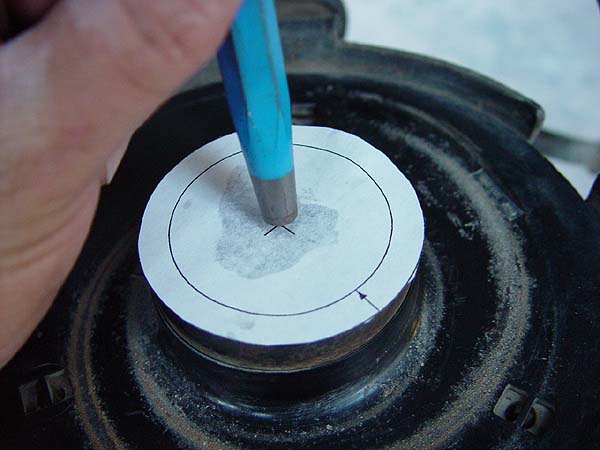
8. Cut out the circle
template provided with the kit, smear a dab of grease on the bottom
of it and then place it on the center of your spring perch. Now, tap
the center of the template with a center punch and then remove the
template.
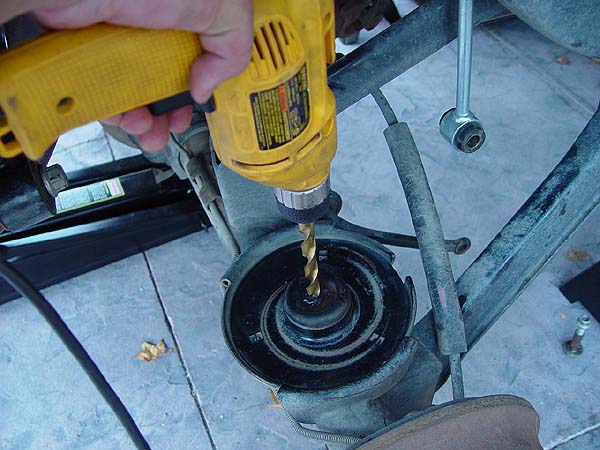
9. Drill a hole through
the center of your spring perch using a 1/2" cobalt or titanium
drill bit. The instructions call for a 3/4" drill bit but the
largest metal drilling bit I could find was 1/2". Fortunately,
the diameter of the air bag hose is only about 5/16" and 1/2"
seemed to be more than adequate.
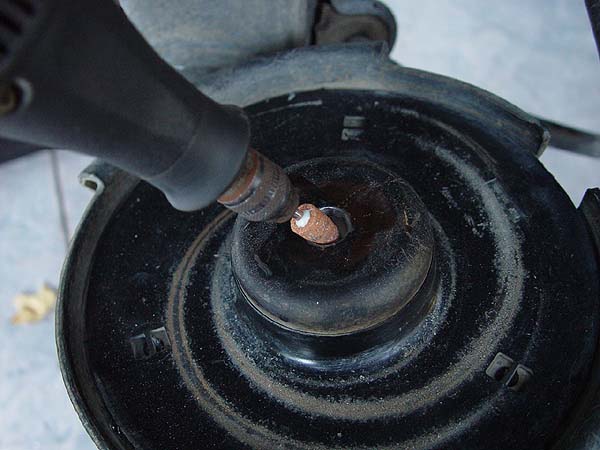
10. Using a Dremel with
a grinding bit, clean up all the edges of any sharp metal or burrs
around the hole you just drilled. Be sure to clean the bottom side
of the hole underneath the spring perch too.
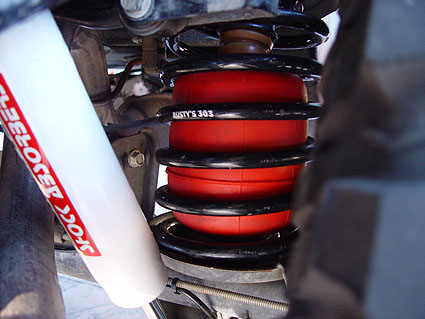
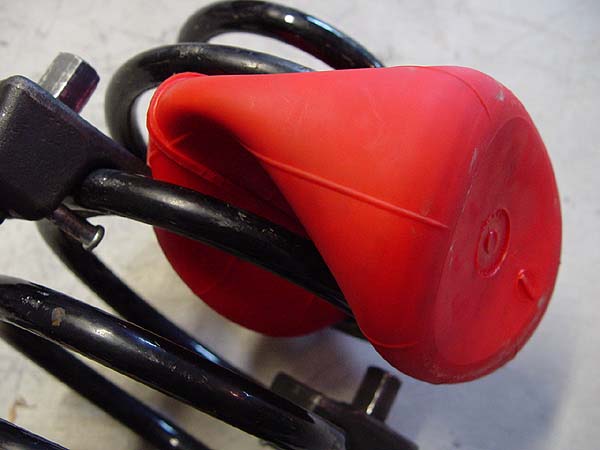
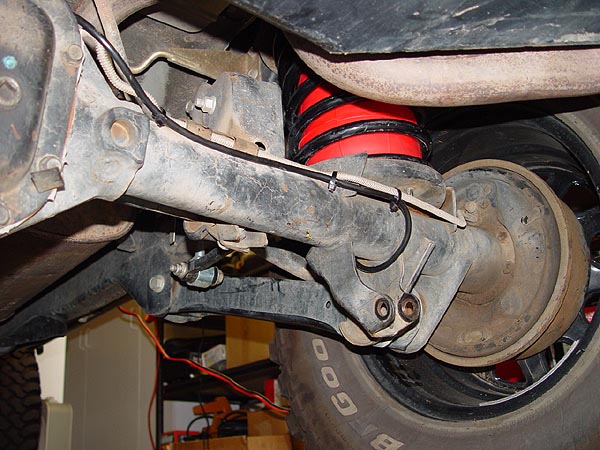
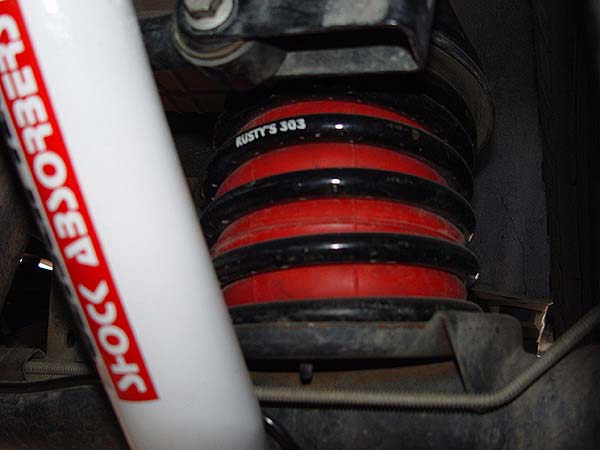
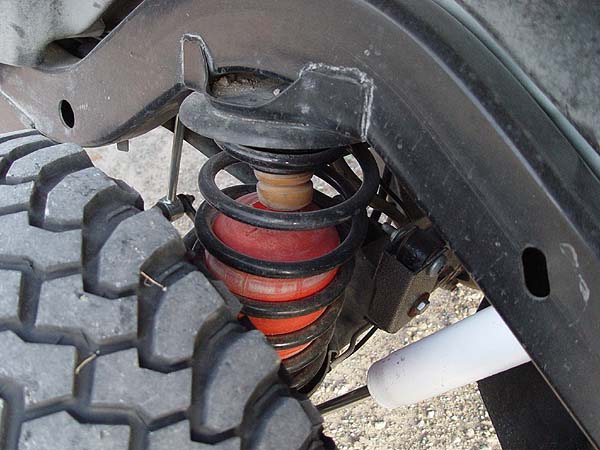
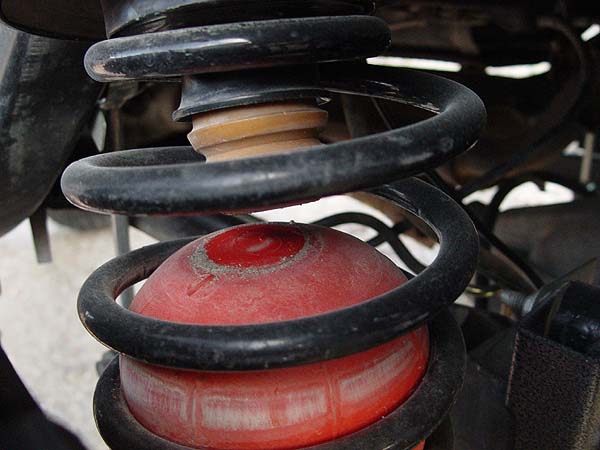
11. Grab an air bag,
pull the black plug off the inflation nipple, deflate it as much as
you can and then put the plug back on. Take notice which way is up
on your spring and then shove the deflated air bag through the coils
as shown in the pic to the right. Make sure the inflation nipple is
pointing towards the bottom of the spring. Once in far enough, pull
the black plug off, let the air bag re-inflate and then center it
within the spring.
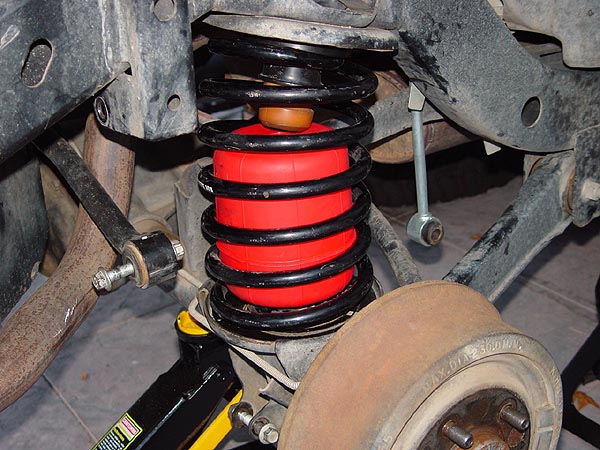
12. Carefully re-install
your spring making sure the inflation nipple is still pointing down.
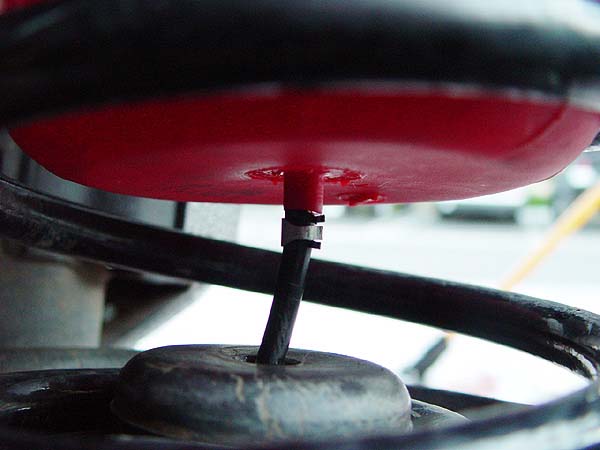
13. Using a pair of
pliers, attach a hose clamp on to the end of the air hose provided
with the kit and then feed it through the hole you drilled in the
spring perch from the bottom up. Do not cut the air hose for any reason
at this time.
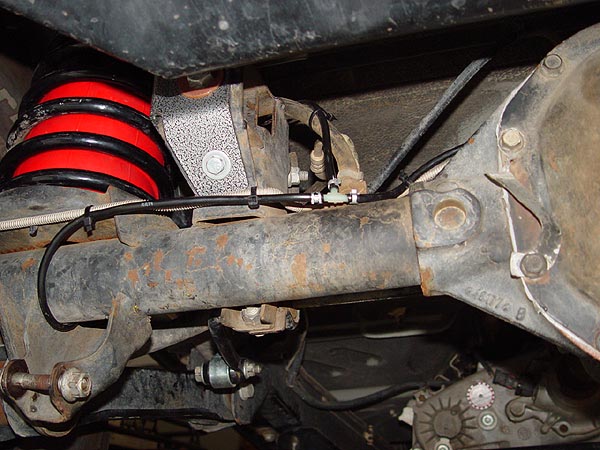
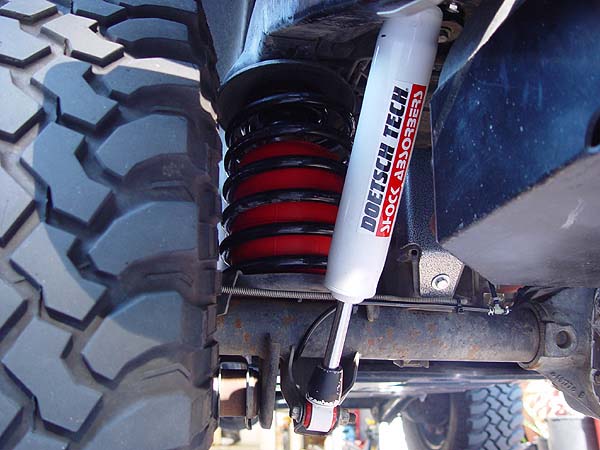
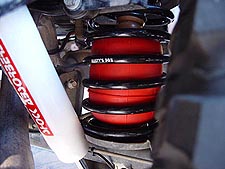
14. Connect the air
hose to the inflation nipple on the air bag and then secure it by
sliding the hose clamp up over it. Take the remaining hose and route
it down around your axle and through your shock mount as shown in
the pic to the left. Take some zip ties and attach the air hose to
your brake line and follow it over to the driver side and let it hang
there for now.
15. Slowly raise your
axle back up and compress the coil enough that the spring compressors
loosen their grip. Use a 3/4" wrench to make whatever adjustments
you need to loosen up the compressors enough to be removed.
16. Remove the spring
compressors and carefully lower your axle back down.
17. Repeat steps 5-12
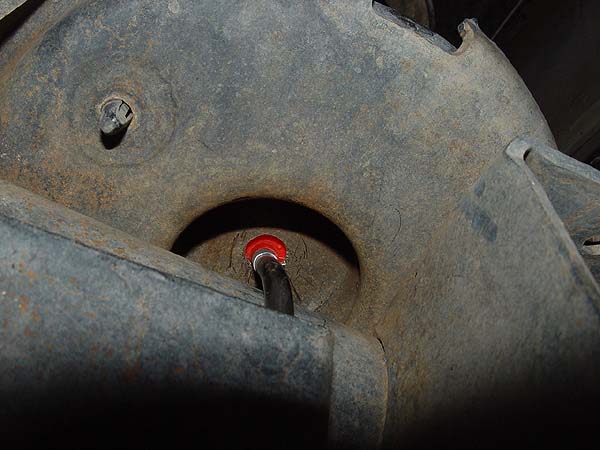
18. Using the hose that
you routed over earlier, feed it up, around your axle and through
the shock mount as shown in pic to the left. Now, slip a clamp on
the end, feed it through the hole in the spring perch and then attach
it to your air bag like before. Both bags should now be connected
by the same hose.
19. As in step 14, take
a couple of zip ties and attach the air hose to your brake line until
you reach axle breather hose. Cut the air hose at this point to remove
the excess and then re-connect the two hose ends using the "T"
fitting and clamps provided with the kit.*
* note:
The kit actually comes with a second schrader valve so that you can
set things up in a way that will allow you to inflate each bag separately.
I choose not to go this route because I felt that it would be beneficial
to have both bags share the same air presure. This would allow one
bag to deflate it's air into the other bag as my axle articulates
on the trail allowing for maximum stuff.
20. Take the excess
hose, slip a clamp on one end and then attach it to the top of the
"T" fitting. Using zip ties, follow and attach the air hose
along the axle breather hose. Just let the hose hang out the back
for now.
19. Repeat step 15-16
20. Okay, at this point
go ahead and re-attach your track bar (making sure to torque it to
85 ft. lbs.), sway bar links and shocks. Again, raise or lower your
axle until the bolts to each of these parts connect easily.
21. Re-attach your wheels
and tighten your lug nuts but do not torque them at this time. Remove
the jack stands from under your Jeep.
22. Lower your Jeep
and torque your lug nuts to 95 ft. lbs.
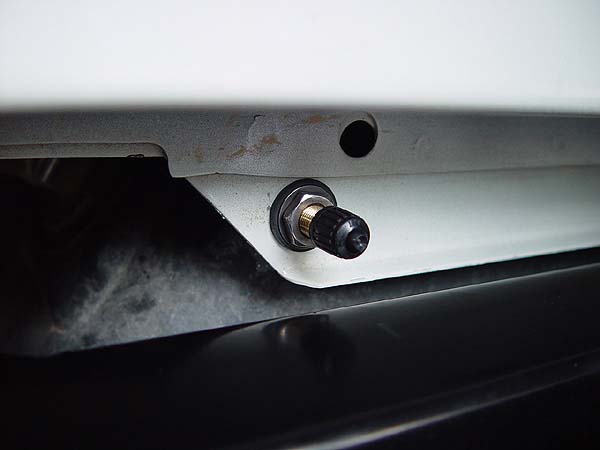
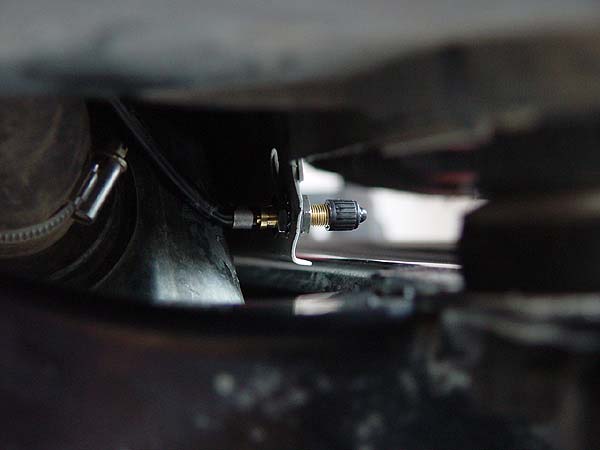
23. With your Jeep safely
back on the ground, we will now address where to locate your air hose
inflation valve. Because I have a 1" body lift, my Jeep has a
lip that hangs down in between the tub and rear cross member. Towards
the driverside of the Jeep, there should be enough space behind this
lip and the gas tank that you can mount the inflation valve here.
Start by locating your drilling point and marking it with a center
punch.
24. Carefully drill
a 5/16" hole using a cobalt or titanium drill bit. Again, be
very careful not to punch right through as your gas tank is sitting
just behind the lip and you don't want to be poking a hole in it.
Clean the edges of the hole using your Dremel and grinding bit. I
also went ahead and touched up the edges with some touch up paint
to prevent corrosion.
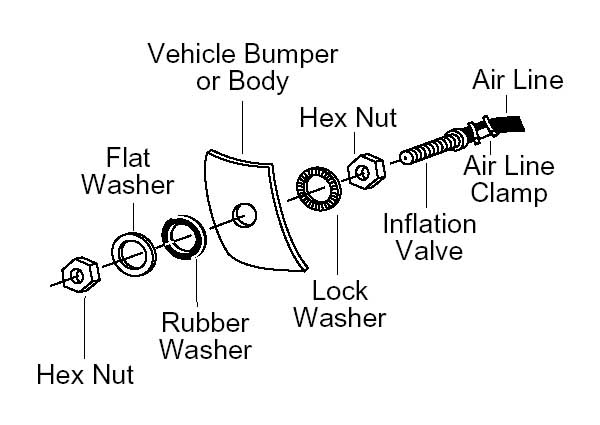
25. Slip on a clamp
to the end of the air hose, attach the valve, and secure it with the
clamp. Thread one of the valve nuts on to the very back and follow
it with a spoked washer. Then, carefully slide it through the hole
you drilled and fasten it using a rubber washer, regular washer and
nut as show in the diagram to the left.
26. Slowly inflate the
air bags using a standard tire pump to 35 psi (DO NOT exceed 35psi)
and then check for leaks along all the connection points using soapy
water.
27. Deflate your air
bags in 5psi intervals and take your Jeep for a spin between each
one to determine what gives you the best ride. DO NOT let your air
bags fall below 5psi at anytime. I usually keep mine at about 10psi.
28. Recheck the air
Pressure in the air bags 24 hours later. A 2-4 psi drop is normal
after installation but if you see more than a 5psi drop, repeat step
26.
Maintenance
To operate your Air Lift suspension, simply inflate the air bags to
35psi before you load up your Jeep. Then, deflate them until you have
achieved a desired height or comfort in ride.
Operation
Unless
you installed one of the more expensive Air Lift kits that come with
a self regulating compressor that always maintains a constant psi,
it is important to check the pressure of your air bags on a regular
basis to make sure it doesn't fall below 5psi. As is indicated in
the instructions provided by Air Lift, I have been checking mine once
a week. I just takes a few seconds to do and so far, I have not seen
any significant loss in pressure. I will keep you updated on this.
Post Installation Notes
Initally, I was a bit concerned about how these air bags would effect
my axle articulation. However, after doing some initial testing, I
have found that the bags compress quite nicely and do a great job
of acting as bumpstops. So far as I can tell, I have not lost any
stuff and the bags just fall with my coils on the droop side. I will
try to take some pics of flex as soon as I can and post some pics.
Update 11/15/03
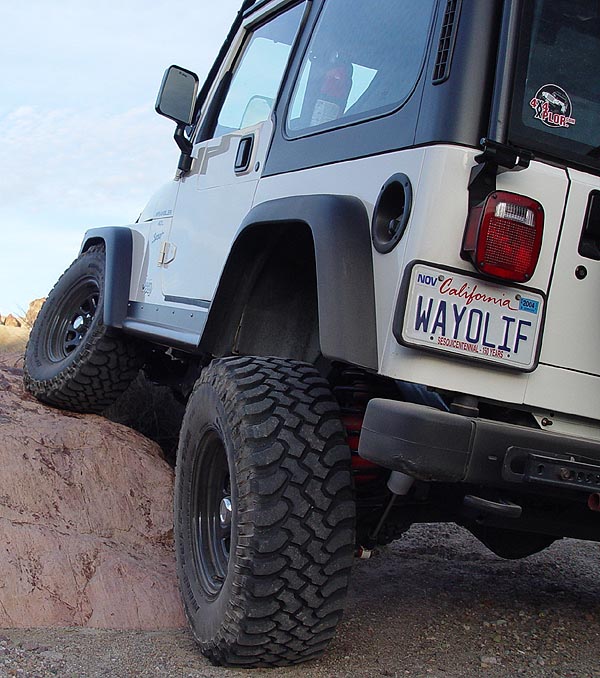
I have taken my Jeep out on two easy wheeling/camping trips with my
family and can tell you that these air bags performed perfectly. Loaded
up with close to 200 lbs. of gear + passengers and a dog, I was still
able to keep my Jeep from sagging. On the trail, I didn't even notice
they were there. Needless to say, I am super happy with my decision
to go this route. Oh, one thing to remember is to deflate your air
bags once you're back in town and unloaded. I forgot to and the rear
of my Jeep sat at about 5" taller than stock causing some serious
drive line vibes. After airing them down to about 15 psi, all was
back to normal. :)
That should be it. Please let me know if you have any questions. |
|
|