 |
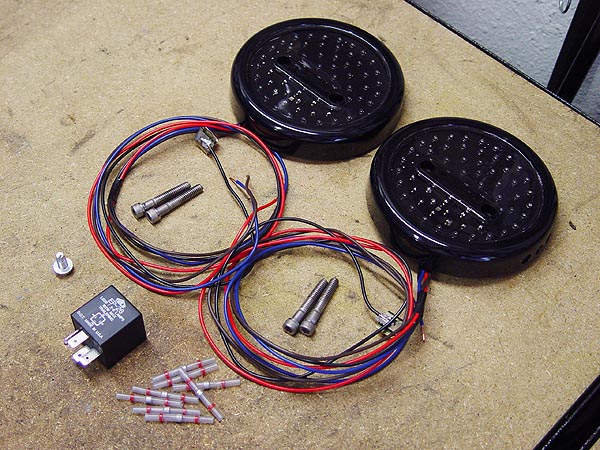
Here's a pic of all the things you will get with your new Off Road Only LiteDOT LED Tail Lights. Make sure that you have all the parts listed on the packing sheet before proceeding. (NOTE: The flasher relay you see in this pic was purchased separately). |
 |
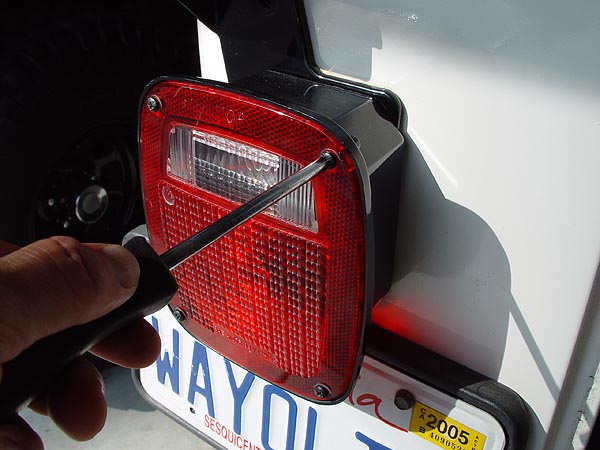
1. To start your ORO LiteDOT LED Tail Light installation on your Jeep, remove the 4 screws securing your factory tail light lens to the housing using a phillips screw driver.
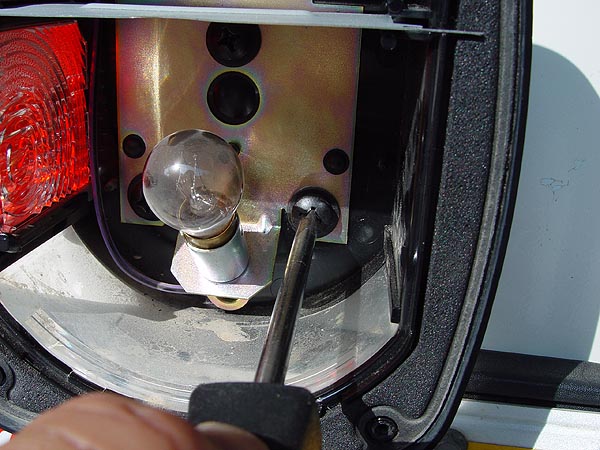
2. With the lens cover removed, you should be able to see a set of 3 black screws securing the tail light housing to the body of your Jeep. Again, remove these screws using a phillips screw driver. The screws may be on a bit tight and I would recommend using a phillips screw driver with broad teeth so that you don't accidentally strip the screw heads. |
 |
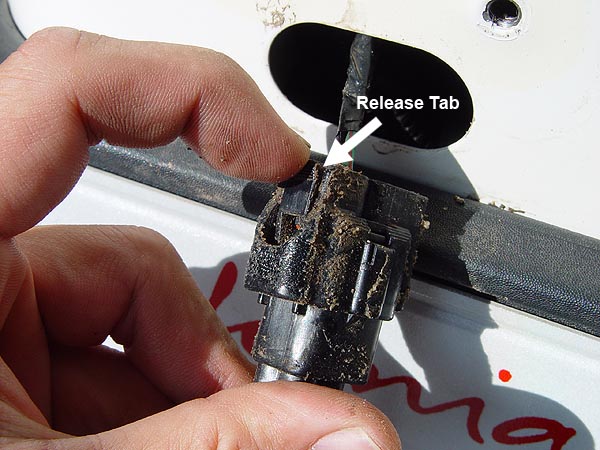
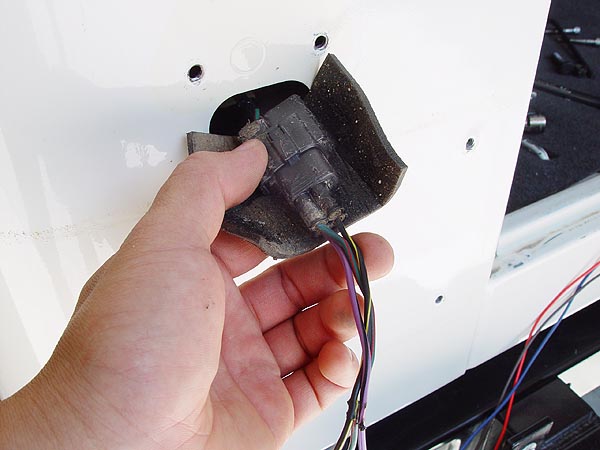
3. With your factory tail light removed, carefully pull the wiring harness out until you find the connecting plug which should be wrapped in a piece of neoprene. Carefully remove the neoprene so that you can reuse it later and then separate the plug by pressing on the plastic release tab as shown in the pic to the left. |
 |
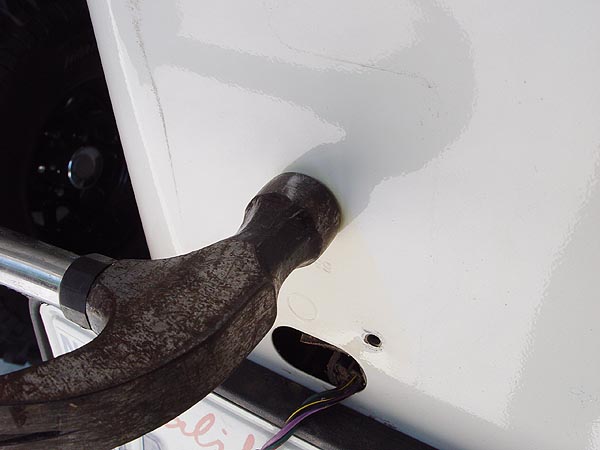
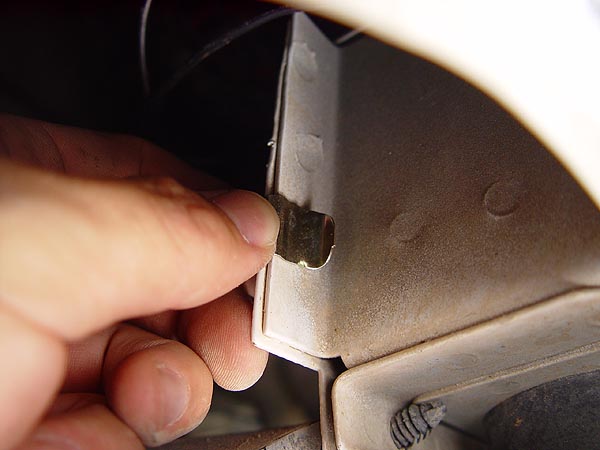
4. The 3 threaded holes on the body of your Jeep may be dimpled out a bit which can prevent your ORO LiteDOT LED Tail Lights from mounting flush. To fix this, give the holes a couple of taps with a hammer to push them back in a bit. |
 |
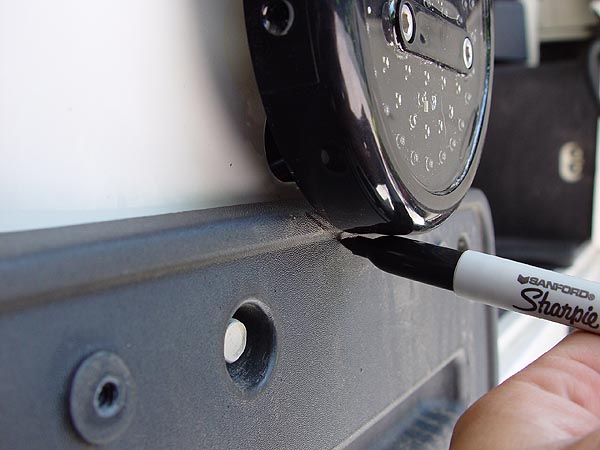
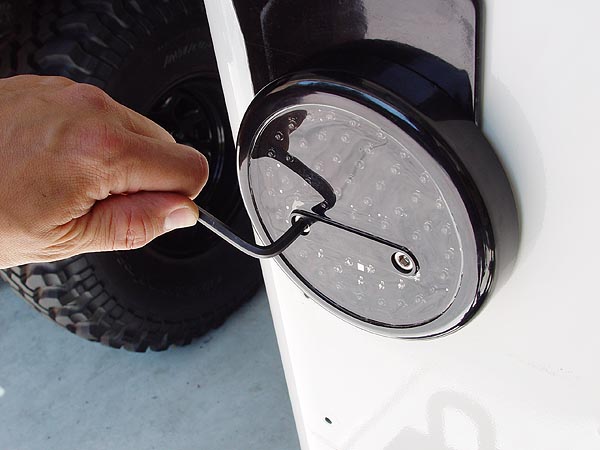
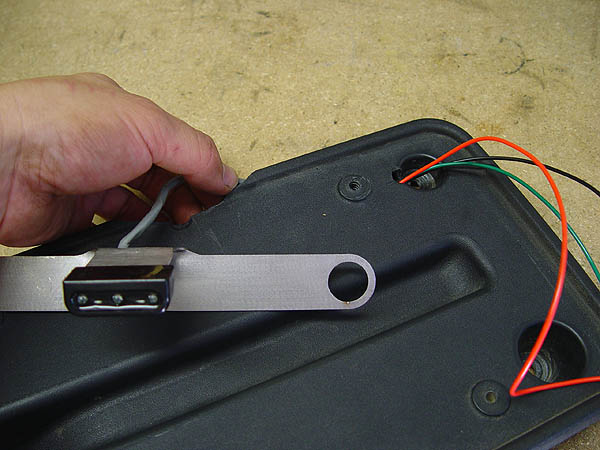
5. If you plan on using your factory license plate mount, the top of it will need to be trimmed a bit in order to accommodate your new ORO LiteDOT LED Tail Lights. Loosely attach your new LiteDOT with the longer bolts supplied and use it as a template to mark off how much of the mount you will need to trim as shown in the pic to the left. |
 |
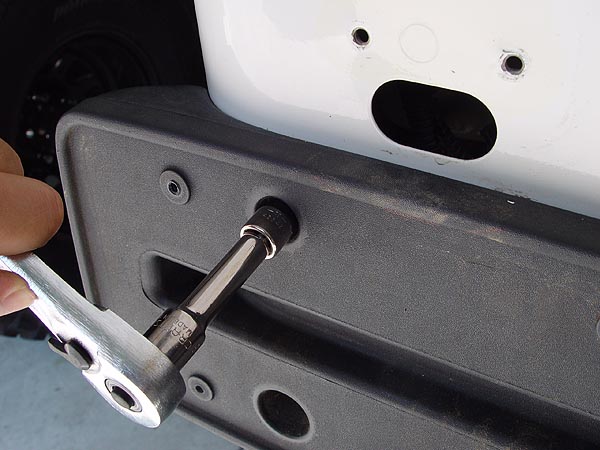
6.
Remove the 4 bolts securing your license plate mount to the body of your Jeep using a 10mm socket. a couple of the bolts are recesses deeply inside the plastic mount and a 3" ratchet extension will help you to reach them. |
 |
7. On most Jeeps, the 3 tail light bolt holes have been tapped with metric threads. Use the thread cutting screw supplied with your ORO LiteDOT LED Tail Lights to convert the existing metric threads to a 1/4-20 threaded hole. You only need to convert the 2 lower holes and you will need a 3/8" socket for the job. (DO NOT use the socket head cap screws to do this as they may result in thread and body damage.) |

|
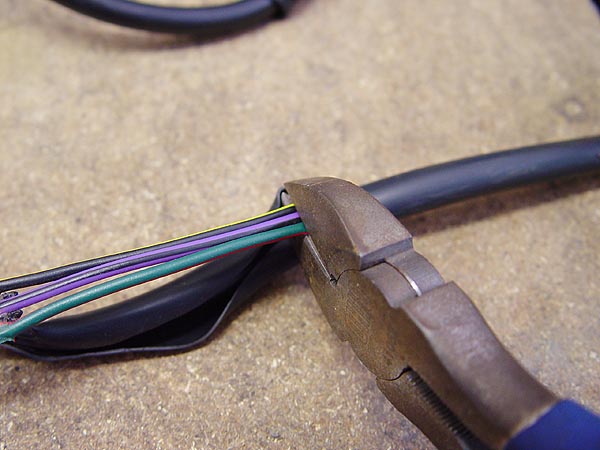
8. Now, take your factory tail lights to your work bench, cut open and peal back the plastic wiring harness cover to expose the 3 wiring inside. Cut the wires approximately half way between the connector plug and the tail light housing.
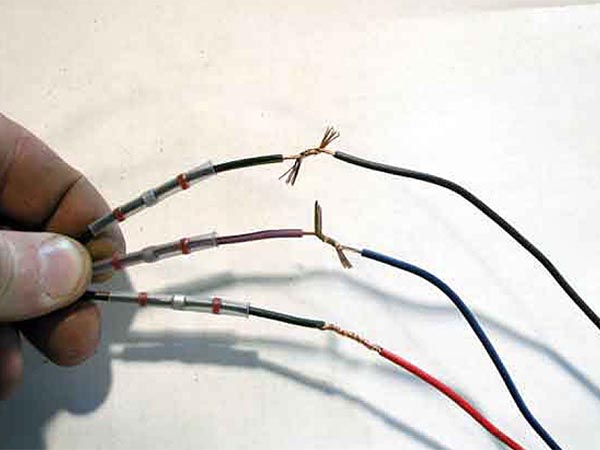
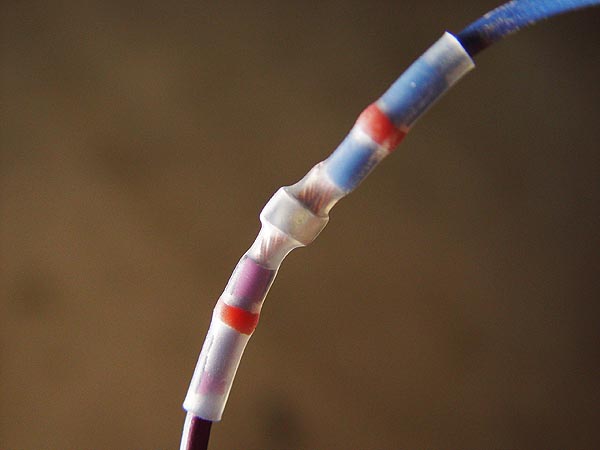
9. Using a pair of wire strippers or utility knife, remove approximately 3/4" of the insulators off the ends of the 3 factory wires. Twist the loose bare wire ends to keep them together and then slip a solder seal shrink connectors on each wire.
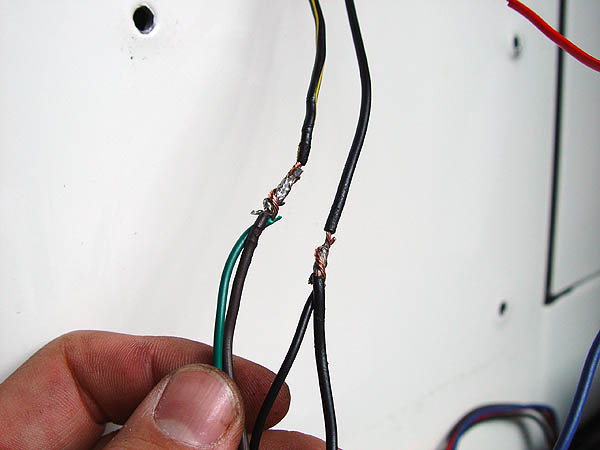
10. Now, attach the ORO LiteDOT LED Tail Light wires to the factory wires by "audio twisting" the ends together as shown in the pic to the left. Then, slide the solder seal shrink connectors over the bare wires.
ORO LiteDOT LED Tail Light
Wire Color Codes
Left & Right Side:
Tail = Brown
Brake/Turn = Red
Back-Up = Blue
Ground = Black
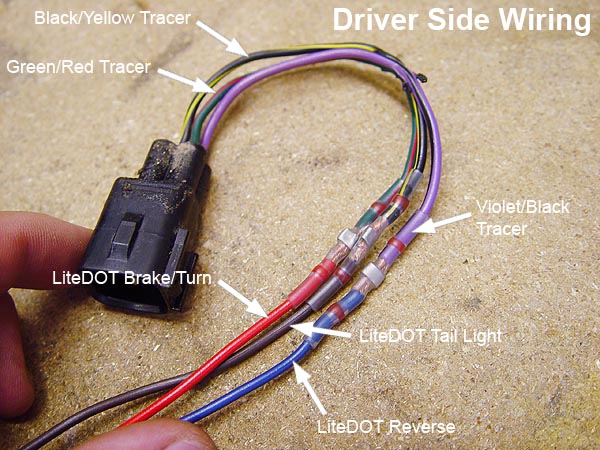
Jeep Wrangler TJ Factory
Wire Color Codes
Left Side:
Tail = Black/Yellow Tracer
Brake/Turn = Green/Red Tracer
Back-up = Violet/Black Tracer
Right Side:
Tail = Black/Yellow Tracer
Brake/Turn = Brown/Red Tracer
Back-Up = Violet/Black Tracer |
|
 |
|
|
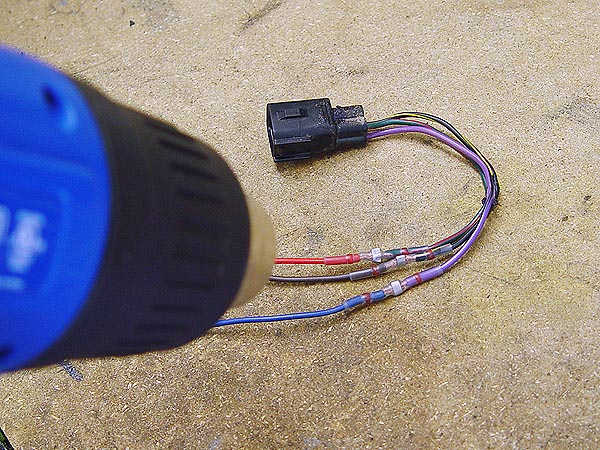
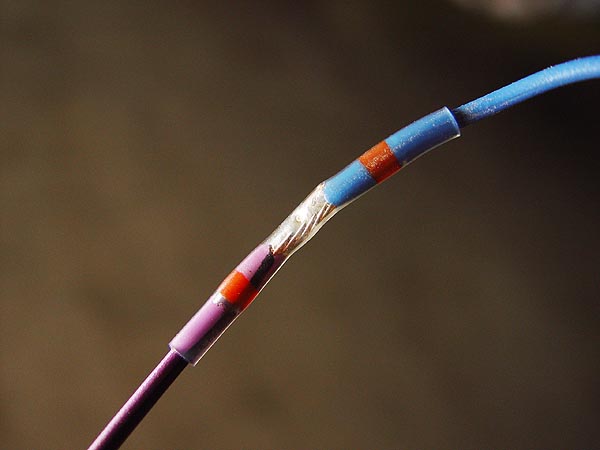
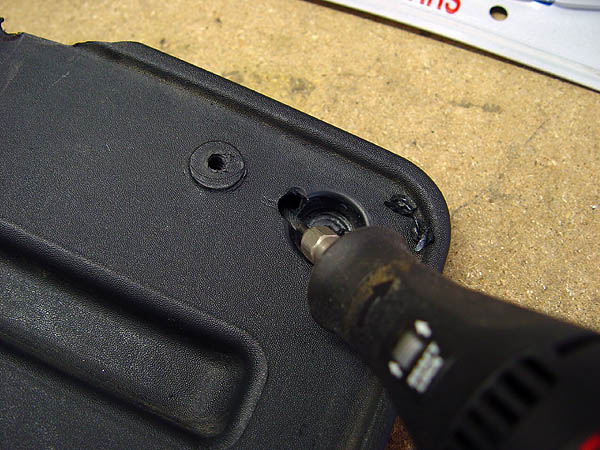
| 11. Using a heat gun, shrink the solder seal shrink connectors slowly and evenly until the center ring melts. This will insure a complete connection between the wires and a water proof seal. |
 |
12. Go back to your Jeep, reconnect your wiring harness plug, wrap it back up with the neoprene cover and then feed the wiring harness completely through the body. There will be a lot of excess wires hanging down so be sure to bundle it up with a zip tie or tuck it away neatly under your Jeep. |
 |
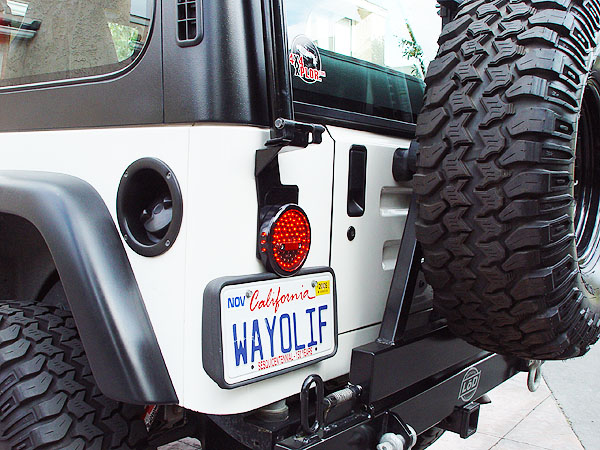
13. Using a 3/16" Allen Key, secure your new ORO LiteDOT LED Tail Lights to the 2 lower bolt holes on your Jeep using the ¼-20x1 Socket head cap screws supplied with the kit. DO NOT over tighten these bolts as you may damage the mounting threads. (NOTE: the black metal behind the ORO LiteDOT LED Tail Light shown in this photo is the rear mount of my Kargo Master Congo Cage). |
 |
14. The ground wires provided with the ORO LiteDOT LED Tail Lights come equipped with paint piercing fangs. Look under your Jeeps rear quarter panel and find a suitable point to slide it in place. I chose to attach my ground wire to the tub near the body mount as shown in the pic to the left. |
 |
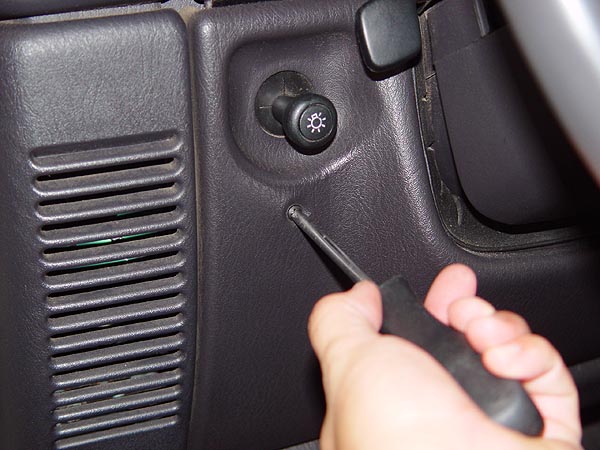
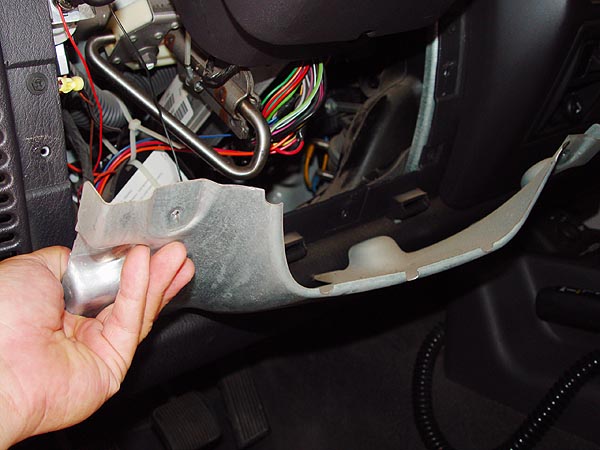
15. With both ORO LiteDOT LED Tail Lights installed, it's time to install your new flasher relay. Without it, your indicator lights will blink too fast. To start, climb inside your Jeep and remove the plastic knee panel under the steering wheel using a phillips screw driver. |
 |
16. Now, remove the steel backup plate using a phillips screw driver.
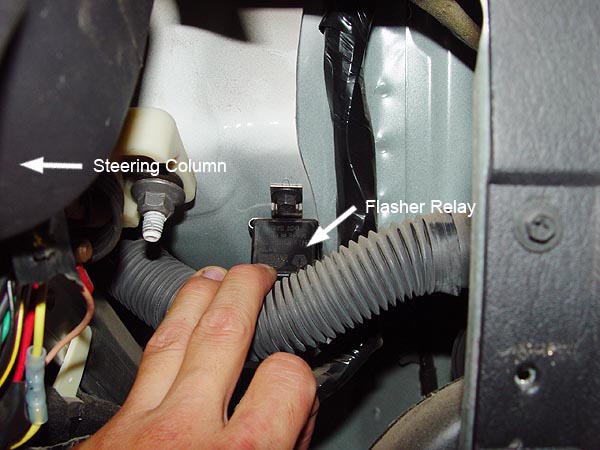
17. On a 1997-2000 Jeep TJ, the flasher relay is attached to the steering column on the side closest to the center console. The relay is clamped in place and to remove it, you will need to take a firm grip of it and then slide it out by pushing it forward towards the firewall. See pic to the left.
(for newer or older model Jeeps, please refer to the instruction manual).
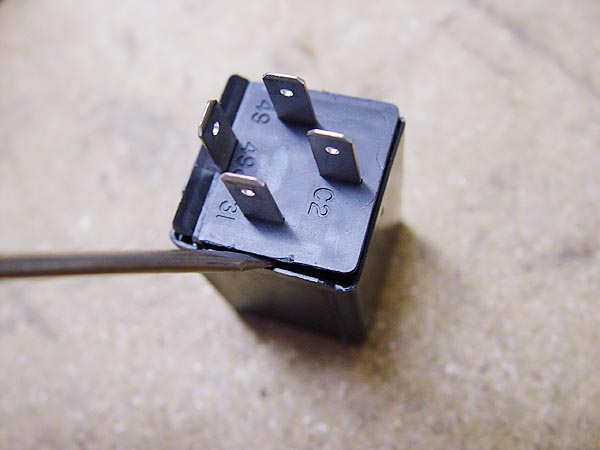
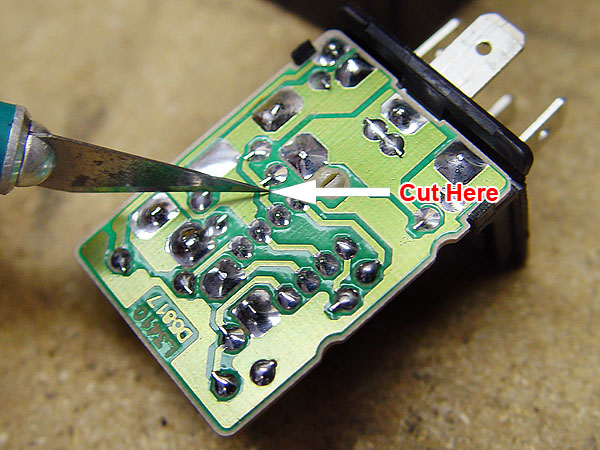
18. Modify your existing flasher relay or install a new relay with the correct resistance. New relays will not be slotted like the factory unit but I was still able to shove it onto the existing clamp and it seems pretty secure. |
|
 |
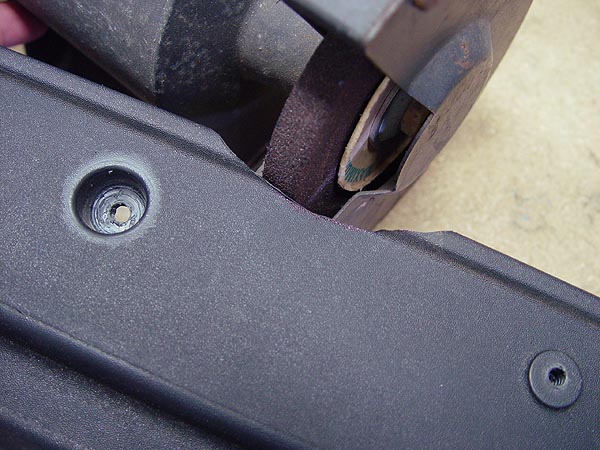
19. If you're reusing your license plate mount, you can trim it down using a hacksaw, dremel, die grinder or bench grinder like I did. This is really easy to do as the plastic will just about melt off. When you are done trimming, let it cool off a bit and then cut away the excess plastic burrs with an X-acto knife or utility knife. Then, reinstall it back on your Jeep.
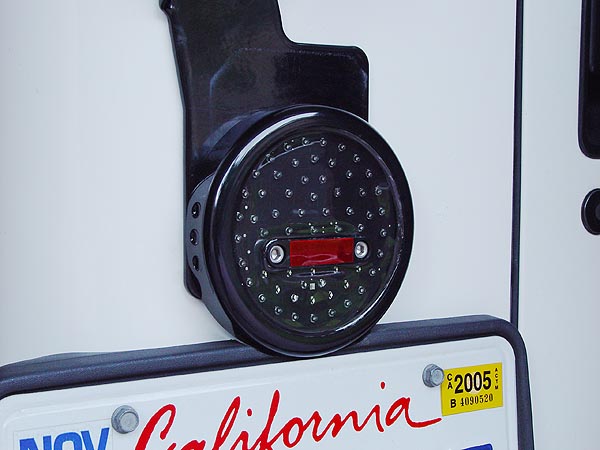
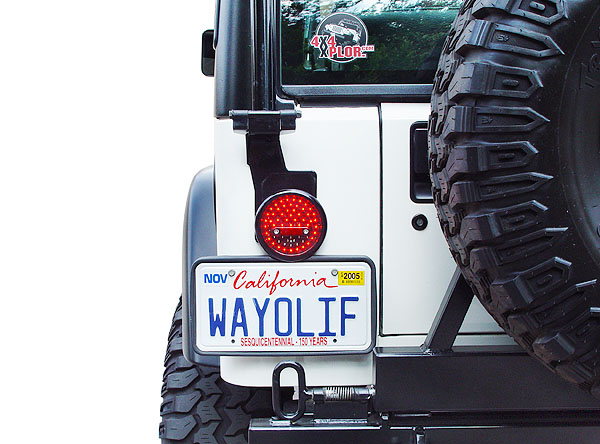
20. Apply the reflector tape supplied with the ORO LiteDOT LED Tail Light kit somewhere on the back of your Jeep. I chose to cut mine down and I applied a piece where the label was suppose to go as can be seen in the pic to the left.
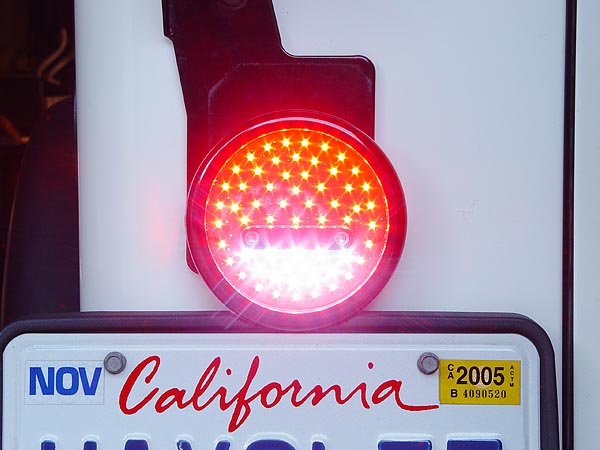
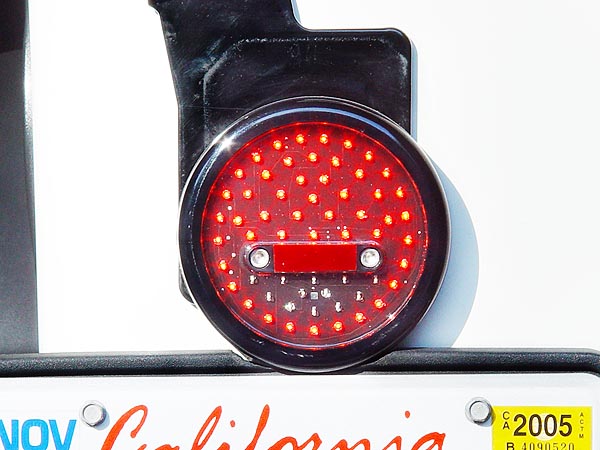
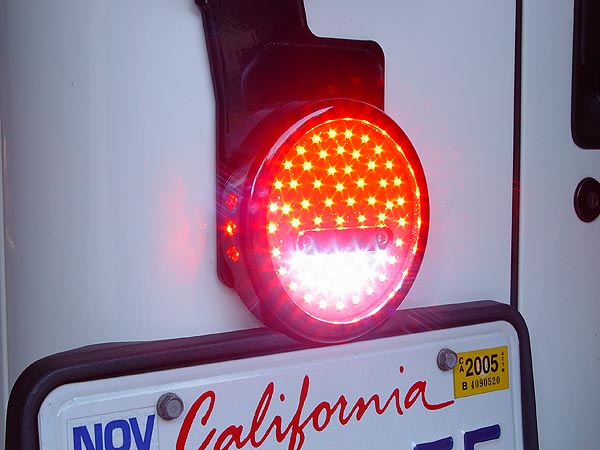
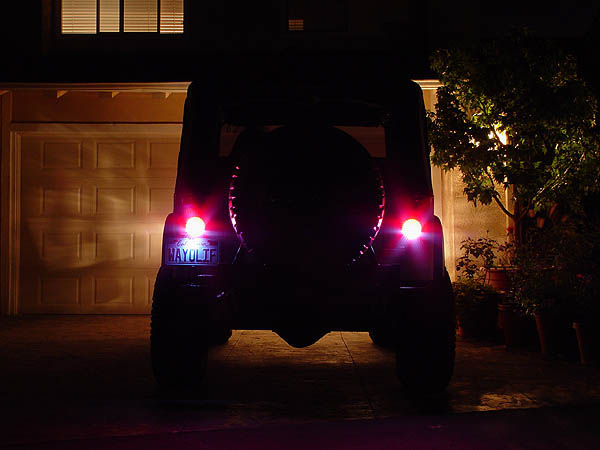
21. Put everything back together and test out your new ORO LiteDOT LED Tail Lights. If they don't light up, check your ground wire to make sure it's biting all the way through the paint.
That should be it. Please let me know if you have any questions. |
Off Road Only LitePLATE
License Plate Light Jeep Factory Mount Installation
|
 |
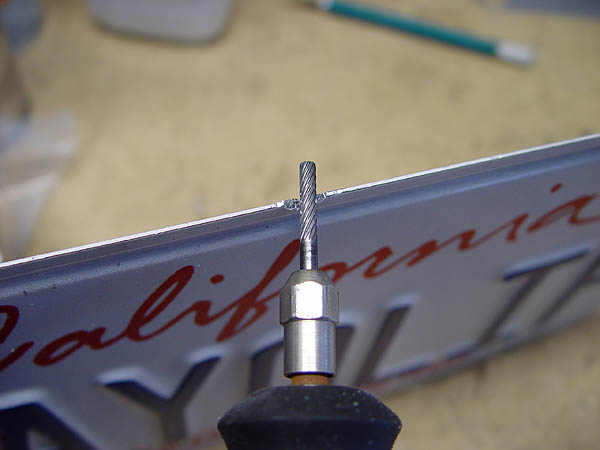
1. Remove your Jeep factory license plate mount and then using a dremel with a cutting bit, make a hole in to the upper right side counter sunk bolt hole as shown in the pic to the left. |
 |
2. Fish a length of RED and BLACK insulated 24 guage wire through the hole you just made and feed it out through the top hole on your modified license plate mount. Then solder the RED 24 GUAGE wire to the BLACK LitePLATE wire and the BLACK 24 GUAGE wire to the BARE LitePLATE wire. Seal off the exposed wire with electrical tape or use heat shrink bands to keep out the elements.
NOTE: The RED LitePLATE wire is for the optional 3rd brake light and is not needed. Seal it off and out of the way with Electrical tape. |
 |
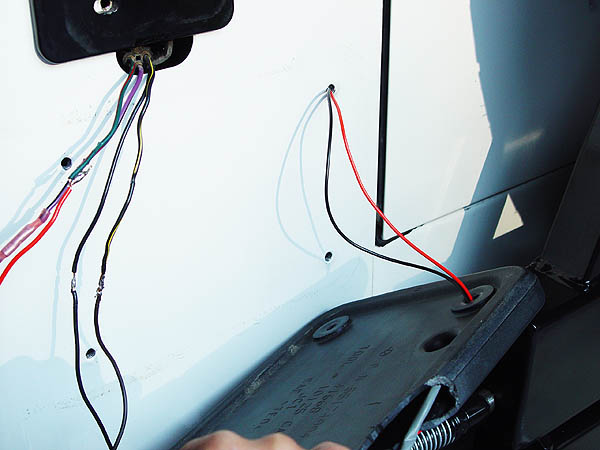
3. Feed the RED and BLACK 24 GUAGE wires through the bolt hole on the plastic license plate mount and then through the bolt hole on your Jeep's rear quarter panel. Reach up under the rear quarter panel and feed these wires back throught the tail light access hole so that you can work on them easier. |
 |
4. Splice and solder the BLACK 24 GUAGE wire to the BLACK LiteDOT ground wire or just attach it to a ground on your Jeep's tub or frame. Then, splice and solder the RED 24 GUAGE wire to the BLACK/YELLOW TRACER (tail light) wire.
Seal off the exposed wire with electrical tape or use heat shrink bands to keep out the elements. |
 |
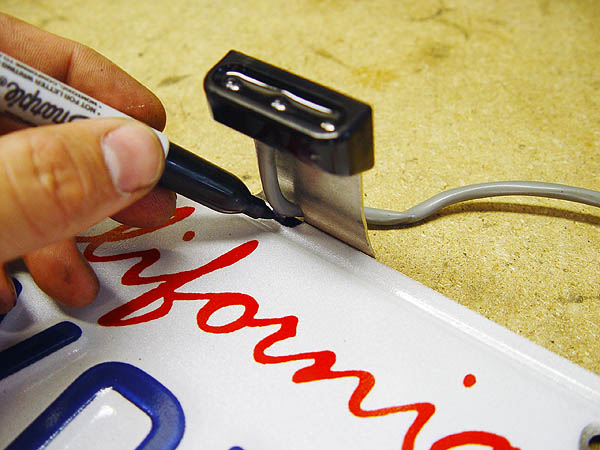
5. Position your new ORO LitePLATE behind your license plate and mark off where it will need to trim at top |
 |
6. Using a Dremel with a metal cutting bit, cut a small notch on the top of your license plate where the wiring harness will sit. |
| 
|
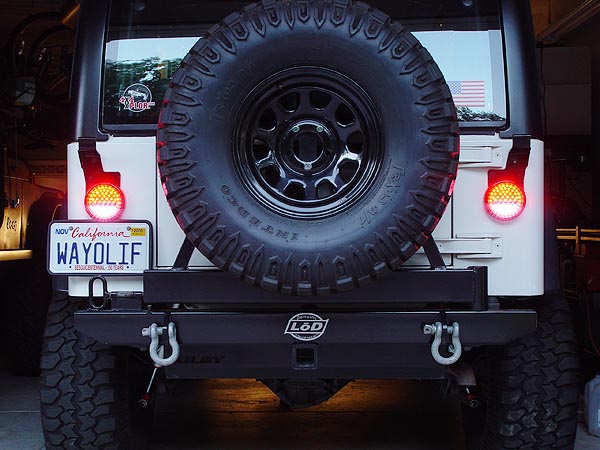
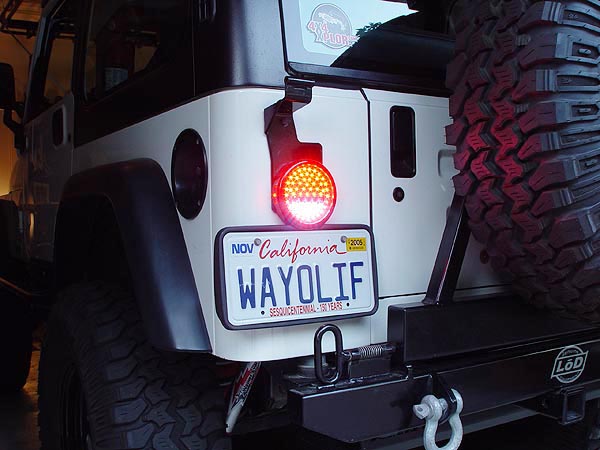
7. Reinstall your license plate mount on to your Jeep's rear quarter panel, sandwich your LitePlate between your license plate and mount and then secure it in place using the factory bolts.
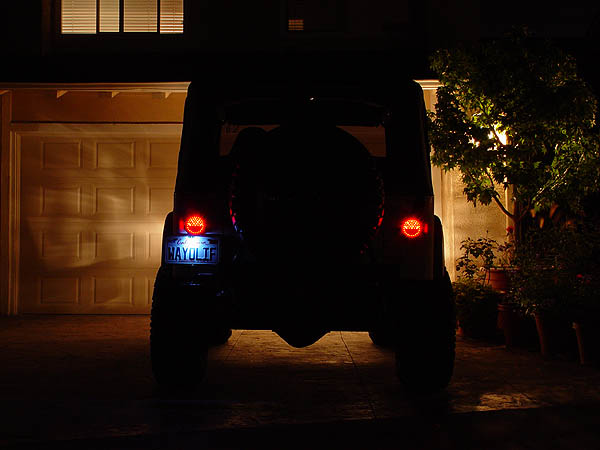
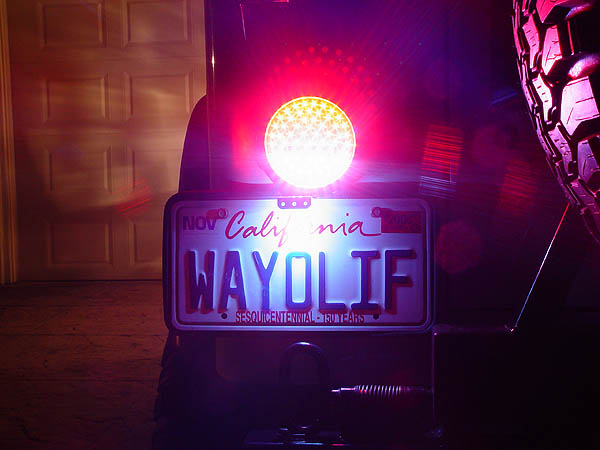
8. Turn on your lights to make sure everything lights up correctly.
Congradulations, you now have a lighted license plate and are street legal again. Please let me know if you have any questions. |