|
|
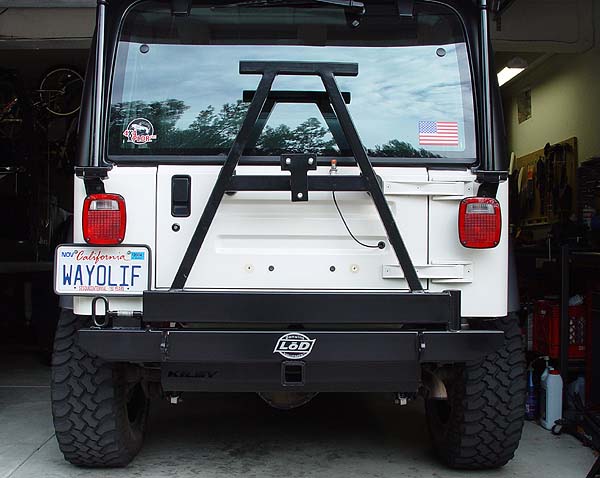
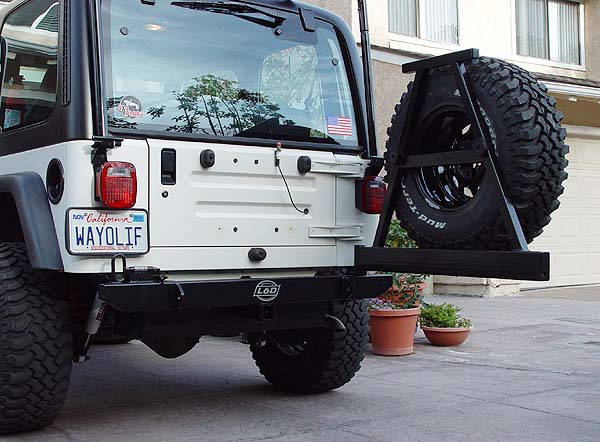
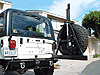
LoD
Heavy Duty Jeep Rear Bumper Tire Carrier
1987-2006
Jeep TJ & YJ Wranglers
Sooner
or later, every Jeep owner gives their rig a lift and with a lift
comes bigger tires. It's just inevitable. Only problem is, what do
you do about carrying a full size spare? Attaching it to your factory
tire carrier on the tailgate is problematic at best and breakage just
waiting to happen at worst. What you need to do is get the weight
off of your tailgate and on to your frame. The solution? Install a
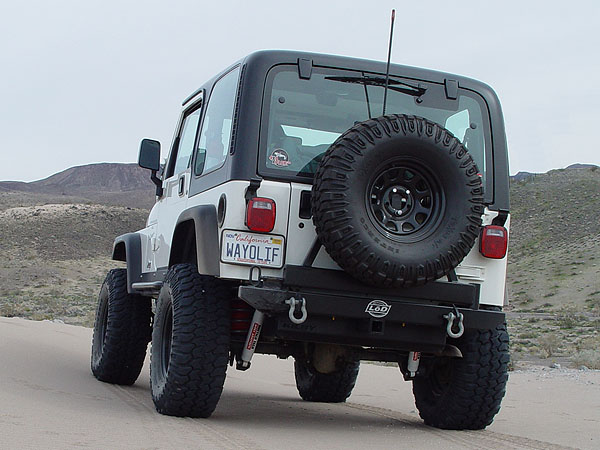
heavy duty rock bumper with a swing away tire carrier. Unfortunately,
a good setup will set you back about $500-$600 right? Wrong. LoD is
an upcoming manufacturer of heavy duty rock bumpers, skid plates,
rocker guards and other Jeep accessories. Their goal is to provide
their customers with the highest quality products but at a price they
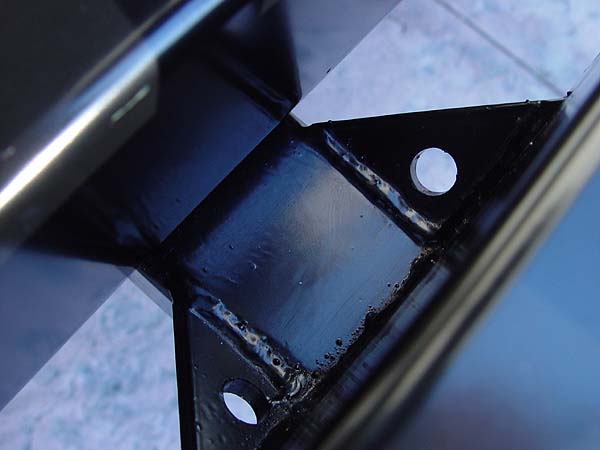
can afford. I can tell you first hand that the LoD heavy duty bumper/tire
carrier system is extremely beefy and well built. The black powder
coating is superb, it can hold up to a 37" tire, has two shackle
mounts, a trailer hitch and it's completely rattle free. The best
part.... it was way cheaper than the competition!! And, for a few bucks more, you can upgrade to an LoD Xtreme Duty Jeep Rear Bumper/Tire-Carrier.
What
You Need
•
LoD
Heavy Duty Jeep Rear Bumper/Tire Carrier
• 13, 18, 19mm Sockets & Wrenches
• 5/8" Wrench
• T-30 Torx Bit
• Ratchet
• 1/8", 1/2" Cobalt Drill Bit or Unibit (optional)
• Hand Drill
• Tape Measure or 36" Straight Edge w/Ruler
• Center Punch
• White Lithium Grease
• Standard Hammer
• 3 lb. Hammer
• Wooden Board or Block
• Hack Saw
• Bench Vice
• Small Round File
• Dremel
• Grinding Bit for Dremel
• Floor Jack
Installation
1.
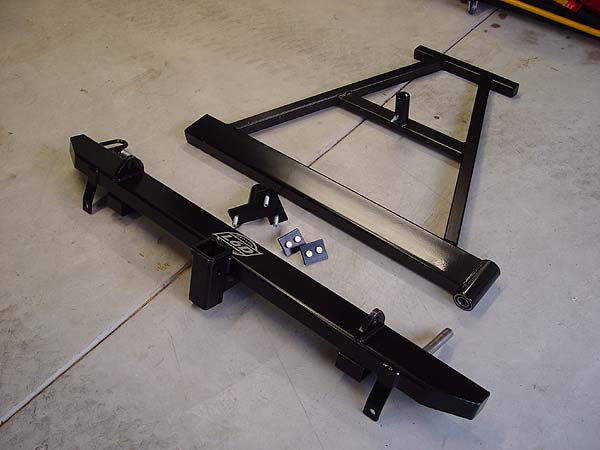
Open up your boxes and make sure you have the LoD bumper,
A-frame tire carrier, tire mounting bracket, bumper mounting plates
and hardware. If you are missing anything, now is the time to figure
things out. Please look carefully for the hardware as it is small
and easy to miss. My hardware was wrapped up in a ball of newspaper
and I almost threw it out. DO NOT assemble the A-frame
section onto the bumper at this time.
2. Begin
this project by removing your Jeep's plastic bumper end caps. To do this,
you will need a T-30 Torx Bit to remove two bolts on top, two underneath
and one attached to a flange behind the bumper.
3. If you have a factory Jeep J-hook style
tow hook, remove it using a 19mm and 18mm socket. Be sure to extract
the metal tab with the nut welded on to it from inside your frame.
4. There are a total
of 6 bolts securing your factory bumper to your Jeep. On either side,
you will find two bolts located directly behind the rear cross member
and one underneath attached to your frame rail. Using an 18mm socket,
remove all six bolts but keep the two that were attached underneath
the frame rail handy as they will be re-used. Remove your bumper.
5. Clean up and wipe
down your Jeep's rear cross member.
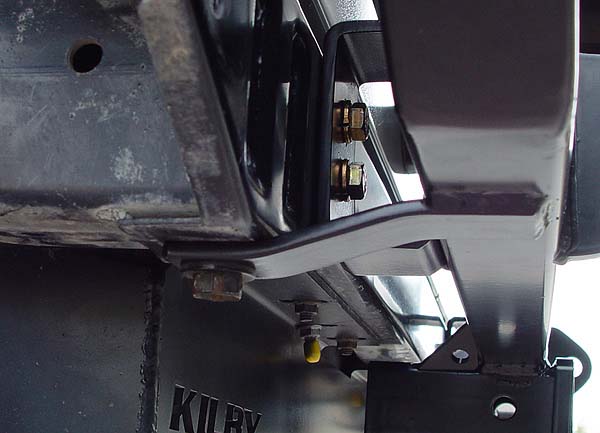
6. For reasons of strength,
you will need to drill two sets of new mounting holes in your Jeep's
rear cross member (This step is for 1998 and newer TJ's only - YJ's and 1997 TJ's do not require
drilling). These new holes will be located just inside the frame rails
32" apart center to center. Each set will require two vertically
aligned 1/2" holes to be drilled 1-1/8" apart center to
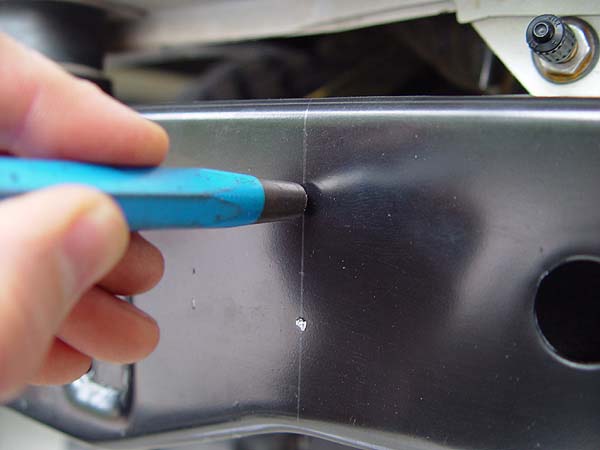
center. Temporarily attach just the new LoD bumper to your rear cross member by securing it to the frame rails with the factory bolts. Using the bumper as a template, mark off the points where you need to drill your holes with a short pencil or grease pencil. Remove the bumper and then mark your drilling points with a center punch.
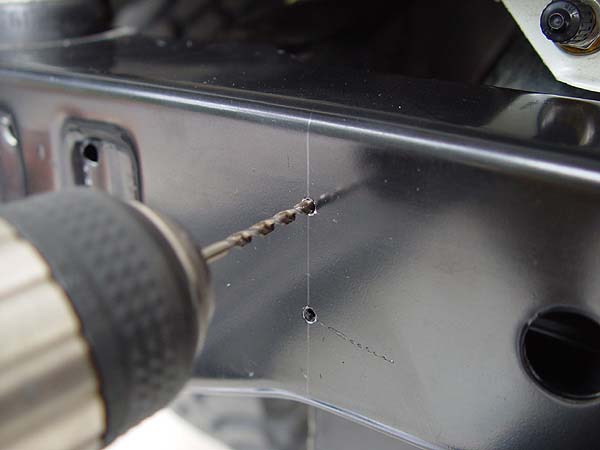
7. A 1/2" drill
bit is quite large and can be difficult to get started right where
you need it. So, to insure accuracy, I decided to drill 1/8"
pilot holes first. These pilot hole helps guide the larger 1/2"
bit or unibit to stay where it needs to be. Drill slowly and try not
to push too hard. If you punch through with all your weight behind
the drill, you just may end up poking a hole in your gas tank and
that ain't good.
8. Clean up your holes
with a file or Dremel with a grinding bit.
9. Here's where a friend
to help you out comes in handy. Lift your new LoD bumper up to your
Jeep's rear cross member and thread in the two bolts that attach the
bottom brackets to the bottom of your frame rails. Do not tighten
the bolts at this time as you may need to shift the bumper around
to get all the other bolts on.
10. Now comes the fun
part. With your friend holding the LoD bumper up and in place, take
one of the mounting brackets with the two nuts welded on and slip
it behind your rear cross member on the driver side of your Jeep.
Hold the mounting bracket with the flush side up against the back
of the cross member where you drilled the holes earlier and thread
in the two bolts in finger tight. The space behind your cross member
is very tight so be patient and take your time.
SEE INSTALLATION NOTES
11. Repeat step number
10 on the passenger side of your Jeep.
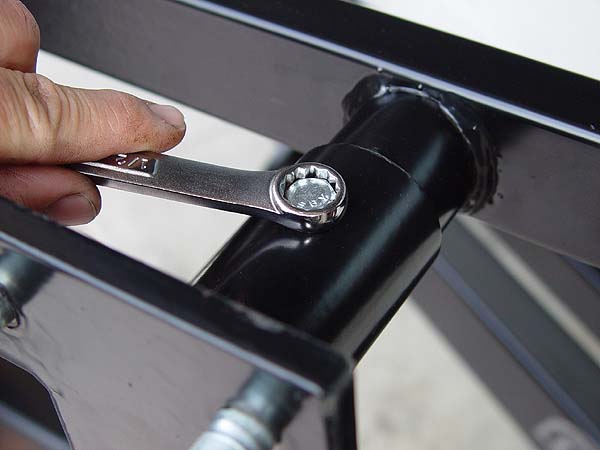
12. Using a 5/8"
wrench, tighten up all four mounting bolts attached to your Jeep's rear cross
member. Be sure to tighten the two bolts under your frame rails at
this time as well using an 18mm wrench.
13. Great! Now that
you have your new LoD bumper mounted on your Jeep, it time to install
the A-frame swing out tire carrier. To begin, open your tailgate and
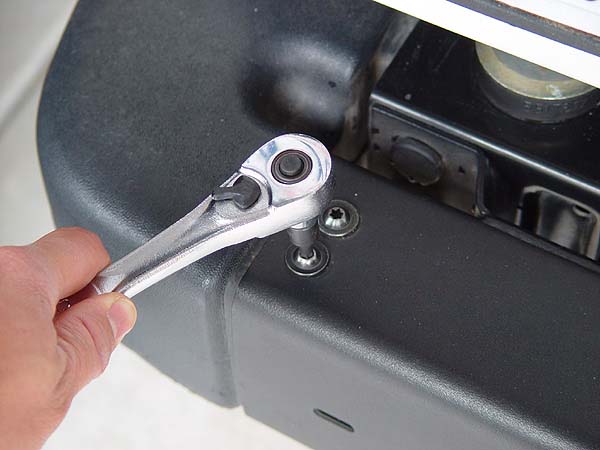
remove the bolt securing the small plastic cover on the hinge side
using a phillips screwdriver.
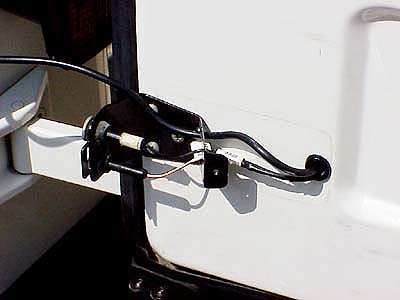
14. Disconnect the two
wires leads for your Jeep's 3rd brake light by pulling on them firmly one
at a time. The wires are just plugged into the contacts so no cutting
is necessary. From the outside of your Jeep's tailgate door, carefully pull
each connector out one at a time. You may need to pull the rubber
grommet out first in order to do this. If you do need to remove the
rubber grommet, be sure to replace it once the wires have been extracted.
Re-attach the plastic cover onto your tailgate door.
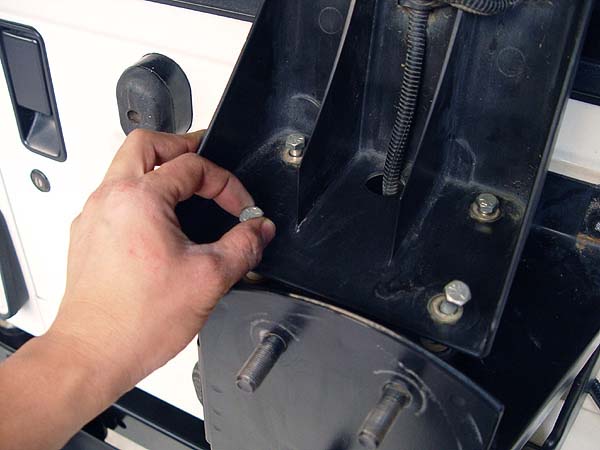
15. Now, remove the
four 13mm bolts attaching your Jeep's 3rd brake light assembly to
the OEM tire carrier. Set aside your 3rd brake light and proceed to
remove the five 13mm bolts securing your OEM tire carrier to your
tailgate.
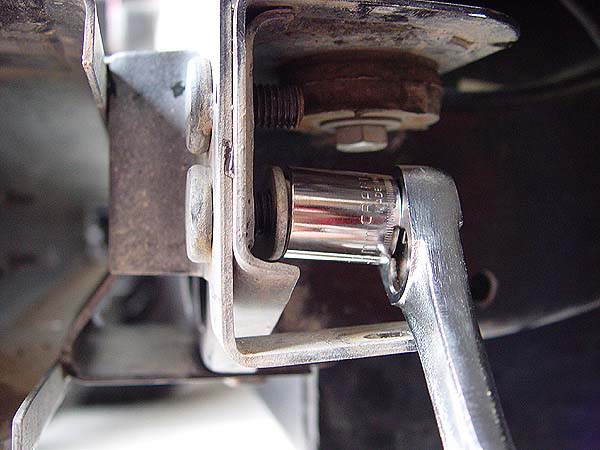
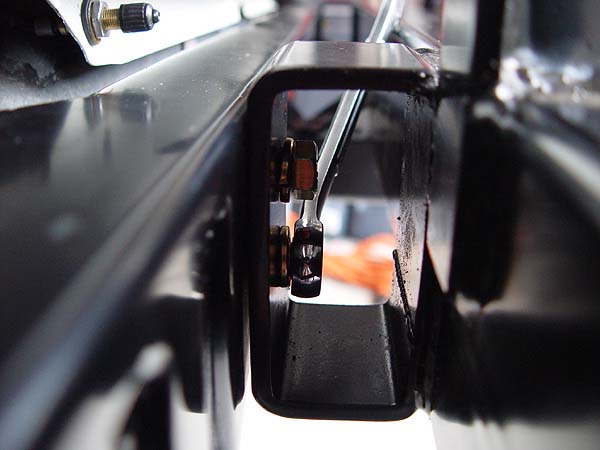
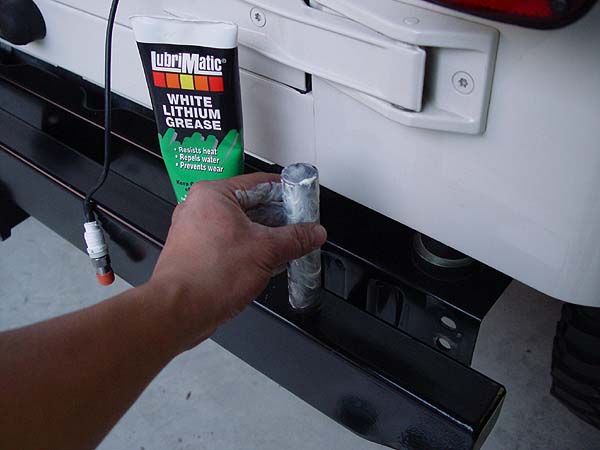
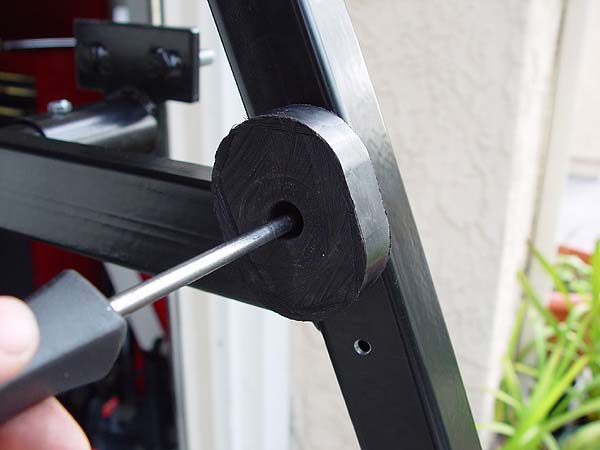
16. Using some white
lithium grease, lube up the 1" hinge pin on the LoD bumper as
shown in the pic to the left.
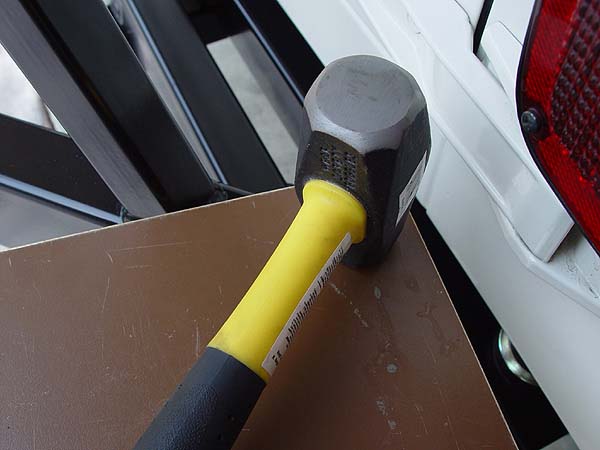
17. With the help of
a friend, hold the A-frame hinge section over the hinge pin on the
LoD bumper, place a board or a block of wood over the hinge and then
tap it onto the hinge pin using a 3 lb. hammer. Keep tapping until
it is all the way on.
NOTE:
Steps 18-21 are for older LoD bumper tire carrier models. Newer LoD
bumpers have been redesigned to include a metal flange that does not
require you to modify your rubber isolators.
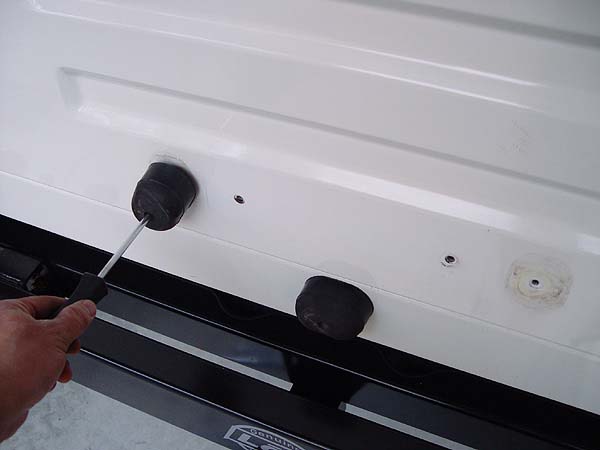
18. Using a T-30 Torx
bit, remove the two lower spare tire rubber isolators from your Jeep's tailgate.
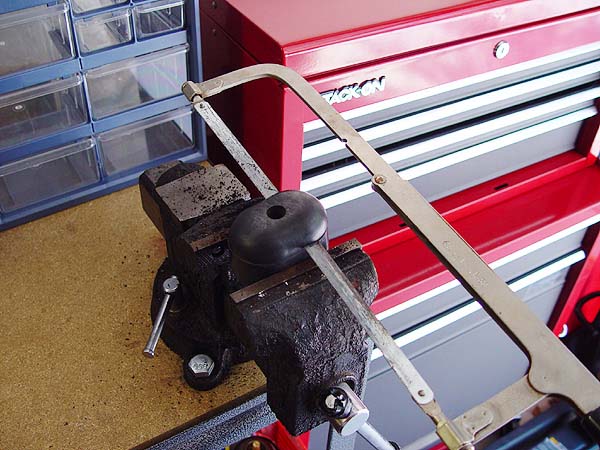
19. Place one of the
rubber isolator in a bench vice and trim off the top just above the
seam using a hacksaw as shown in the pic to the right. Repeat this
process on the other isolator.
20. If you look on the
back side of the LoD A-frame tire carrier section, you will notice four
pre-drilled and pre-threaded holes (two on either side) where the
cross brace is located. You will need to re-mount your trimmed rubber
isolators at this location on your A-frame. The lower holes are for
Jeeps without a body lift and the upper holes are for Jeeps with a
1" Body Lift. It is very important to install these rubber isolators
onto the A-frame section as they are intended to make contact with
the upper isolators still on your tailgate. This will provide a tight
fit and keep your tire carrier rattle free.
21. Slowly close the
LoD A-frame shut and check to see how much contact is being made on the
rubber isolators. If the A-frame will not shut, remove the rubber
isolators and trim them down some more.
22. The spare tire mounting
bracket that comes with the LoD tire carrier is adjustable. Be sure
to mount this bracket onto your A-frame in a location that will provide
a tight fit once your spare tire is on it. When all is said and done,
your spare tire should sit firmly against the A-frame. If it doesn't,
relocate the mounting bracket back a hole.
IT IS CRITICAL THAT YOUR SPARE TIRE MAKES FULL CONTACT AND PRESSES FIRMLY AGAINST THE A-FRAME. FAILURE TO DO SO WILL VOID YOUR WARRANTY
23. If you live in a state where a 3rd brake light
is required, you will need to buy and/or make an aftermarket light. Here are a couple of links that should help you out:
Tuna Can LED Write-Up
ORO PlateLITE & Rock Hard License Plate Bracket
24. Last but not least, lube up your LoD Bumper latch pin and
spring with with some white lithium grease or other spray on lubricant
to help insure its ease of use. Re-apply lube to this area on a regular
basis.
That should be it. You now have a functional mod that looks great
too!! Please let me know if you have any questions.
Post
Installation Notes
I
have been using the LoD bumper tire carrier for well over two years now
and can tell you that I absolutely love it. It looks great, works
flawlessly and is in fact completely rattle free. This thing is every
bit a good as, if not better than most high priced name brand tire
carriers out on the market today.... but, sells for about half the
cost.
04/14/05
It has come to my attention that people who live in areas with a lot
of rain or salted roads may experience a sticking latch pin due to
rust. I would recommend that regardless of where you live, please
make sure to keep this latch pin and spring lubed on a regular basis
with some white lithium grease or other spray on lubricant to help
prevent rusting.
Special Thanks
I would like to give special thanks to Doug Pinckney (aka. Thumps)
for helping me to add a few extra tips that should help you out during
your installation.
FAQ's
Q.
What gauge steel is the LoD bumper made out of and how much does it
weigh?
A. The LoD bumper is
made out of 11 Gauge Steel (1/8" thick) and it weighs about 65 lbs.
Q. What is the tow rating
for the hitch?
A. The LoD bumper hitch
has not "officially" been tow rated. However, there are
plenty of guys using it to pull small trailers and/or boats. I would
just recommend NOT exceeding the 2,000 lb. maximum pulling weight
and 200 lb. tongue weight capacity as stated by Jeep. Even if it can
support more I would not advise it on a short wheel base vehicle like
a Jeep.
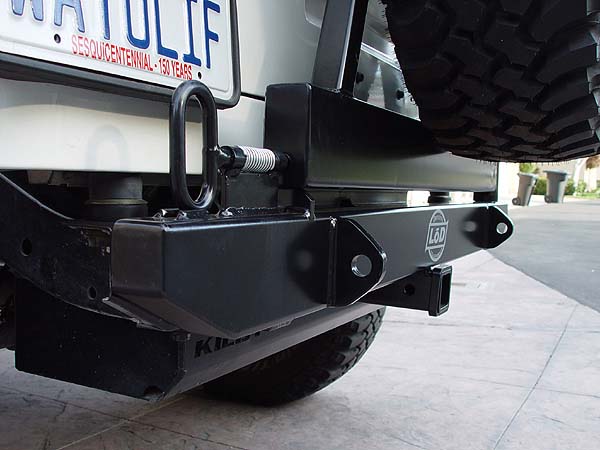
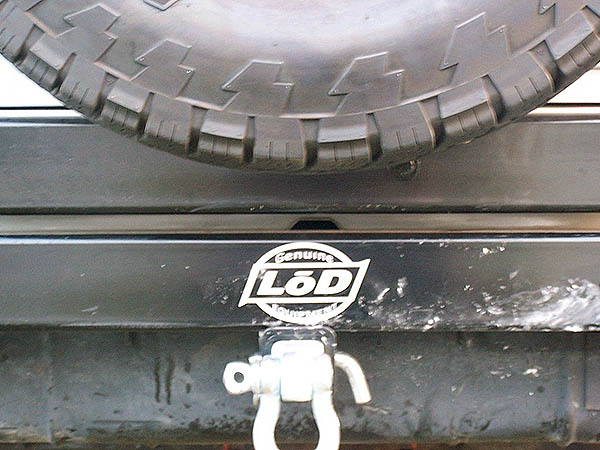
Q. Does the trailer
hitch have any safety chain mounts?
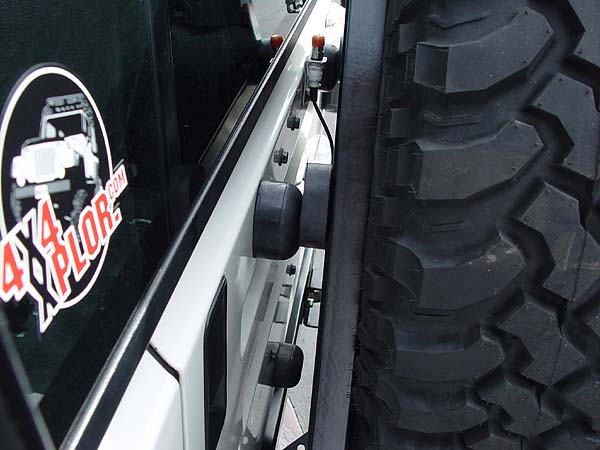
A. Yes, as you can see
in the pic to the right, there are two flanges with holes drilled
into them for safety a chain to hook up.
Q. Does the LoD bumper
come with frame tie-ins?
A. This bumper requires
you to drill new mounting points just inside of the frame rails. These
new mounting points are significantly stronger than the factory points
which are located on the ends of the rear cross member. LoD bumpers
also come with two additional straps that tie into the frame rails
using factory mounting holes.
Q. Where can I find
out more information about LoD? Do they have any catalogs or website
I can visit?
A. LoD is an upcoming
manufacturer of Jeep parts that I am trying to help out. For now,
the only information available is what you see here on my website.
Q. How long will it
take for me to get my LoD bumper/tire-carrier?
A. Typically, your order
will take anywhere between 5-7 working days to process and 7-10 working
days to deliver via UPS Ground Service.
UPDATE 02/01/07: LoD is currently backed up a bit and orders are taking about 2-3 weeks to process. Once completed, shipping will take approximately 3-5 working days to deliver from Indiana via UPS Ground Service.
Q. I do not have a PayPal
account, can I still pay by credit card?
A. Yes. LoD can accept
Visa, Master Card and American Express through PayPal. You do not
need to have a PayPal account to pay by Credit Card. LoD will also
accept payment by Money Order.
Q. Is the LoD bumper
really 100% rattle free?
A. Yes. The A-frame
section on the bumper has a metal flange that pushes up against your
tailgate rubber isolator to create a snug fit. Some slight trimming
of the rubber isolator may be required to allow for proper closure.
Q. Is LoD and 4x4xplor.com
affiliated with each other?
A. 4x4xplor.com and
LoD are friends and I help them sell their products. In turn, LoD
gives a small percent back on every item sold through this website
to help support its existence.
As
Stated by LoD
FINALLY, a tire carrier that can hold up to a 37” spare for
your TJ and YJ or CJ-7 – at an affordable price. LoD Jeep Tire
Carriers are built to withstand the harshest conditions that today’s
off-road enthusiasts can put them through. LoD tire carriers feature
two (2) double sealed ball bearings that are pressed into the top
A-frame – creating a very strong, very tight fit around the
1” solid steel pin, fully welded into the bottom bumper. Additionally,
every LoD Tire Carrier features an innovative heavy-duty self-latching
slam latch with a 5/8” steel locking pin. The bottom bumper
is equipped with two (2) CNC laser cut clevis mounts that are fully
welded to withstand the off-road punishment. The top tire holder is
fully adjustable to accommodate wheels with different backspacing.
All LoD tire carriers come with a 2” Receiver welded to the
bottom of the bumper and gussets – and welded to the back for
extra bracing and trailer safety chains. Fully POWDER COATED black
for a long lasting, durable finish. Each LoD Tire Carrier mounts to
existing holes on the bottom of the frame on TJ and YJ’s and
also to the cross member on the back of the frame for a very secure
fit. The LoD Tire Carrier package includes cross member strengthening
brackets (for TJ and YJ’s) and the CJ-7 Kit includes frame tie
in brackets. All bolts are included except for the bottom two bolts
of the frame – due to varying sizes. (98 and newer TJ’s
require four, ½” holes to be drilled in the cross member)
MADE IN THE USA.
NOTE: This write-up has been provided as a reference only. 4x4xplor.com and/or its author are not responsible for any errors, incorrect or missing information. LoD is solely responsible for the quality of all their products. |
|
|